
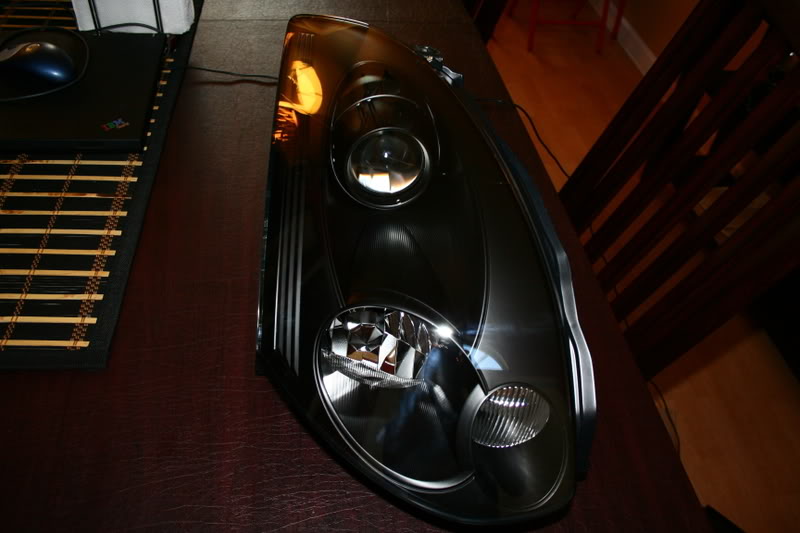
DIY - Painting Your Headlights


I still consider the part I left as "the inside" as in it's the "inside" of where the light would be reflected... FAIL. I need to take the headlights out to change the bulbs... I'm not 100% satisfied with the paint job so *maybe* I'll fix that part and paint them a more glossy black. If I want to paint over that, I shouldn't need to sand and re-prime will I? Just scuff up the paint and paint over it?
One step I messed up on also was, I cleaned the inside of the lenses the day I started the project, but didn't seal the headlights until the following day... in the mean time, cat hair and dust got on the inside of the lens!! That's really annoying!
Oh yeah, and something I would recommend, when buying sand paper (at least from autozone or the like) just buy the BIG sheets, and cut them up into smaller sections... the huge pieces are the same price as the smaller sections and you get more than twice as much!!!
Joined: Jun 2003
Posts: 14,505
Likes: 451
From: NorCal
You don't have to take the lights apart to change the bulbs. You can access the bulbs from behind the wheel well. (there is a DIY on this procedure). Scuffing up the existing paint is fine (I would use 600 grit for that).
Yeah, if you let the lenses sit overnight, you will most likely get dust inside them. If you have a compressor, I would spray them down/out with air to get the dust out. You can also use compressed air in a can. (little details I do when I do headlights).
Did you use black primer for the base coats? If you want a nice dark matte black finish, use black primer and Duplicolor Bumper Coating. I love the finish of this paint.
Good luck and +1 on getting the big sheets
Joined: Jun 2003
Posts: 14,505
Likes: 451
From: NorCal


jK I started like 1 hr ago and its goin good so far just getting my first light off now
update: on primer stage now wooo hooo for waiting ill probably be done around 11 or 12 lol
update: LOL 3 am putting my first light back on woot
update: on primer stage now wooo hooo for waiting ill probably be done around 11 or 12 lol
update: LOL 3 am putting my first light back on woot
Last edited by Mercinator; Apr 12, 2009 at 06:17 AM.

Joined: Jun 2003
Posts: 14,505
Likes: 451
From: NorCal
I did on the first set I did which were my own headlights but the only reason I did was because I used a set of lenses off of some ebay headlights. They don't seat properly onto the base as the OEM ones do. All the other sets I've done, including sfgr415 above, have never had any signs of condensation. If you are weary about it still, add some sealer around it.
I did on the first set I did which were my own headlights but the only reason I did was because I used a set of lenses off of some ebay headlights. They don't seat properly onto the base as the OEM ones do. All the other sets I've done, including sfgr415 above, have never had any signs of condensation. If you are weary about it still, add some sealer around it.
Just whatever you do, make sure not to use silicone. Vapors tend to mess up the lenses.

 It was so thorough, for a minute, I almost believed even I could do this myself!
