
Progress Thread: DarksideG35

First thing.. Either shoot early in the morning as the sun is going up, or later in the evening as the sun is going down..
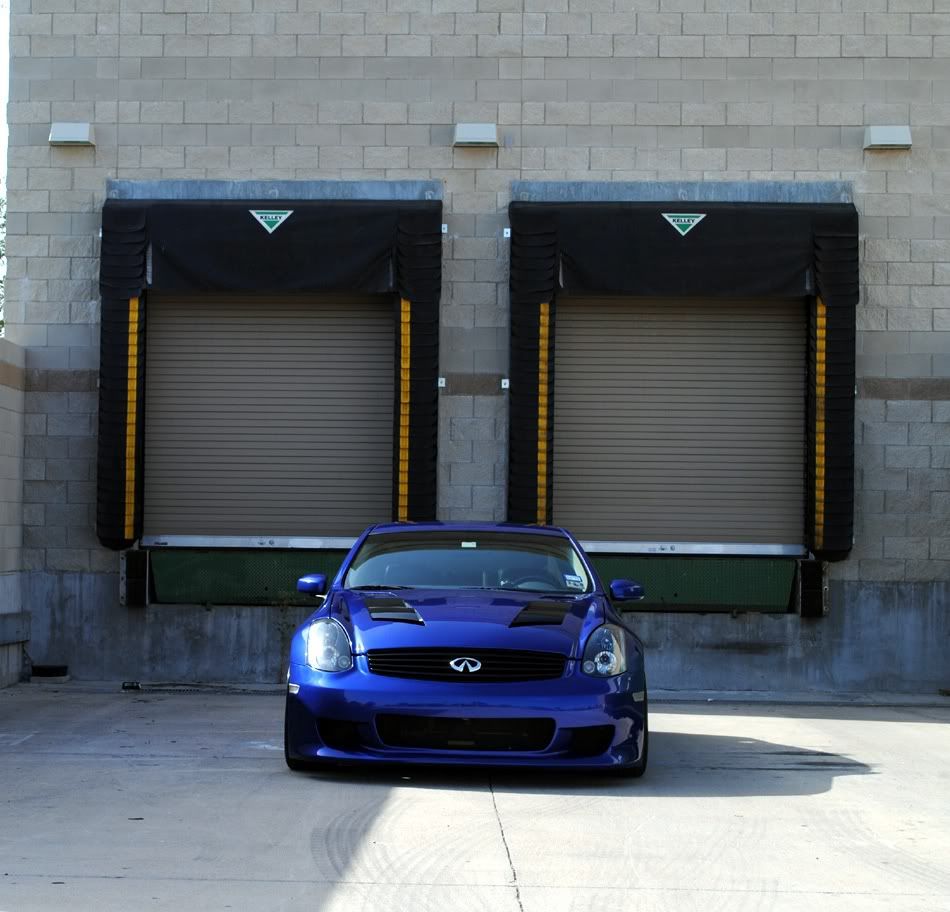
You're shooting all your shots when the sun is directly overhead.. That's why you're getting either harsh shadows or flares on your color and can never show it properly..
If you're really trying to get an accurate depiction of your color, try getting up in the morning before the sun reaches it's pinnacle, (Since you're central timezone) like around 5-6am.. The sun is on it's way up, and is a lot lower, so will show your color a lot better.. If that's too early for you, it starts going down around 7:30-8pm...
Also if you had some complimentary colors behind your car like the greens of trees or anything other than white (parking garages) that would help the metering system of the camera expose properly for your car's color rather than darkening it.. Camera's are looking for true gray and since that whitish pavement is so bright, it darkens everything else in the picture..
As far as editing, you should be able to get by on an old version of photoshop, the core features haven't really changed, they've just made some things simpler to do and more tools to do it with.. They're time savers really..
Adding curves adjustment layers, or sharpening, or masking or color adjustments are still the same..


Joined: Jul 2007
Posts: 922
Likes: 92
From: Austin, TX
First thing.. Either shoot early in the morning as the sun is going up, or later in the evening as the sun is going down..
You're shooting all your shots when the sun is directly overhead.. That's why you're getting either harsh shadows or flares on your color and can never show it properly..
If you're really trying to get an accurate depiction of your color, try getting up in the morning before the sun reaches it's pinnacle, (Since you're central timezone) like around 5-6am.. The sun is on it's way up, and is a lot lower, so will show your color a lot better.. If that's too early for you, it starts going down around 7:30-8pm...
Also if you had some complimentary colors behind your car like the greens of trees or anything other than white (parking garages) that would help the metering system of the camera expose properly for your car's color rather than darkening it.. Camera's are looking for true gray and since that whitish pavement is so bright, it darkens everything else in the picture..
As far as editing, you should be able to get by on an old version of photoshop, the core features haven't really changed, they've just made some things simpler to do and more tools to do it with.. They're time savers really..
Adding curves adjustment layers, or sharpening, or masking or color adjustments are still the same..

damn dude, those turned out pretty good. what tools/filters/etc did you use to get the car to look like that in the pic?
Thanks man! Well kind of a rush job on adobe cs3! Did lens blur for the background, used curves, adjusted shadow and highlights! Kinda gave me a blue hue on the first pic though! Got kinda lazy fixing that! Hehehe!
Joined: Jul 2007
Posts: 922
Likes: 92
From: Austin, TX
still came out nicely, i might have to switch up my photo editing software and see whatelse i can come up with. i have 2 more pics that arent posted bc i think theyre way too dark, even after trying to edit them they just didnt look right
Meaning, getting the aperture number as small as you can get it (as close to 1 as possible)... the larger the number, the more sharp your whole image will be (items in the foreground and background won't be blurred- this is called a deep depth of field)
cliff notes:
larger aperture (small number) = shallow depth of field = items in the foreground and background are blurred
small aperture (large number) = deep depth of field = items in the foreground and background are sharp and in focus..
you can also affect how MUCH blur you get by how close or far the background is from the subject and the camera's relative position from the subject as well...
For example.. Put your finger up close to your face, and focus on your finger.. Notice how everything around your finger is now blurry? Well now put your finger further from your face, notice how things in the background are more in focus?
What you're doing in photoshop reminds me of tilt-shifting.. check this out..
http://www.tiltshiftphotography.net/...p-tutorial.php
it's starting to make his car look like a toy because it's not really a realistic lens blur.. I know what you're trying to do is selective focus, but when there's no context of foreground and background, it makes the brain think the subject is smaller because it has no concept of proportion.. There's nothing else in the image for the eye to relate to for size..
Also trying to help you guys in photography as well.. If you were interested. I'm not the foremost authority by any means, just trying to share a little knowledge and a little constructive criticism, all love..
I actually appreciate the info man! Yea currently just tampeing with setting and what to do with the background! Not really that knowledgeable with editingnpics via photoshop but learning little by little!
Love the info so now i understand how aperture affects a shot taken! Currently just have an sd990 sobdontbreally get to play with aperture much! Ocassionally i get to tamper with my friends dslr but not long enough to learn much about it!
Still experimenting and am gonna try different approaches on editing pics! Not really planning on lugging around dslrs though! Closest i might come would be micro four thirds or fuji x100
Yea! Even the pic i did with monard, kev and anthony had that effect! Kinda fun seeing that though but yea ill try to compose my pics differently! Btw, its Glenbert actually but go with Glenn! Haha!