

This DIY is a result of this thread;
spacers resulting in wheel vibration
The Problem...
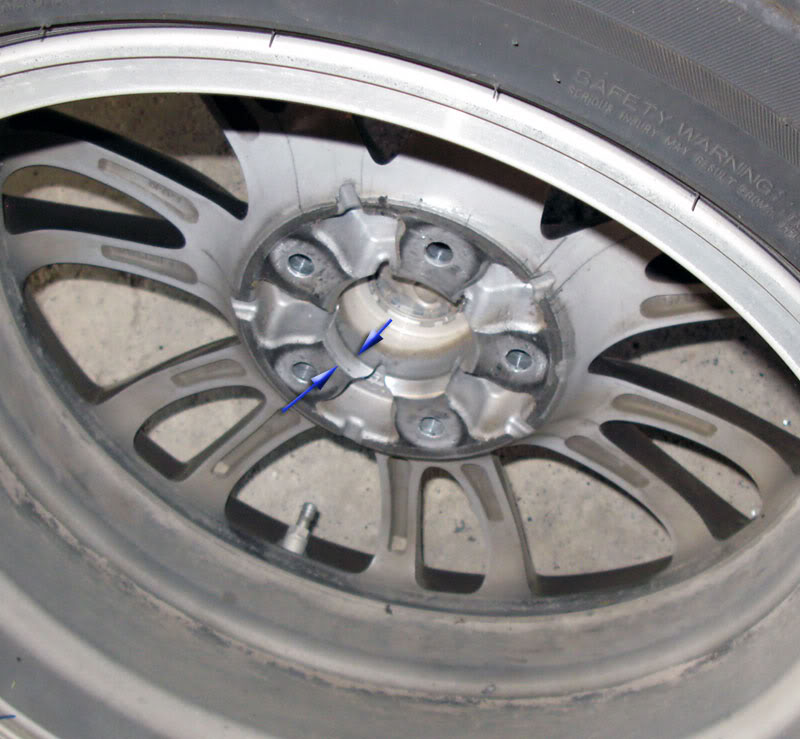
one cause of the problem�.
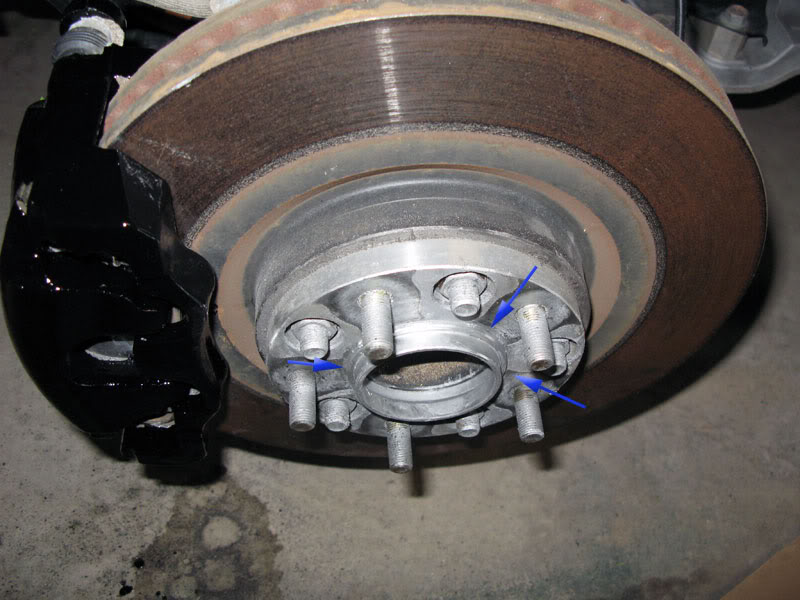
The OE wheel has an exceptionally deep hub chamfer.
This means that there is very little for the spacer hub to seat onto.
2nd cause of the problem�.
The depth of the spacer hub is shallow.
This is not a problem for most wheels,
but when combined with the OE wheel above, the hub is too short.
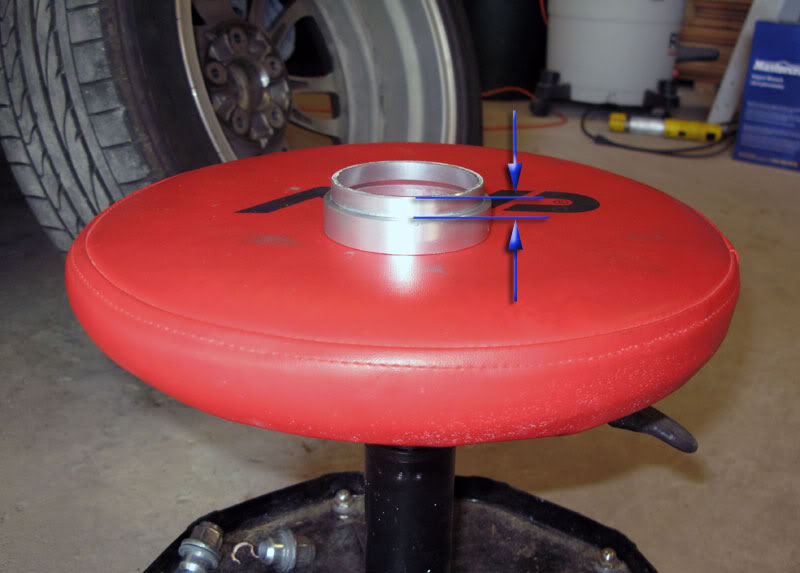
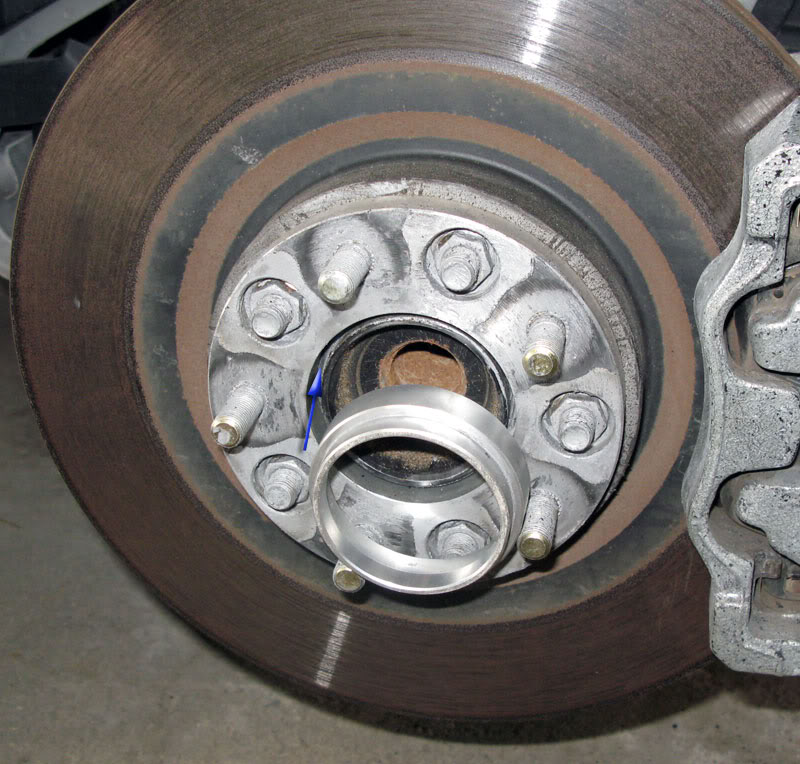
In this pic you can see that the hub when in place in the spacer,
sits back past the spacer surface.
This is done so that there is no chance of the hub extending too far out
& preventing the wheel from mating flush on the spacer.
�.However in our case, it just adds to the lack of depth issue.
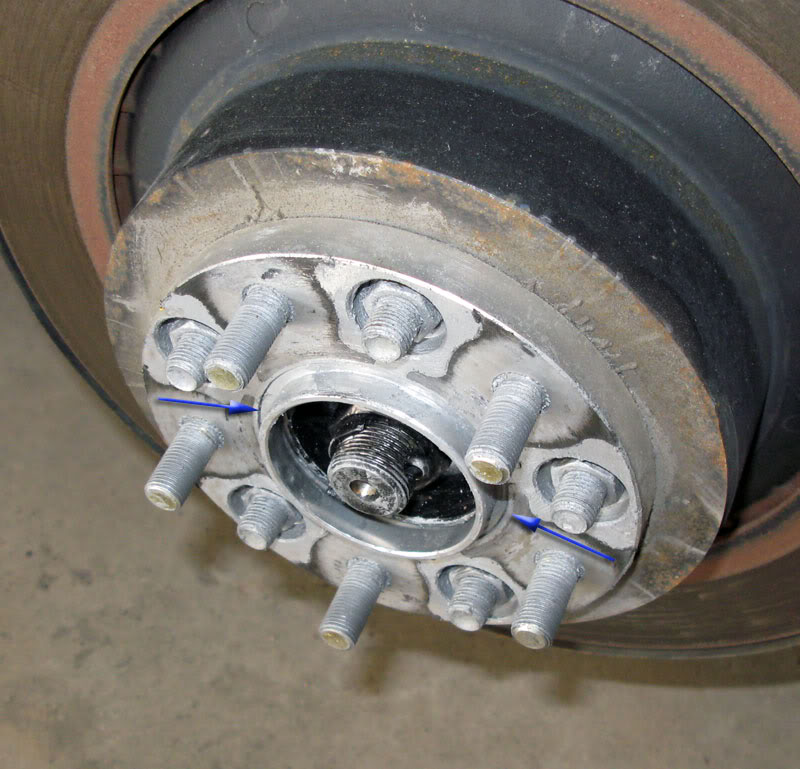
With the hub removed from the spacer,
I was able to engage the hub into the wheel bore ONLY if 100% pushed into the wheel.
spacers resulting in wheel vibration
The Problem...
one cause of the problem�.
The OE wheel has an exceptionally deep hub chamfer.
This means that there is very little for the spacer hub to seat onto.
2nd cause of the problem�.
The depth of the spacer hub is shallow.
This is not a problem for most wheels,
but when combined with the OE wheel above, the hub is too short.
In this pic you can see that the hub when in place in the spacer,
sits back past the spacer surface.
This is done so that there is no chance of the hub extending too far out
& preventing the wheel from mating flush on the spacer.
�.However in our case, it just adds to the lack of depth issue.
With the hub removed from the spacer,
I was able to engage the hub into the wheel bore ONLY if 100% pushed into the wheel.
The basic idea is to keep the spacer hub extended as far as possible w/o interfering with the wheel.
It would be possible to bond the hub in place in the spacer with epoxy, JB weld etc.
Since that meant getting the extension just right by eye,
I decided against it.
I went with a crush ring in behind the hub that would hold the hub extended,
but crush into place when the wheel was tightened.
That way it would self level.
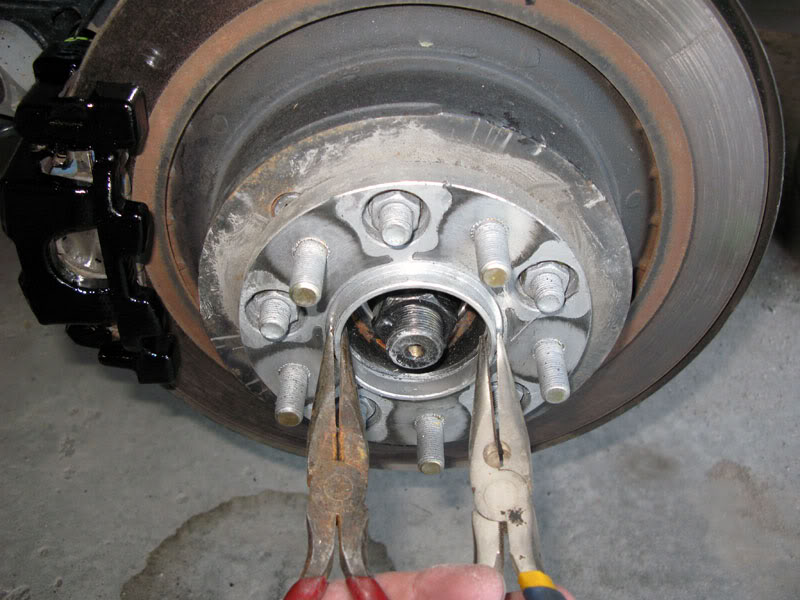
The detail pics……
I was able to remove the hub from the spacer w/o taking the spacer off.
I used anti-seize when I installed though, so YMMV
I made the crush ring from a piece of #10 copper wire (solid, not stranded)
I used the hub to shape it. (sorry for crappy pic)
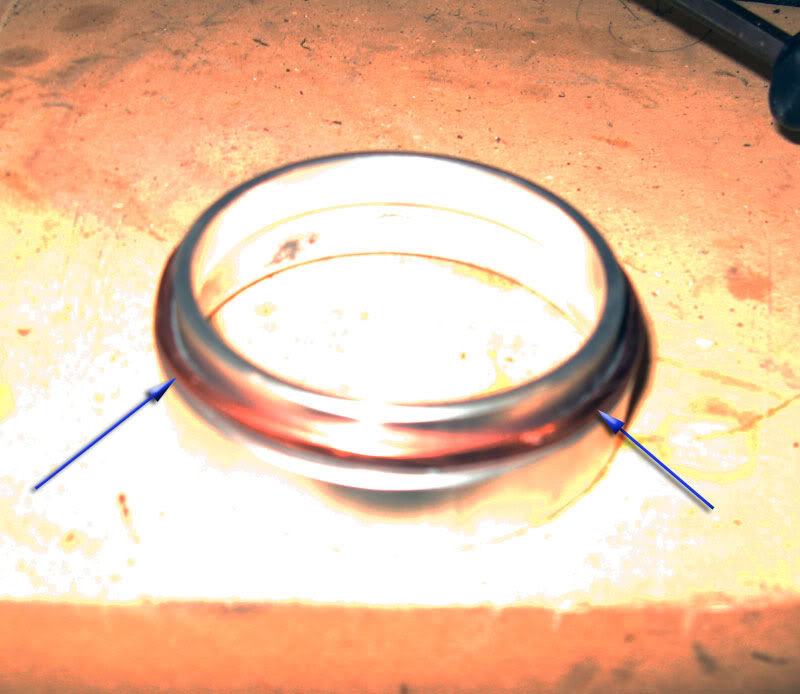
crush ring sized to hub bore.
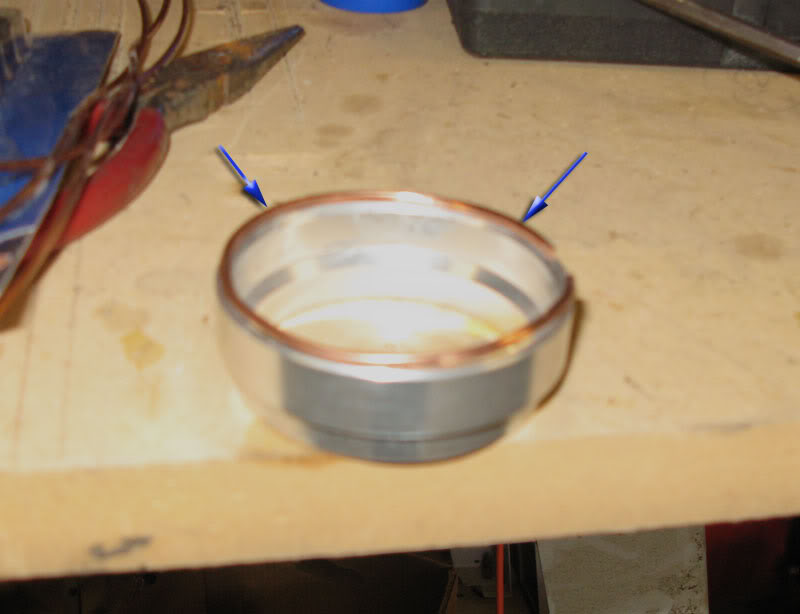
Insert crush ring, then re-insert hub into spacer.
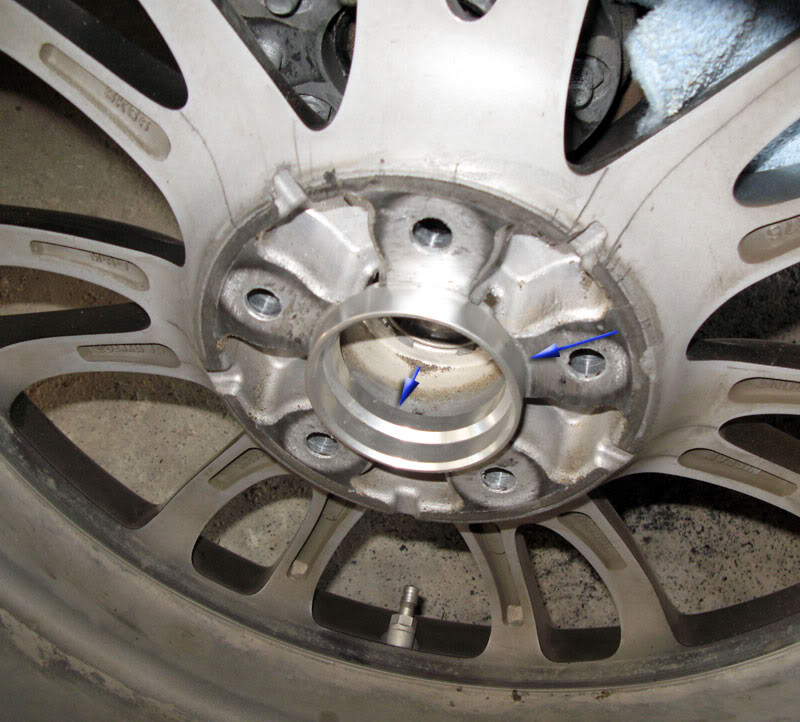
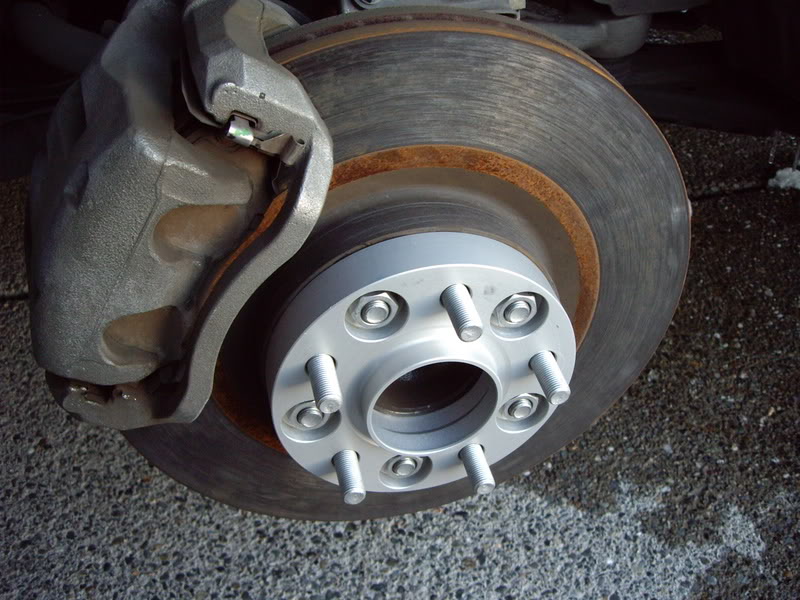
Hub re-inserted…
Note it sits out from spacer face.
It will crush back into place when the wheel is tightened
& that's it.
My vibration is completely gone
It would be possible to bond the hub in place in the spacer with epoxy, JB weld etc.
Since that meant getting the extension just right by eye,
I decided against it.
I went with a crush ring in behind the hub that would hold the hub extended,
but crush into place when the wheel was tightened.
That way it would self level.
The detail pics……
I was able to remove the hub from the spacer w/o taking the spacer off.
I used anti-seize when I installed though, so YMMV
I made the crush ring from a piece of #10 copper wire (solid, not stranded)
I used the hub to shape it. (sorry for crappy pic)
crush ring sized to hub bore.
Insert crush ring, then re-insert hub into spacer.
Hub re-inserted…
Note it sits out from spacer face.
It will crush back into place when the wheel is tightened
& that's it.
My vibration is completely gone

Registered User
might I suggest using the macro setting on your camera when taking close up shots so it doesnt blur.... :P
Quote:
...shaky hand, I was thinking about my 1st ICB.Originally Posted by Wes_888
might I suggest using the macro setting on your camera when taking close up shots so it doesnt blur.... :P
Registered User
 Great fix Ian .
The V2 spacer with your mod is the way to go.
Registered User
Quote:
Great fix Ian .
The V2 spacer with your mod is the way to go.
Will this issue be present in the V1 version?Originally Posted by GEE35FX
Great fix Ian .The V2 spacer with your mod is the way to go.
JMO but I would never use a V1 type of spacer with extended lugs.
...but yes, likely the same issue. (assumption that hub is the same design)
...but yes, likely the same issue. (assumption that hub is the same design)
Registered User
^^+1 on that, I do not like the thought of using the longer studs with the V1 spacer, I would feel much safer with the V2 Spacer. I just don't like the thought of using the longer studs with the stress that is involved. You would not believe how much a stud will stretch ( I have used a piece of equipment at the Nuclear Plant called a Biach Stud tensioner that torques studs by stretching them so you can tighten the nuts to the proper torque values and it is amazing the amount of stretch involved)
Registered User
Interesting.. thanks for the info guys.
I would have never known these things. All the while, I thought v1 was safer.. :S
I would have never known these things. All the while, I thought v1 was safer.. :S
Quote:
I would have never known these things. All the while, I thought v1 was safer.. :S
...changing the studs is a biatch as well.Originally Posted by Wes_888
Interesting.. thanks for the info guys. I would have never known these things. All the while, I thought v1 was safer.. :S
New ones have to be pressed into the axle hub,
which means taking everything apart.
Quote:

& the moral of the moral of the story is......Originally Posted by AesonVirus
The moral of the story is... AFTERMARKET WHEELS!
get AFTERMARKET WHEELS with the right offset = no spacers
The V2s are hub centric as well, just a 2pc design.
It all depends on how long the hub extension is.
Is that a single machined piece?
The hub looks longer than the V2
Are those the 25mm H&Rs?
...again with V2, it's only an issue because of the OE wheel.
It all depends on how long the hub extension is.
Is that a single machined piece?
The hub looks longer than the V2
Are those the 25mm H&Rs?
...again with V2, it's only an issue because of the OE wheel.