
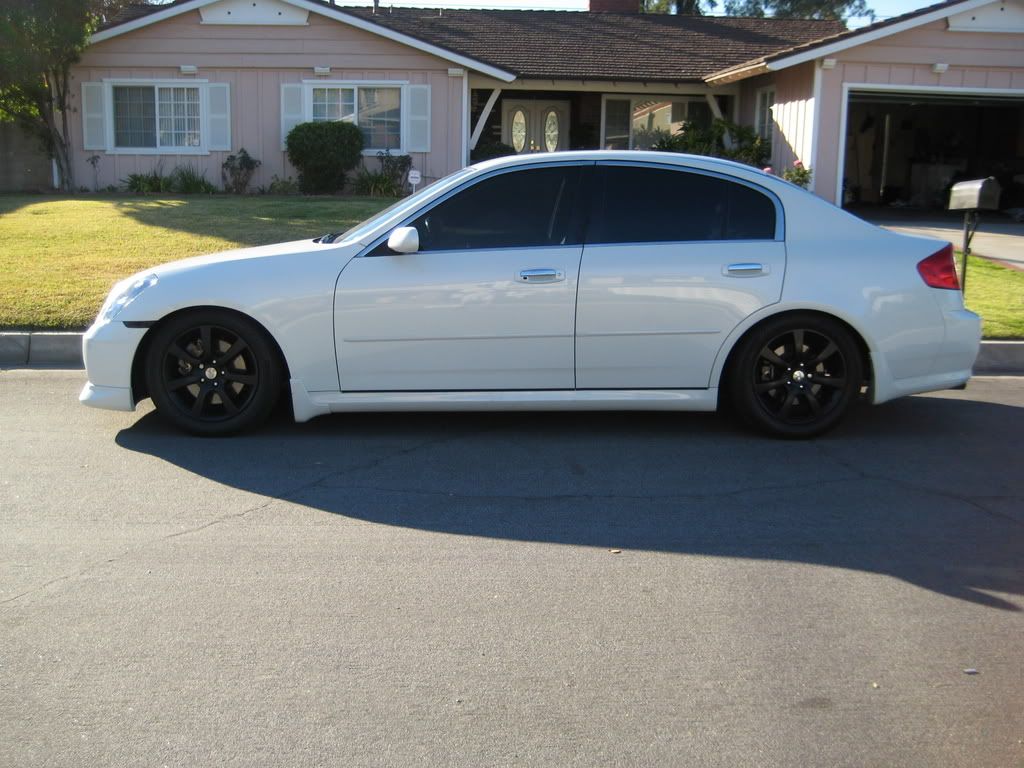
Painted my rims black!!


who cares if the insides are painted or not. the paint is going to chip the first time he takes it out of the driveway anyways and from then on its gonna look like crap 24/7. painting stock rims IMO is one of the silliest and cheesiest mods known to tuners. either save up and get REAL aftermarket rims OR powdercoat.

Nope no sanding, I didnt want to have to completely go back over the fronts again. The area behind the face isn't terribly visible anyways so if the paint isn't perfect I don't think it will matter. I haven't painted my center caps yet, I think I'm going to do them in red since I want something to break up the black. My lugs are silver though so I'm not totally sure yet.
who cares if the insides are painted or not. the paint is going to chip the first time he takes it out of the driveway anyways and from then on its gonna look like crap 24/7. painting stock rims IMO is one of the silliest and cheesiest mods known to tuners. either save up and get REAL aftermarket rims OR powdercoat.

I painted mine and did a quick and half assed job only because I was gonna have them on for a few weeks, plus I wanted to fix some curb rash. I didn't paint the barrel and you couldn't really tell, especially when the rims got dirty. I don't see why it's going to look like crap 24/7 and even how the paint is going to chip the first tape he takes it out the driveway.
Although dirty, do you see any paint chips here?
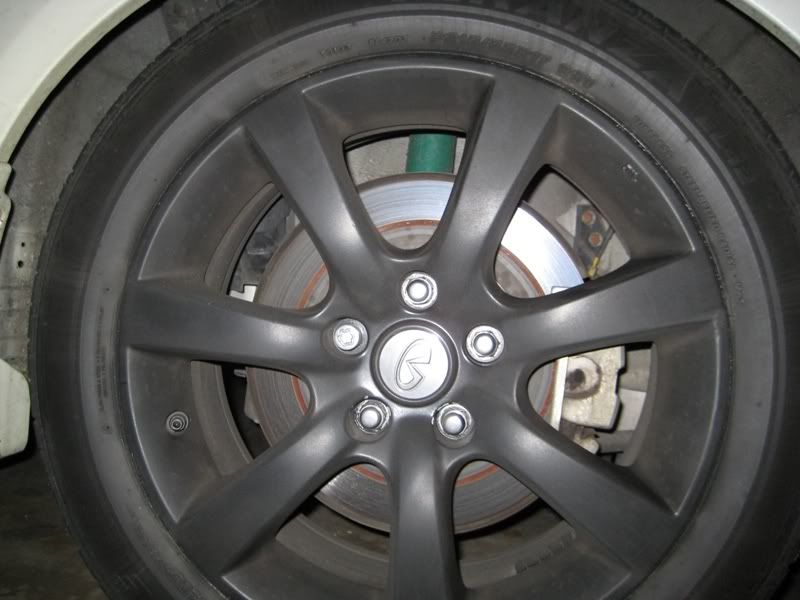
This is after driving for about a month. Not to mention, it was only 1 layer of paint sprayed on semi-thick.
I don't get why the OEM wheels need to be powdercoated to look good. They don't. Many people have painted them themselves. Also, whats the difference between painting and having them powdercoated if having them painted is "the silliest mod to tuners?"
*EDIT: The ONLY paint chips I actually had was from banging the lug nut and getting the socket into the holes. And that was because I was being careless.
Last edited by The Stimulation; Mar 23, 2009 at 03:35 PM.

Joined: Jan 2009
Posts: 823
Likes: 0
From: Tallahassee, FL
Don't listen to that guy, he's just a hater 
I have them all finished and mounted, but I'm going to let the car sit for a few more hours before I drive to the store and get a tack cloth to wipe everything down with. There's quite a bit of dust from the clear, so far I really like it though!
Center caps aren't in yet... like I said I am still not sure if I'm going to leave them chrome or not.
I think if you did red it would stand out too much. Maybe if you did the Mt. Fuji part red, but I think it would look better if you had red time attacks as well if you did that.
Or maybe if you painted them black and left the Mt. Fuji part chrome.
Or maybe if you painted them black and left the Mt. Fuji part chrome.
Joined: Jan 2009
Posts: 823
Likes: 0
From: Tallahassee, FL
Yeah I think if I paint them red I'm going to have to TA them. I'm not going to be masking off that damn Fuji logo, it's small as hell haha. I'll either paint the whole thing or leave them as is.


Joined: Jan 2009
Posts: 823
Likes: 0
From: Tallahassee, FL
I decided to just leave the center caps... Went and got a tack cloth (holy crap that thing is STICKY!) which worked wonderfully at getting all the dust off. I didn't want to wipe them down with a rag yet since the paint is probably still curing some. I think they look freaking sick!! Are they perfect? No, but I'm very happy with them!


Joined: Jan 2009
Posts: 823
Likes: 0
From: Tallahassee, FL
Yeah I used either Semi-Gloss or Low-Gloss black. I can't remember which right now. I don't like flat paint all that much. This was a good medium between flat and SUPER glossy where it looks so as if it's been dipped in black petroleum haha.
