
DIY G35 350GT V35 Cruise Control


DIY G35 350GT V35 Cruise Control
With the thanks to Leon from SAU for supplying me the goods and some instructions and much phone help!
Thread will be updated with part numbers
Installation of Cruise Control:
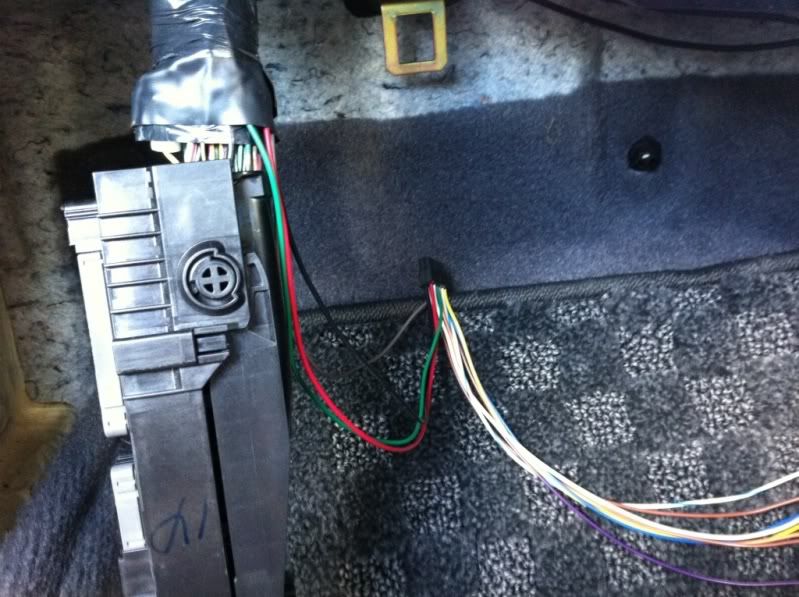
Bundle of wires
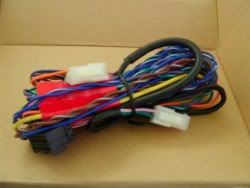
Green – Ground – Not needed ATM, tape up
Blue/White – Not needed, cut off with 10mm to spare and tape up
Yellow – RPM – For manual only, not needed ATM, tape up.
Orange – Switched positive connected to ECU pink pin #119 or 120 OR Accessory Power like Cigarette lighter.
Purple – Clutch wire, Pin 102 ECU did not work so to ground of clutch switch (if you can dam get to it)
Brown/White – Brake wire, connect to brake.
Pure Blue – Speed wire, for 6MT its the speed wire behind Stereo. 5AT its in the TCM (pin #27)
Step 0: Wind windows down, take off positive battery terminal
Step 1:
Remove accelerator pedal connector
Step 2:
Plug the stock grey accelerator plug into the black T-harness plug and then use the T-harness grey connector to plug onto the accelerator plug.
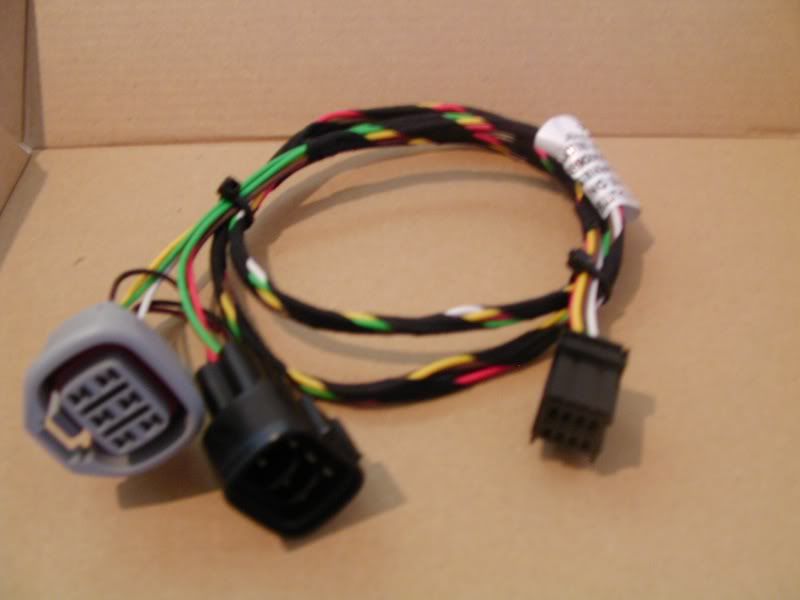
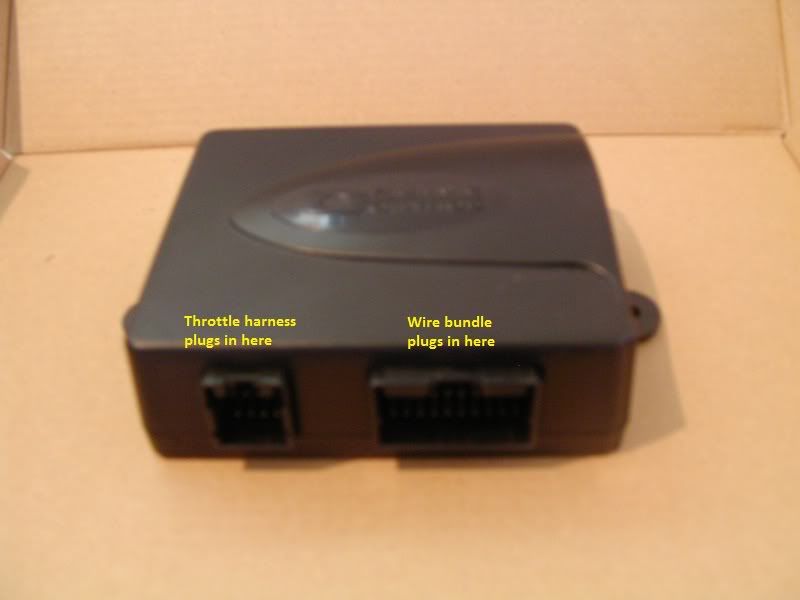
Step 3:
Once mounted you can connect the remaining plug into the Cruise control module.
Step 4: The Wiring !
a) Power: Orange wire
* You have two options for positive, since I already have a few things on my cigarette 12V I didn’t want another. If you are 6MT and don’t have anything on cigarette then use it but if your 5AT you need your speed wire over near the ECU anyway.
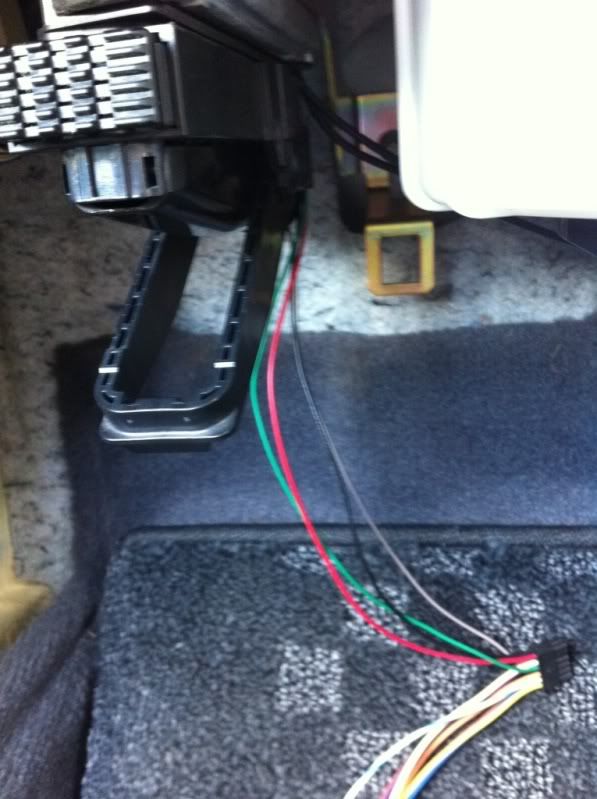
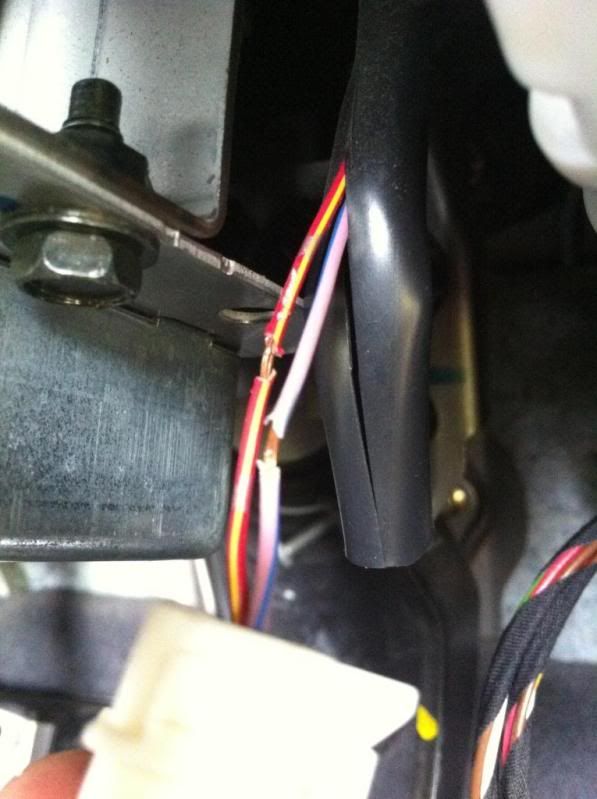
b) If you are wiring the 12V to the ECU then you will need follow the stereo removal guide and get to the point where you have the stereo side covers off.
c) Get a long rod/ coat hanger, and tape the 12V (and blue speed wire if your 5AT) to the rod and push it below the stereo bracket as shown in red square.
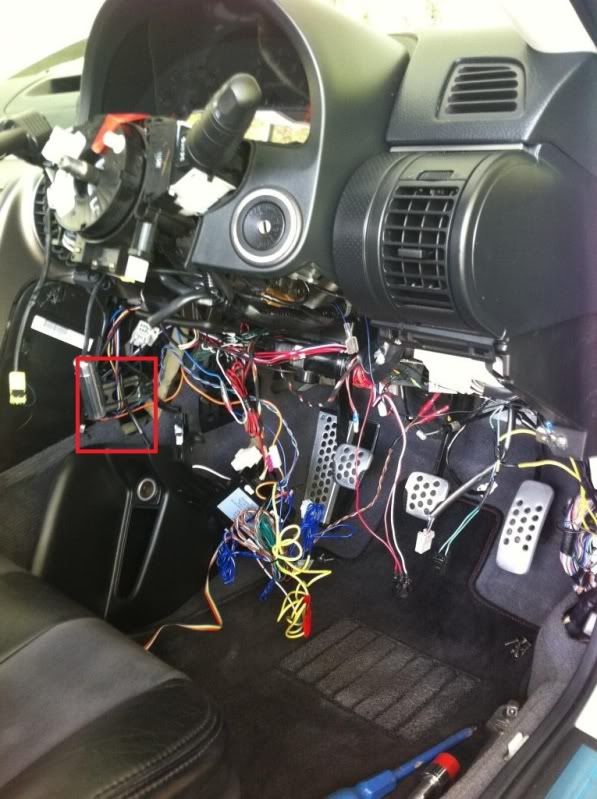
d) You can now route these neatly around the back of the foot well and cable tie along the mounting tabs of the lower plastic glove box cover.
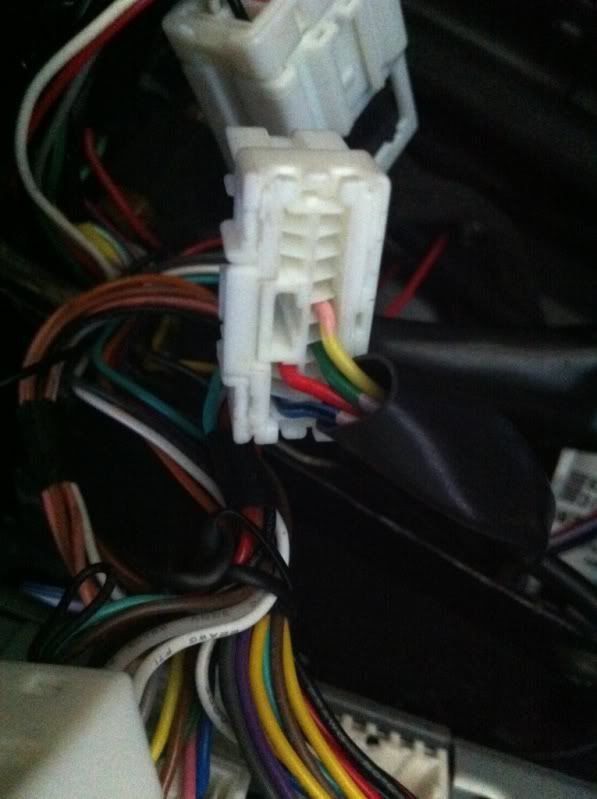
e) Remove ECU, there is a little tab you push and then the handle pulls down and the ECU just comes off.
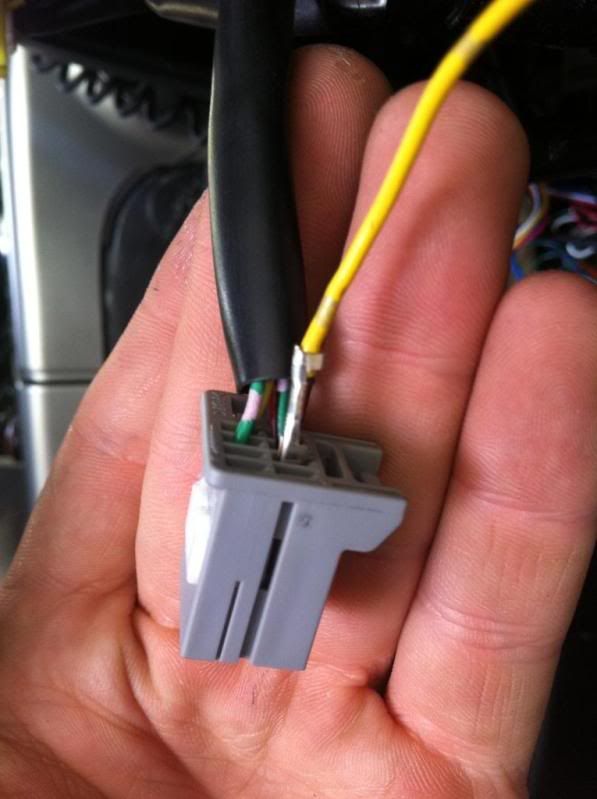
f) Remove the inner black cover and also the tape that hold the sleeve on the wires. Then roll the sleeve up to expose the wires.
g) Orange wire: Switched positive connected to ECU pink pin #119 or 120
*Imagine the red as orange*
If you’re going to do RPM wire then look at Optional Step 1 before you continue.
h) Tape the wires back up, pull sleeve down and then tape the sleeve
*Ignore amt and colour of wires*
i) Push ECU back into place, push the leaver back up.
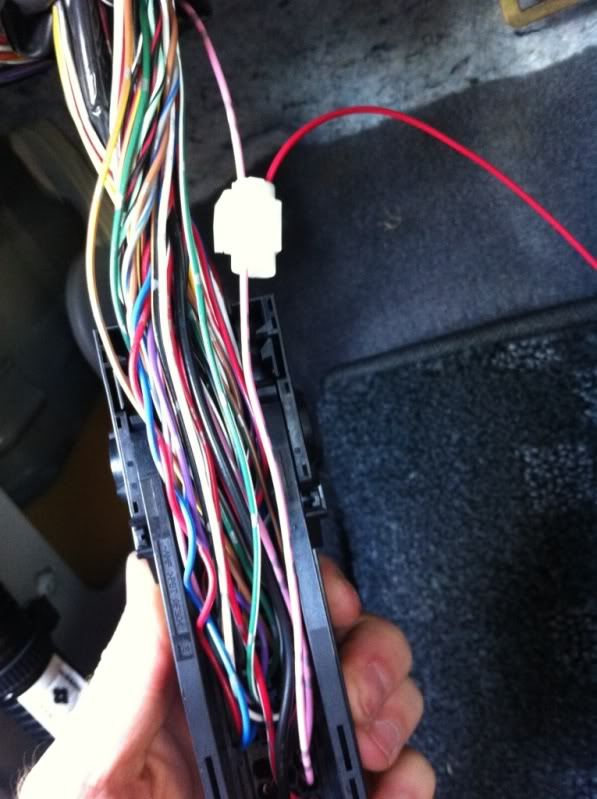
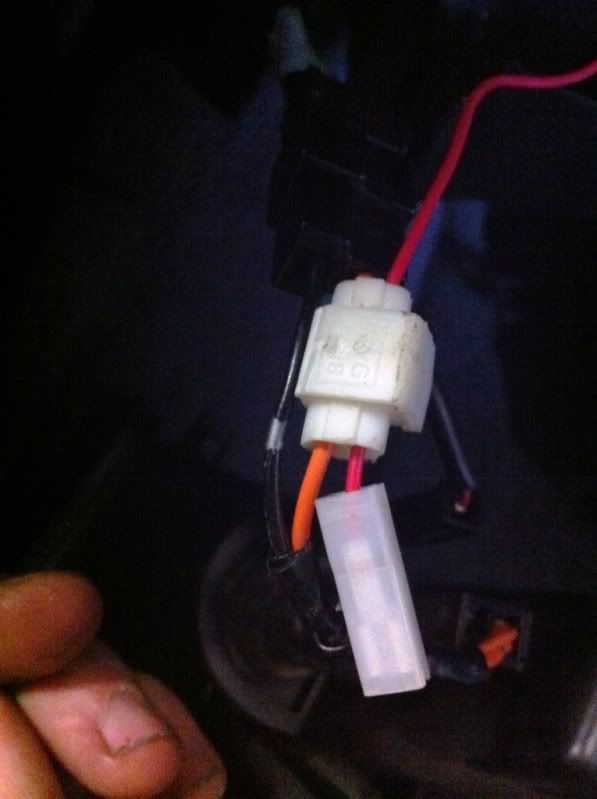
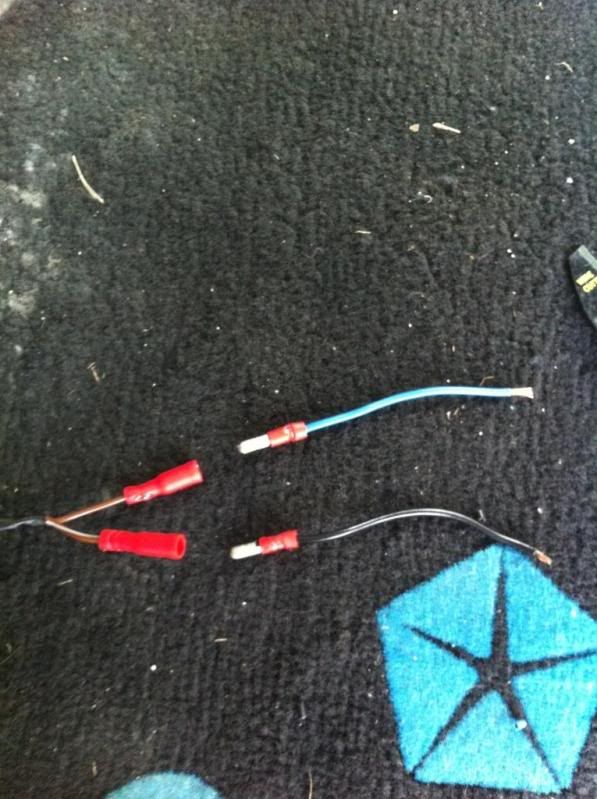
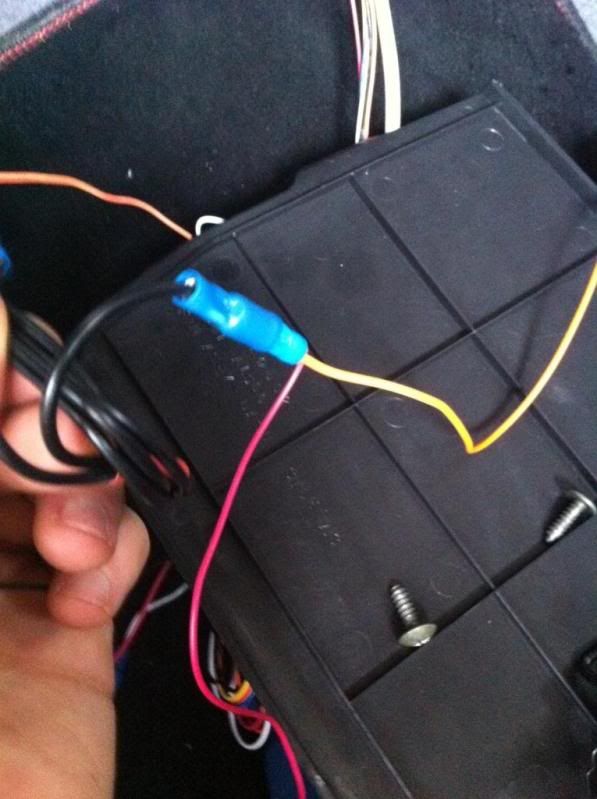
Other 12V source: cigarette lighter wire (Orange)
Use a crimp and splice the two positive wires together. I actually ran a little separate wire from the cigarette with a female connector on it so I can combine a few other positive wires like this orange one into a male plug and then simply plug the two together.
*Ignore wire the thing on the end* yours will be orange...
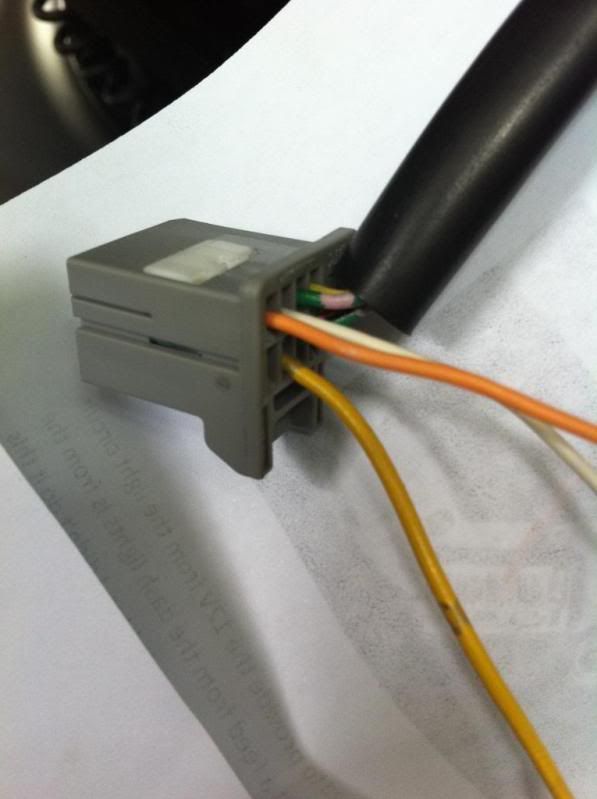
Optional Step 1: Yellow wire: RPM connected to ECU yellow/red pin #62
*Imagine green wire is yellow...*
Step 5: Speed wire: Pure Blue
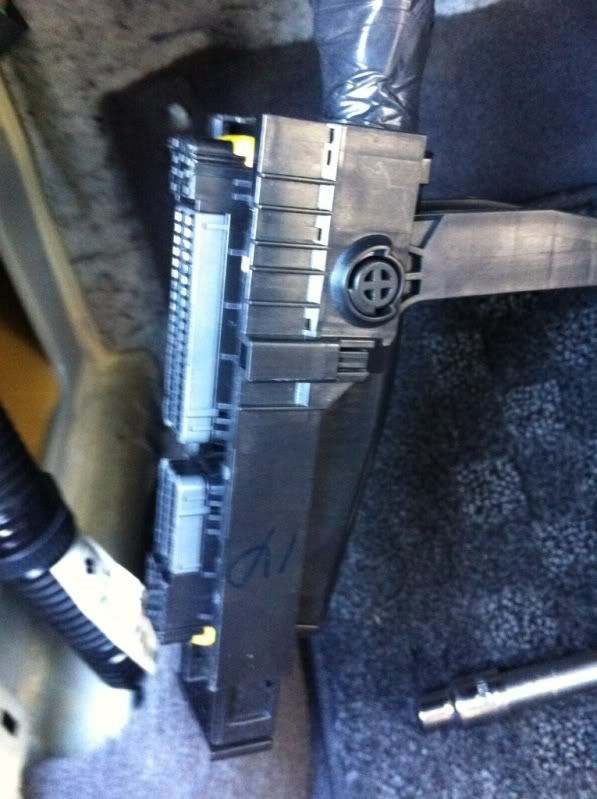
5AT:
a) Remove passenger trim if you havnt already
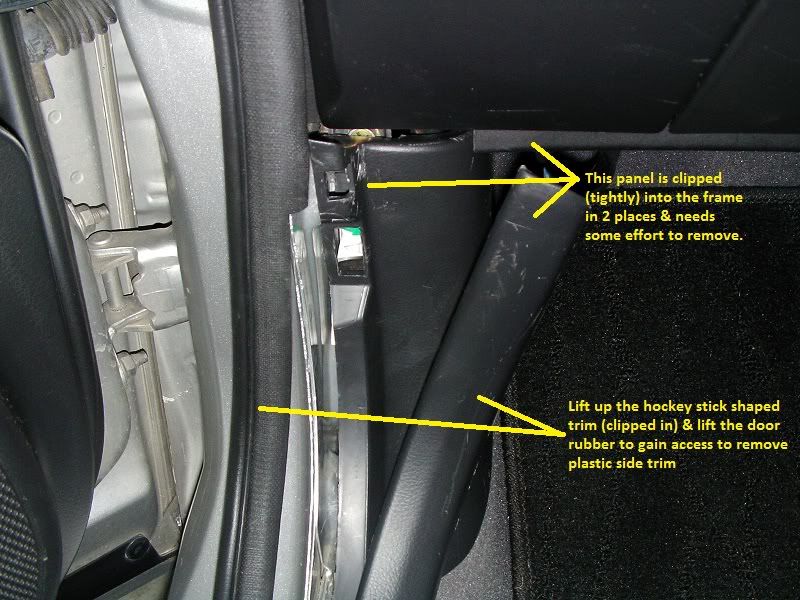
b) That blue wire you brought across now needs to go to pin #27
c) You will see a thick yellow/black wire in the grey upper plug
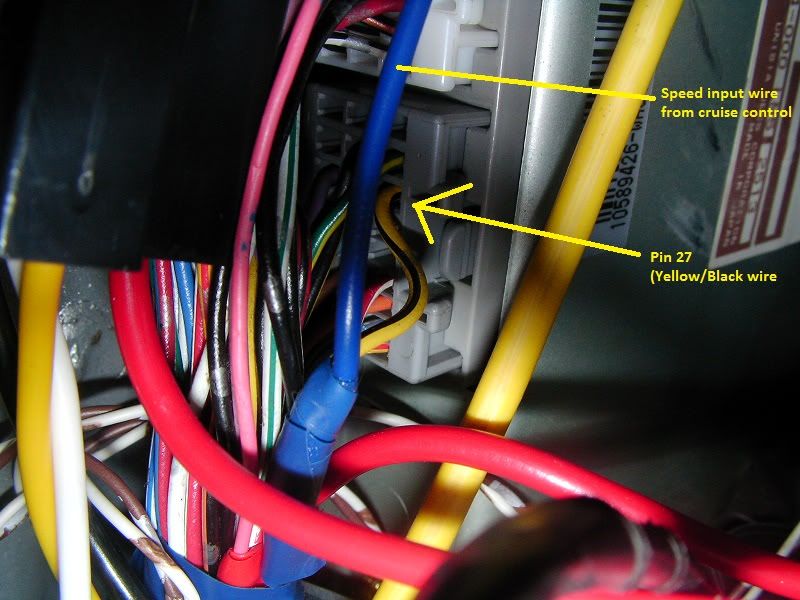
d) Either do a similar separate wire with female plug and then male plug on your blue wire or solder them. Do not crimp, its never a good enough connection for speed wires
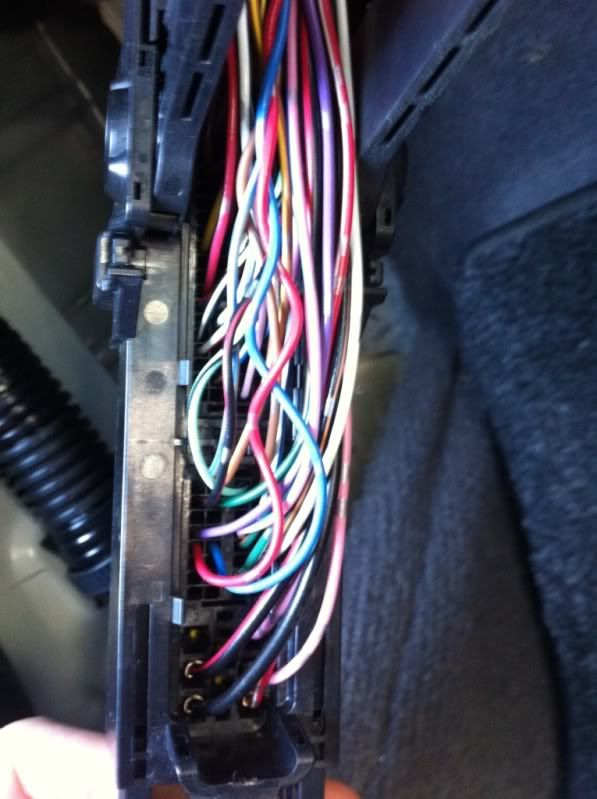
6MT:
a) Continue with the Stereo removal guide
b) Bottom left plug is the one im using that has the VSS wire.
c) Once unplugged you will need again to use a separate wire and solder it to the blue/black vss wire (Top right hand wire when the plug is facing towards you)
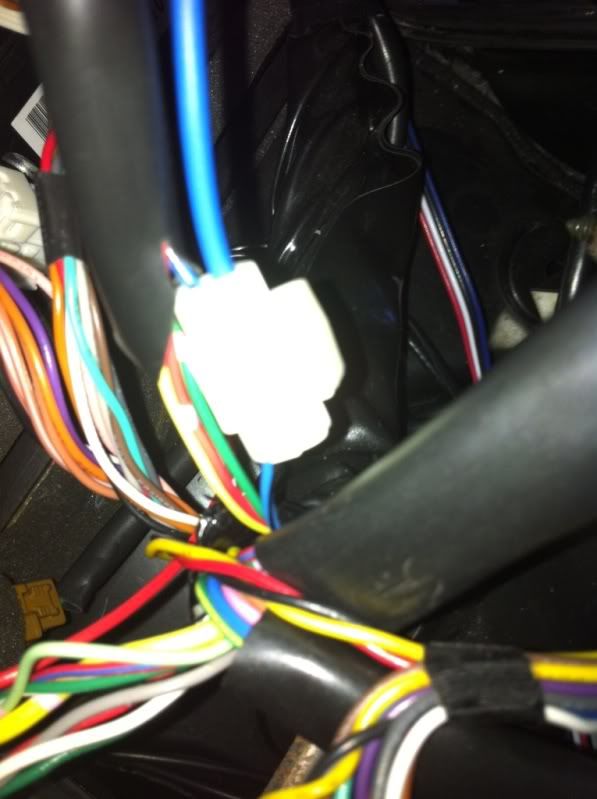
Put a female plug on the end of the wire you soldered into the VSS and make sure its long enough to go under you steering wheel area
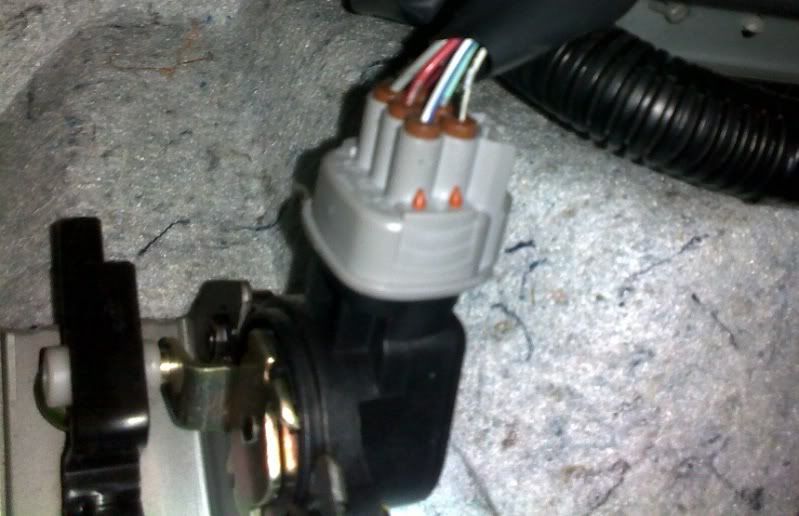
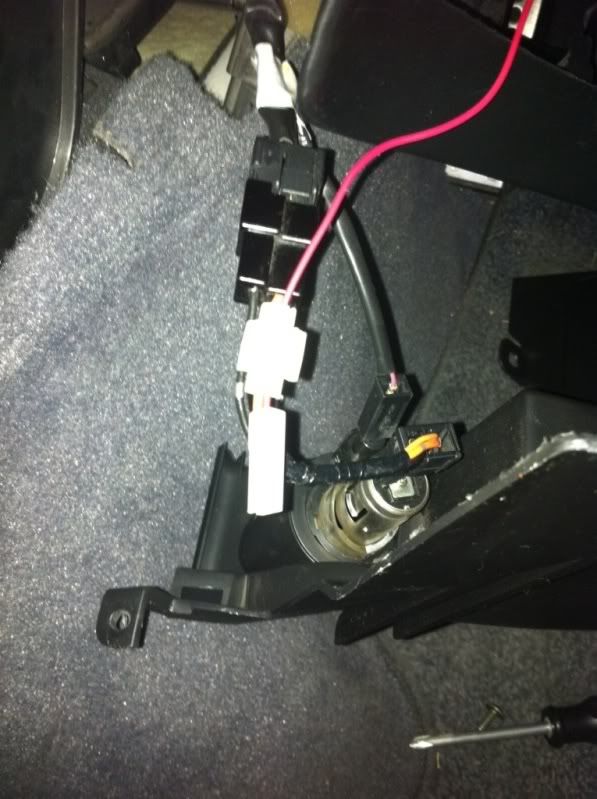
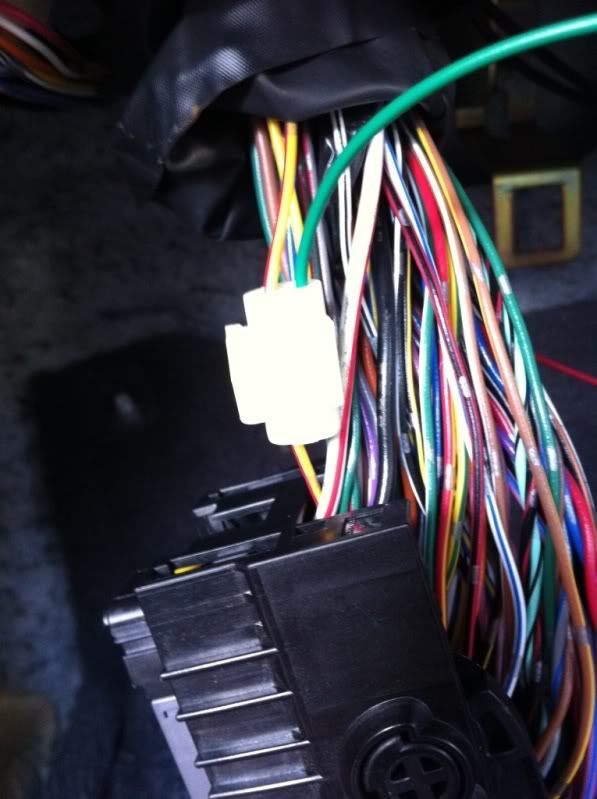
Step 6: Brake wire: Brown and Brown/White
a) Unplug the brake switch
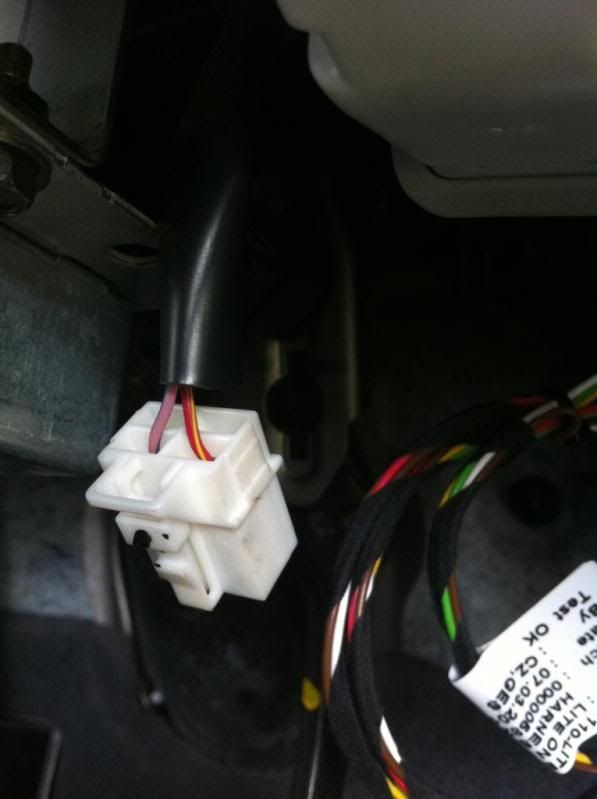
b) You will need to again solder two short wires into each wire with a female plug on it. So strip a section of each wire back
c) get two small wires ready with male ends on them
d) now solder these little wires onto the brake wires
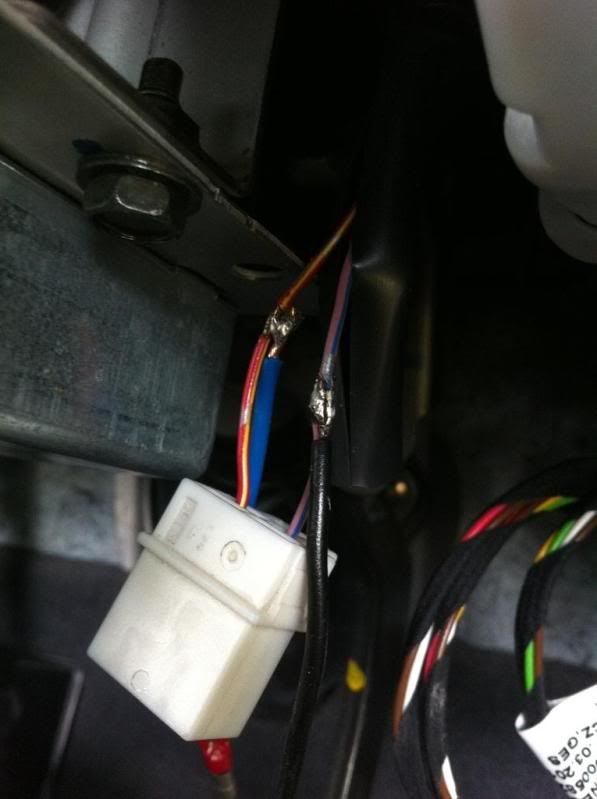
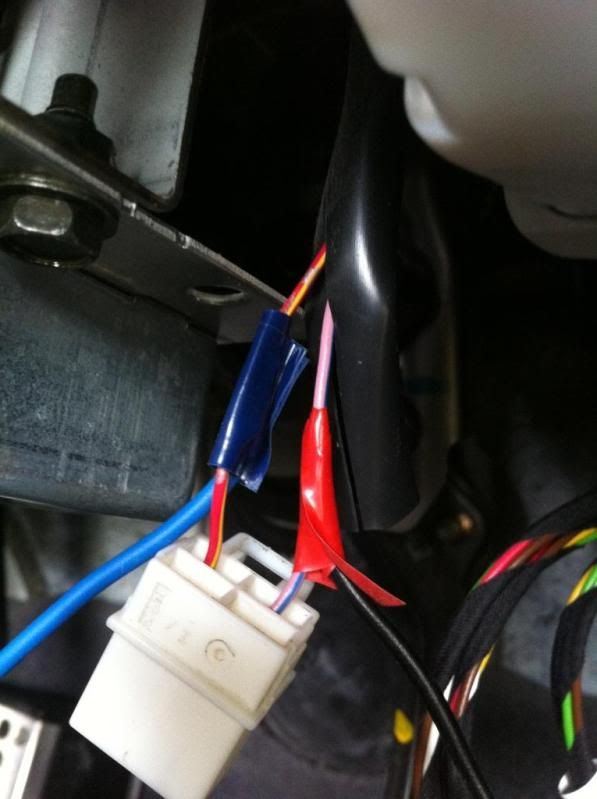
e) Brown wire goes to the red/yellow of the brake switch (ignore the colours of my little wires)
c) Brown/White wire goes to the pink/blue of the brake switch (ignore the colours of my little wires)
Step 7: You can now program your cruise control.
See this link: http://www.m35stagea.info/forum/view...php?f=24&t=285
Optional Step 2: – if ever needed.
Green wire: ground wire. Mount near where the under plastic steering wheel cover goes on.
*Imagine wire is green..*
Thread will be updated with part numbers
Installation of Cruise Control:
Bundle of wires
Green – Ground – Not needed ATM, tape up
Blue/White – Not needed, cut off with 10mm to spare and tape up
Yellow – RPM – For manual only, not needed ATM, tape up.
Orange – Switched positive connected to ECU pink pin #119 or 120 OR Accessory Power like Cigarette lighter.
Purple – Clutch wire, Pin 102 ECU did not work so to ground of clutch switch (if you can dam get to it)
Brown/White – Brake wire, connect to brake.
Pure Blue – Speed wire, for 6MT its the speed wire behind Stereo. 5AT its in the TCM (pin #27)
Step 0: Wind windows down, take off positive battery terminal
Step 1:
Remove accelerator pedal connector
Step 2:
Plug the stock grey accelerator plug into the black T-harness plug and then use the T-harness grey connector to plug onto the accelerator plug.
Step 3:
Once mounted you can connect the remaining plug into the Cruise control module.
Step 4: The Wiring !
a) Power: Orange wire
* You have two options for positive, since I already have a few things on my cigarette 12V I didn’t want another. If you are 6MT and don’t have anything on cigarette then use it but if your 5AT you need your speed wire over near the ECU anyway.
b) If you are wiring the 12V to the ECU then you will need follow the stereo removal guide and get to the point where you have the stereo side covers off.
c) Get a long rod/ coat hanger, and tape the 12V (and blue speed wire if your 5AT) to the rod and push it below the stereo bracket as shown in red square.
d) You can now route these neatly around the back of the foot well and cable tie along the mounting tabs of the lower plastic glove box cover.
e) Remove ECU, there is a little tab you push and then the handle pulls down and the ECU just comes off.
f) Remove the inner black cover and also the tape that hold the sleeve on the wires. Then roll the sleeve up to expose the wires.
g) Orange wire: Switched positive connected to ECU pink pin #119 or 120
*Imagine the red as orange*
If you’re going to do RPM wire then look at Optional Step 1 before you continue.
h) Tape the wires back up, pull sleeve down and then tape the sleeve
*Ignore amt and colour of wires*
i) Push ECU back into place, push the leaver back up.
Other 12V source: cigarette lighter wire (Orange)
Use a crimp and splice the two positive wires together. I actually ran a little separate wire from the cigarette with a female connector on it so I can combine a few other positive wires like this orange one into a male plug and then simply plug the two together.
*Ignore wire the thing on the end* yours will be orange...
Optional Step 1: Yellow wire: RPM connected to ECU yellow/red pin #62
*Imagine green wire is yellow...*
Step 5: Speed wire: Pure Blue
5AT:
a) Remove passenger trim if you havnt already
b) That blue wire you brought across now needs to go to pin #27
c) You will see a thick yellow/black wire in the grey upper plug
d) Either do a similar separate wire with female plug and then male plug on your blue wire or solder them. Do not crimp, its never a good enough connection for speed wires
6MT:
a) Continue with the Stereo removal guide
b) Bottom left plug is the one im using that has the VSS wire.
c) Once unplugged you will need again to use a separate wire and solder it to the blue/black vss wire (Top right hand wire when the plug is facing towards you)
Put a female plug on the end of the wire you soldered into the VSS and make sure its long enough to go under you steering wheel area
Step 6: Brake wire: Brown and Brown/White
a) Unplug the brake switch
b) You will need to again solder two short wires into each wire with a female plug on it. So strip a section of each wire back
c) get two small wires ready with male ends on them
d) now solder these little wires onto the brake wires
e) Brown wire goes to the red/yellow of the brake switch (ignore the colours of my little wires)
c) Brown/White wire goes to the pink/blue of the brake switch (ignore the colours of my little wires)
Step 7: You can now program your cruise control.
See this link: http://www.m35stagea.info/forum/view...php?f=24&t=285
Optional Step 2: – if ever needed.
Green wire: ground wire. Mount near where the under plastic steering wheel cover goes on.
*Imagine wire is green..*
Last edited by R6n350GT; Dec 8, 2011 at 07:18 AM.
Installation of New Steering wheel buttons
Step 1: Follow this guide to remove steering wheel
a) http://www.m35stagea.info/forum/down...ile.php?id=302
Notes: Make sure you use a quality torx 40 bit and make sure it’s perfectly in and straight as you are un-screwing it. It is in there TIGHT. If at any time you feel it slip, STOP and get a better bit and ask for professional help.
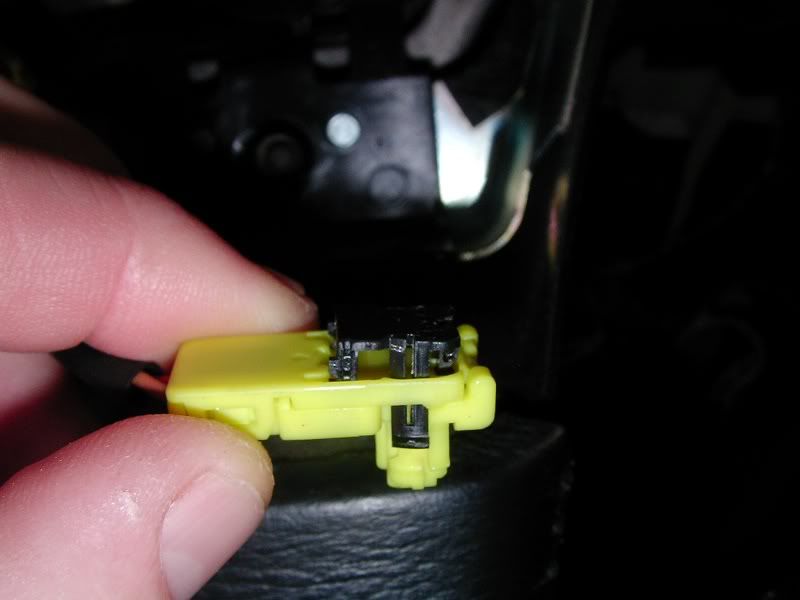
b) When removing the air bag make sure the black battery terminal is off and has been for at least 5 mins. To remove the yellow plug you need to lift up the black plate on the yellow plug and then the whole plug pulls out.
b) Refer to https://g35driver.com/forums/body-in...-04-coupe.html
c) If your new switch didn’t come with the pink wire cut and a eyelet attached to the end then you will need to follow the instructions in the g35driver thread.
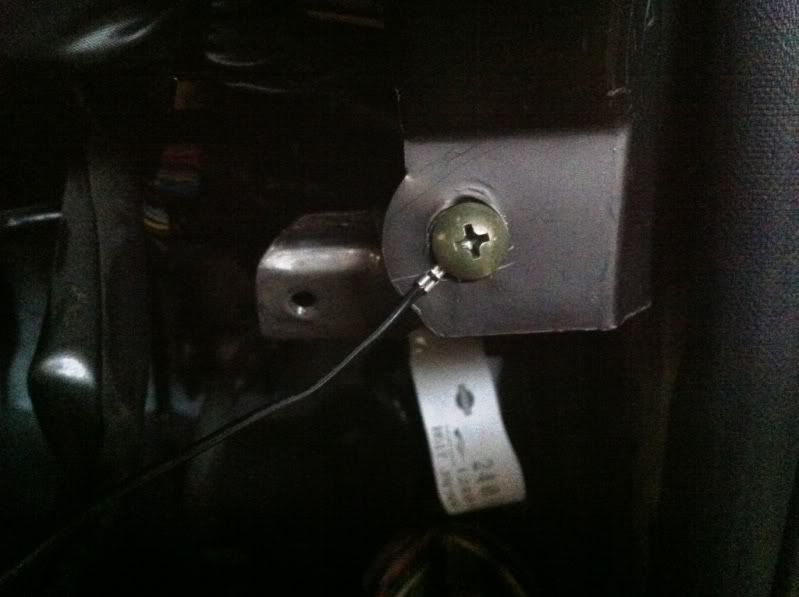
d) Run the steering wires behind the plate and then back inside like pic
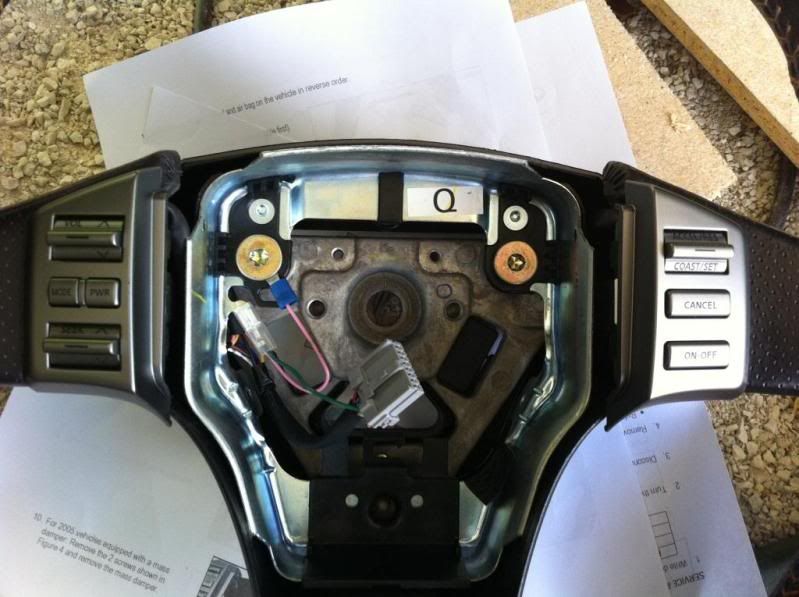
3) Make sure the green plug is attached to the bracket.
4) When attaching the pink wire with eyelet under the torx bolt do not tighten up so tight that you cant push the bracket down, have it make contact and then release. You will know its too tight if you push and the left side with eyelet will not move.
Step 2: attach the steering wheel back, torque it up to 20-25 ft pound.
Step 3: plug the grey plug into its hole as it was before you took the wheel off.
Step 4: Plug the air bag back in and re-assemble
Step 1: Follow this guide to remove steering wheel
a) http://www.m35stagea.info/forum/down...ile.php?id=302
Notes: Make sure you use a quality torx 40 bit and make sure it’s perfectly in and straight as you are un-screwing it. It is in there TIGHT. If at any time you feel it slip, STOP and get a better bit and ask for professional help.
b) When removing the air bag make sure the black battery terminal is off and has been for at least 5 mins. To remove the yellow plug you need to lift up the black plate on the yellow plug and then the whole plug pulls out.
b) Refer to https://g35driver.com/forums/body-in...-04-coupe.html
c) If your new switch didn’t come with the pink wire cut and a eyelet attached to the end then you will need to follow the instructions in the g35driver thread.
d) Run the steering wires behind the plate and then back inside like pic
3) Make sure the green plug is attached to the bracket.
4) When attaching the pink wire with eyelet under the torx bolt do not tighten up so tight that you cant push the bracket down, have it make contact and then release. You will know its too tight if you push and the left side with eyelet will not move.
Step 2: attach the steering wheel back, torque it up to 20-25 ft pound.
Step 3: plug the grey plug into its hole as it was before you took the wheel off.
Step 4: Plug the air bag back in and re-assemble
Last edited by R6n350GT; Dec 8, 2011 at 07:28 AM.
Wiring of the Steering wheel buttons
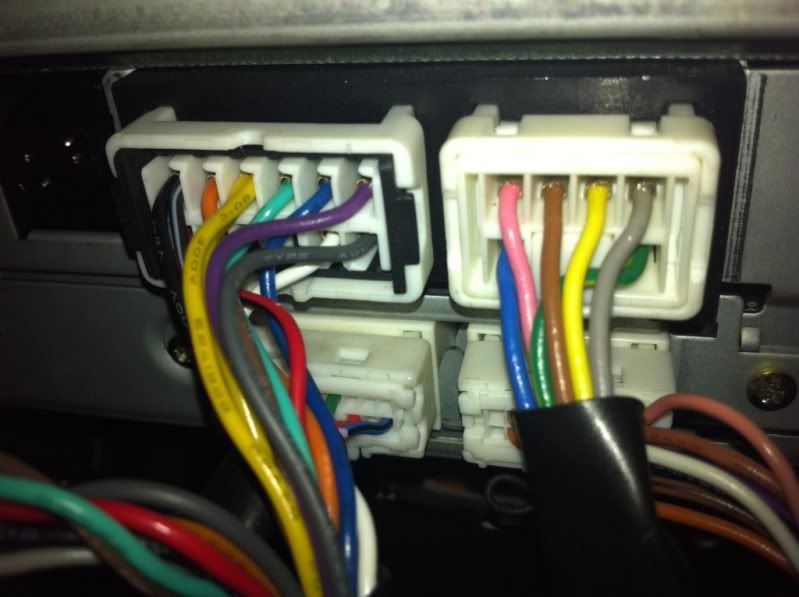
Step 1: Under the steering wheel there are some connectors (yellow and grey), unplug the grey.
Step 2: We need the yellow space wire from the old media button, there is a tap on the plug that lifts off and if you have a fine pin you can push down inside the connector to release the cable and pull it out (or just yank it out)
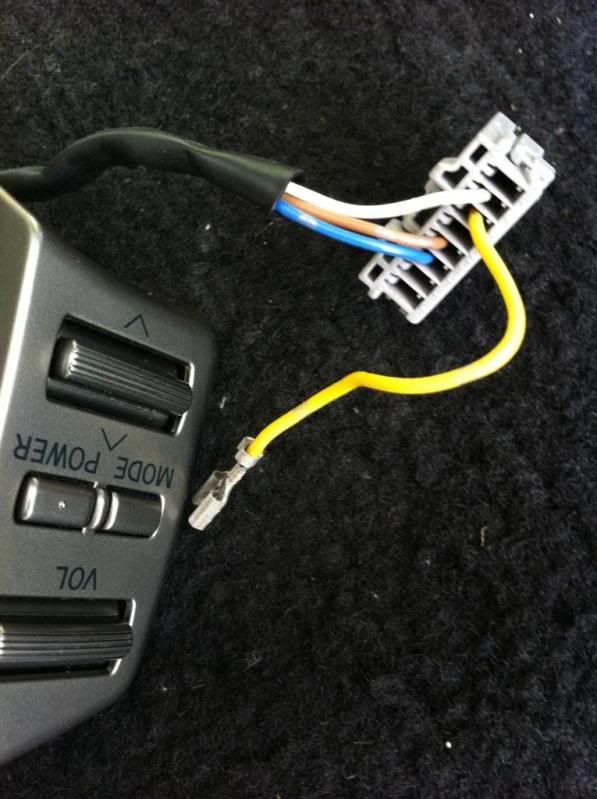
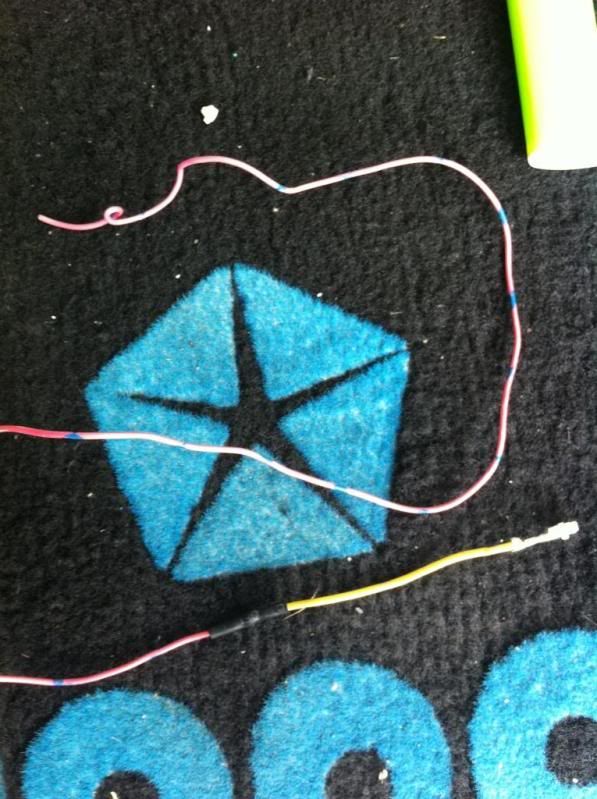
Step 3: Cut the eyelet off the yellow wire and strip the end back, you will need to solder the end of this yellow wire to the end of the supplied red wire. Use heat shrink to cover the join.
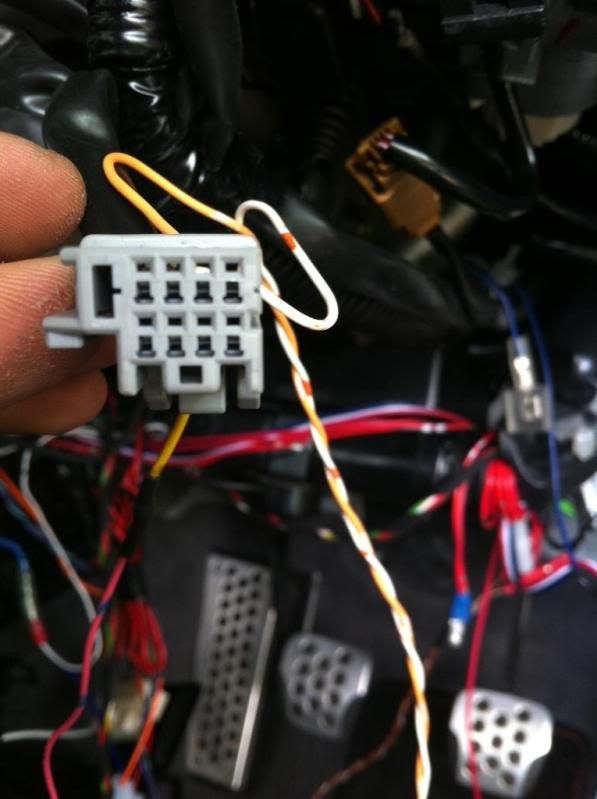
Step 4: Now plug this yellow cable (for lighting the LED in the buttons) into the 8 pin grey connector you pulled out. You will need to use a tiny flat blade screw driver to lift the white tab up so its no longer sitting flat. The yellow plug is to be plugged in the top spare slot from the right (next to green connector). The ‘fins’ of the plug should be facing up.
Step 5: There are 2 more supplied wires, two with ends on them, one orange and one white. Plug the white cable into the bottom slot next to the green wire (the other end of this will eventually plug into the blue pin on the cruise control program plug) and then the remanding orange wire in the bottom outside slot (which other end will go to the black pin on the cruise control plug later) Take note if you have different supplied colour of wires than white and orange which one will plug into which pin on cruise control plug, the one opposite the yellow cable you plugged in step 4 will go to the blue pin.
Tips: Again with the white lock in plate still lifted up on the grey plug make sure the white and orange plugs have their ‘fins’ up. Having the plug facing you, you want to wiggle the wires and look for the [ ] ends moving around in the top holes or slightly above them so when you push down the white lock in plate you will see the [ ] line up in the plug.
Now with the wires coming out of the plug you want to kind of have them pushed against the back of the plug so you holding the connectors in there and then push and wiggle the plug back into its socket. It should slide in, if not the [ ] is not lined up with the pin.
Step 6: now you need to have the red cable you soldered before connected to a 12V source. It can together with the cruise control 12V wire and crimped together in a male plug that then plugs into that female wire you attached to the cigarette earlier on.
Step 7: Once you have followed the initial programming for the cruise control stalk and have unplugged it you will then plug those wires from step 6 into the plug you take the control stalk from.
Once I plug my two wires in I actually tapped them up so they wouldn’t fall out or short.

Step 1: Under the steering wheel there are some connectors (yellow and grey), unplug the grey.
Step 2: We need the yellow space wire from the old media button, there is a tap on the plug that lifts off and if you have a fine pin you can push down inside the connector to release the cable and pull it out (or just yank it out)
Step 3: Cut the eyelet off the yellow wire and strip the end back, you will need to solder the end of this yellow wire to the end of the supplied red wire. Use heat shrink to cover the join.
Step 4: Now plug this yellow cable (for lighting the LED in the buttons) into the 8 pin grey connector you pulled out. You will need to use a tiny flat blade screw driver to lift the white tab up so its no longer sitting flat. The yellow plug is to be plugged in the top spare slot from the right (next to green connector). The ‘fins’ of the plug should be facing up.
Step 5: There are 2 more supplied wires, two with ends on them, one orange and one white. Plug the white cable into the bottom slot next to the green wire (the other end of this will eventually plug into the blue pin on the cruise control program plug) and then the remanding orange wire in the bottom outside slot (which other end will go to the black pin on the cruise control plug later) Take note if you have different supplied colour of wires than white and orange which one will plug into which pin on cruise control plug, the one opposite the yellow cable you plugged in step 4 will go to the blue pin.
Tips: Again with the white lock in plate still lifted up on the grey plug make sure the white and orange plugs have their ‘fins’ up. Having the plug facing you, you want to wiggle the wires and look for the [ ] ends moving around in the top holes or slightly above them so when you push down the white lock in plate you will see the [ ] line up in the plug.
Now with the wires coming out of the plug you want to kind of have them pushed against the back of the plug so you holding the connectors in there and then push and wiggle the plug back into its socket. It should slide in, if not the [ ] is not lined up with the pin.
Step 6: now you need to have the red cable you soldered before connected to a 12V source. It can together with the cruise control 12V wire and crimped together in a male plug that then plugs into that female wire you attached to the cigarette earlier on.
Step 7: Once you have followed the initial programming for the cruise control stalk and have unplugged it you will then plug those wires from step 6 into the plug you take the control stalk from.
Once I plug my two wires in I actually tapped them up so they wouldn’t fall out or short.
Last edited by R6n350GT; Dec 8, 2011 at 07:37 AM.


Trending Topics
Well you guessed it! Its a genuine JDM Skyline 350GT, not Infiniti G35, but same car pretty much!
And no factory CC, blue tooth, seat memory and other cool electronic **** you guys get...
As for the Mopar floot mat, its from my brothers 1967 VK Valiant, i may have the year and model wrong but its a pretty pimpin muscle car!
This guide is for any UK, Aussie and Japan owner who wants CC fitted. Ill fix up errors later and add parts but its around $500 in parts.


Thread
Thread Starter
Forum
Replies
Last Post
Hasanbaloch
Engine, Drivetrain & Forced-Induction
15
Feb 29, 2024 08:45 PM
laksjd84
Exterior - Body Parts
1
Jul 24, 2015 05:12 PM