
Pirates coilovers


 Front driver side is done. Front passenger should be easy tomorrow thanks toro12. How long did it take you to settle and how far did it eventually settle from first set height. Trying to decide between oem or true coilover in the rear. I here that stiffness is better in true coilover style in MDU reviews.

Joined: Dec 2002
Posts: 246
Likes: 19
From: Roswell, GA
Final ride height and camber(after settling)
Plan for a full 5/16" of settle drop. I would have not have noticed if you had not asked!
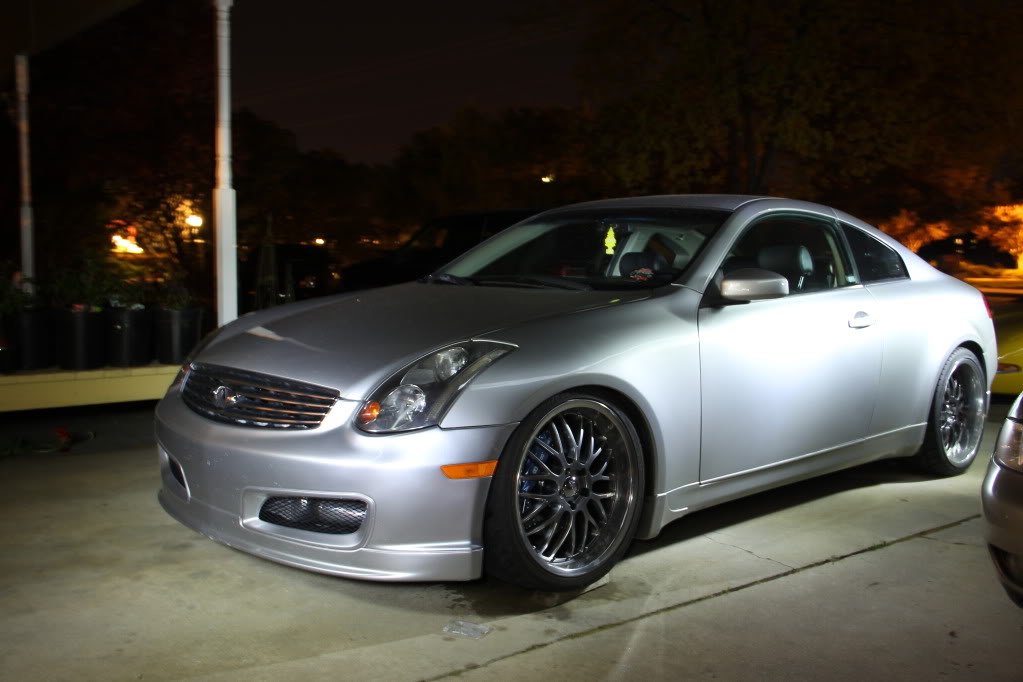
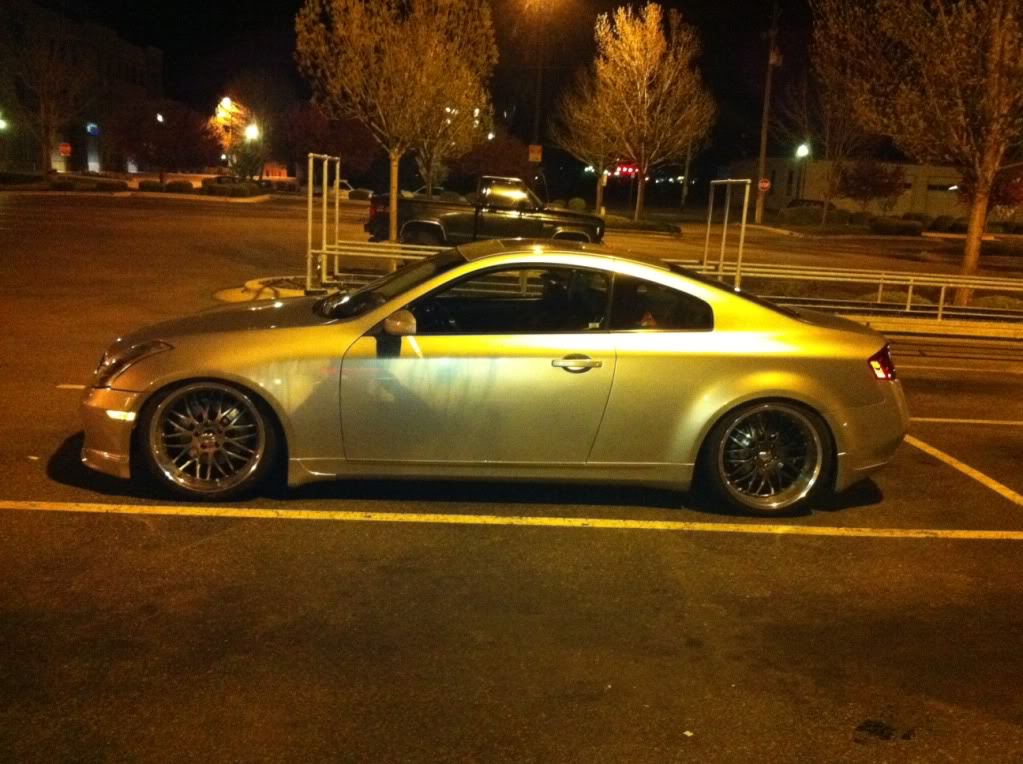
Right now I'm 25 3/4" (-1.6 deg) front, sexy&functional +perfect. 26"(-2.8 deg) rear, rubs fender flange on bumps. So my sedan settled 1/4" front and 3/8" rear since installation, 1/2 tank gas and empty trunk.
What is your target drop fender to slab? Pics are the most fun here.
I suggest start with "true" coilover on rears since that is optimum handling mode.
I have OEM install right now to test these coilovers in that mode; they work well over the past 150 miles.
I always intended to use as "true" on rears and definitely making that mod before mid May along with camber kits and fender roll.
Plan for a full 5/16" of settle drop. I would have not have noticed if you had not asked!
Right now I'm 25 3/4" (-1.6 deg) front, sexy&functional +perfect. 26"(-2.8 deg) rear, rubs fender flange on bumps. So my sedan settled 1/4" front and 3/8" rear since installation, 1/2 tank gas and empty trunk.
What is your target drop fender to slab? Pics are the most fun here.
I suggest start with "true" coilover on rears since that is optimum handling mode.
I have OEM install right now to test these coilovers in that mode; they work well over the past 150 miles.
I always intended to use as "true" on rears and definitely making that mod before mid May along with camber kits and fender roll.
Last edited by toro12; Apr 27, 2011 at 02:57 PM.

Joined: Dec 2002
Posts: 246
Likes: 19
From: Roswell, GA
Change rear kit to True coilover: no pics, I don't have the parts off of my sedan yet but will describe the change as best I can.
What you WILL NOT USE on the rears are:
1) lower control arm bucket stays empty with NO SPRING.
2) leave out the "kit aluminum seat "(it has the tapered cut inside ridge that usually traps the spring end)
3) leave out the "kit aluminum threaded T-shaped spring jacking post". (and the upper large rubber seat)
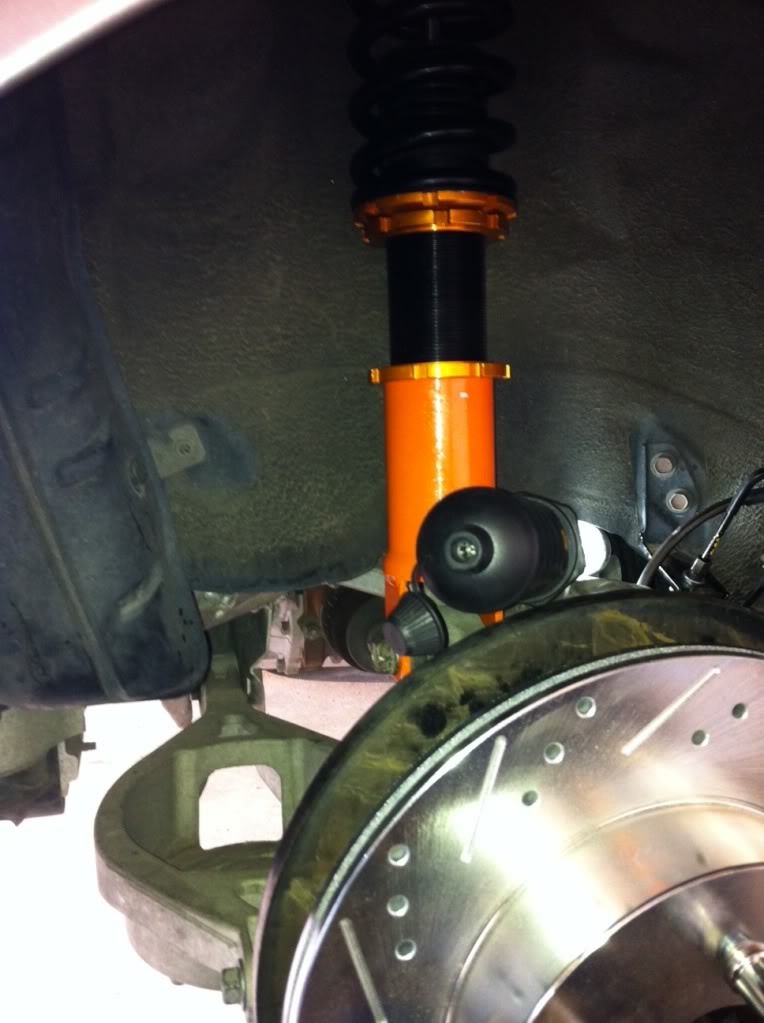
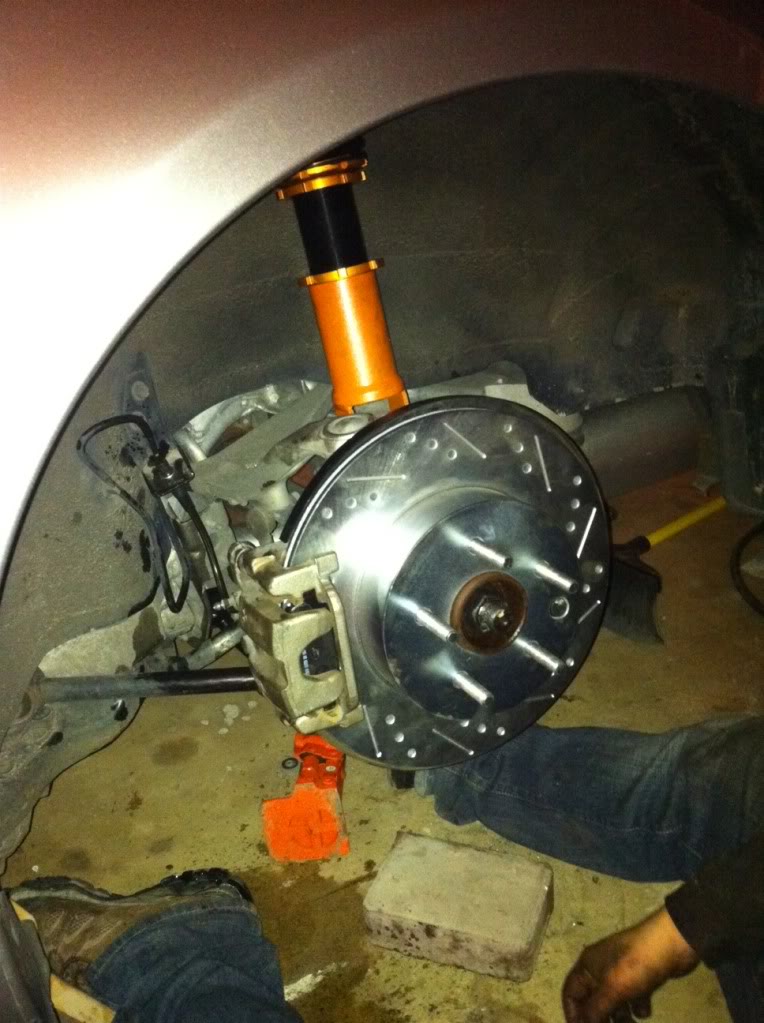
What is left from the rear kit is (1) large aluminum ring, (2) small aluminum rings, the black spring, the steel clevis tube and the shock body with rod and pillow mount assembly.
The TRUE assembly of these parts is as follows:
I'll describe the order of parts from TOP to bottom;
The arrangement is car body with (2) OEM tack welded studs facing down, pillow mount (use the old crispy gasket with some razor trimming); spring slides over the shock body against the bottom of the pillow mount, large ring preloads 10mm of spring against the pillow mount, 1st small ring locks to the large ring upward, 2nd small ring locks downward to the top of the clevis tube which is threaded over shock body at your target drop height and finally the clevis and thru bolt mounts to the wheel hub. Finished, sorry no pics till mid-May.
The rears true coilover is just a height adjustable "strut" like the front coilover strut.
Hey play with it and send a pic ASAP you wrap your head around the plan.
Summary:
Remember, ALL the suspended "load and reactions" are NOW combined/carried on the "true" strut coilover.
Where OEM set-up "load" was carried in the spring bucket and dampering "reaction" were separated to compress/rebound at the shock body. Both set-up work against the car body, just different designs.
Advantages:
Height adjustment of true coilover is the big one. Like the front coilovers it is simpler to make height changes because all of the parts are in one assembly.
Other advantages can be important to race set-up, reduced weight but not necessarily for daily drivers that want a racy sport look and improved handling.
What you WILL NOT USE on the rears are:
1) lower control arm bucket stays empty with NO SPRING.
2) leave out the "kit aluminum seat "(it has the tapered cut inside ridge that usually traps the spring end)
3) leave out the "kit aluminum threaded T-shaped spring jacking post". (and the upper large rubber seat)
What is left from the rear kit is (1) large aluminum ring, (2) small aluminum rings, the black spring, the steel clevis tube and the shock body with rod and pillow mount assembly.
The TRUE assembly of these parts is as follows:
I'll describe the order of parts from TOP to bottom;
The arrangement is car body with (2) OEM tack welded studs facing down, pillow mount (use the old crispy gasket with some razor trimming); spring slides over the shock body against the bottom of the pillow mount, large ring preloads 10mm of spring against the pillow mount, 1st small ring locks to the large ring upward, 2nd small ring locks downward to the top of the clevis tube which is threaded over shock body at your target drop height and finally the clevis and thru bolt mounts to the wheel hub. Finished, sorry no pics till mid-May.
The rears true coilover is just a height adjustable "strut" like the front coilover strut.
Hey play with it and send a pic ASAP you wrap your head around the plan.
Summary:
Remember, ALL the suspended "load and reactions" are NOW combined/carried on the "true" strut coilover.
Where OEM set-up "load" was carried in the spring bucket and dampering "reaction" were separated to compress/rebound at the shock body. Both set-up work against the car body, just different designs.
Advantages:
Height adjustment of true coilover is the big one. Like the front coilovers it is simpler to make height changes because all of the parts are in one assembly.
Other advantages can be important to race set-up, reduced weight but not necessarily for daily drivers that want a racy sport look and improved handling.

Joined: Dec 2002
Posts: 246
Likes: 19
From: Roswell, GA
Just like 4D says, the clevis tube "spins" off of the shock body assembly. Send a pic when you get the spring on in the right order.
The assembled "shock, rod and pillow mount(top part)" ALWAYS are assembled.
This assembly contains the oil and control valve. The "technological" portion.
The clevis tube is just a "simple" steel bracket of sorts. It sets ride height.
Also, gets out of your way to allow you to get the black spring on the shock body.
That is the beauty of dampered coilovers with camber - toe kits . The suspension builder controls all on car tracking conditions with a little work and know how.
I will check the fender to slab distances tonight. The bouncing is gone in the rear I think everything just had to settle for about 10 miles so I'm sticking stiff on the rear. I raised the front 3/4" to prevent rubbing it was to low to not rub the fenders. I will have to take it to the alignment shop this week and see where I'm at in that respect. I'm going to have to keep some negative camber to keep from rubbing but I need to fix toe I'm pretty sure.


