
***Fuel Sending Unit DIY Testimonial***


Joined: Oct 2011
Posts: 126
Likes: 22
From: Dirty Jerzey
***Fuel Sending Unit DIY Testimonial***
I was a complete skeptic with this DIY. I kept saying to myself....How can a freaking Q-Tip fix a well known issue? Well here is my story. Today was a nice sunny cool morning in my neck of the woods. I figured what the hell let me give this a shot. Pennies for a Q-Tip trial is allot better than pissing $400 bucks for a new set of sending units.
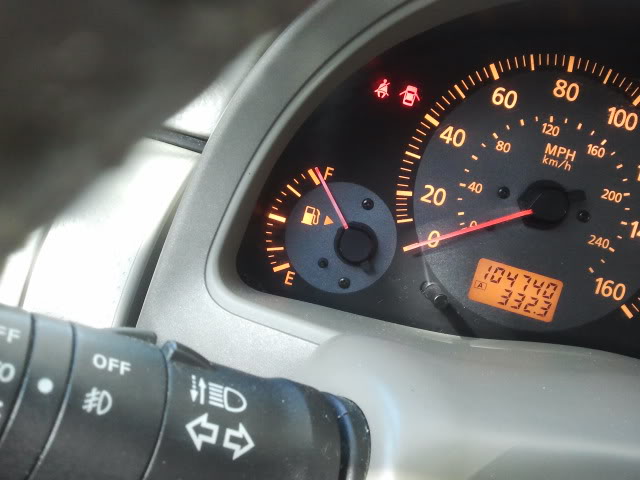
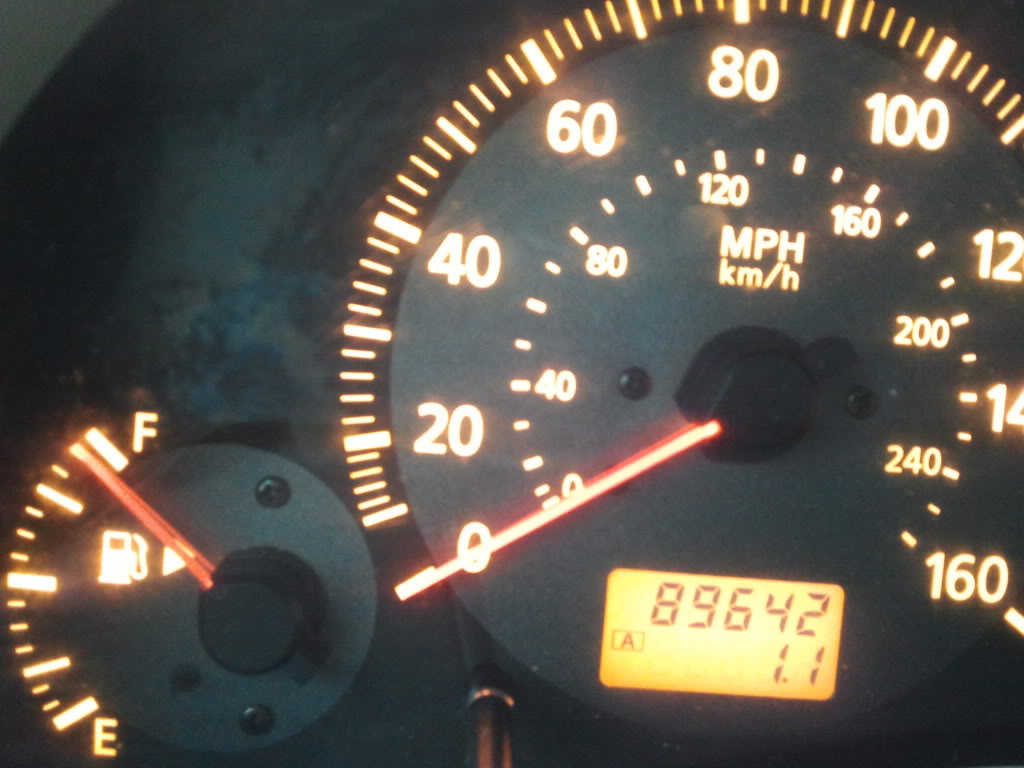
I popped the rear seat with no real issues. All I did was pull it forward and raise it straight up in a continuous motion. Once wedged open I used a piece of wood to hold the seat up in its raised position. I then started with the driver side. The hatch and sensor door was quite easy to open. Also keep in mind there may be some debris around the opening cap. My suggestion is to clean this all this out before even opening up the covers (You wouldn't want that crap falling in the tank). I opened the cap using a screwdriver and pulled out the sending unit. The unit itself was quite clean but why wouldn't it be.....it soaks in gasoline for its entire life. I looked at the float arm mechanism and visually verified where the brass contact slides up and down on a circuit board. I then ran a Q-Tip up-and-down on the circuit board for about a minute. (the contacts to wipe look like mini piano keys for those that do not know). I went through about 3 Q-tips. Now keep in mind this unit is sitting in a bowl of gasoline so don't expect sludge. But what I did find was the Q-Tips were darkened by some type of carbon/metallic residue buildup. Not allot but enough to give the Q-Tip a silver tint. I was also surprised to see my gas tank filled to the top even though my gas gauge read 3/4.
I then started on the passenger side. I followed the same opening procedure. I cleaned the hose and safely secured it on the side. This side is much more of a pain of the *** because the fuel pump is located on this side. As I was opening the unit fuel was pouring out. more than expected The car must have been on a tilt as most paved roads are crowned and of course the fuel pump side was towards the curb (hence the tilt). So to avoid fuel spilling all in the rear chamber underneath the seat I pulled the pump out to the point were I can secure the float contact circuit board above the fuel itself. Again I followed the same process. I went through about 3 Q-Tips and wiped the metal conacts clean for about a minute. I then put the pump back in the tank and bolted down the cover and reconnected the unit.
****My suggestion is to keep wiping the metal contact circuit board until there is no more silver residue on your Q-Tips as you keep using them. Keep going through Q-Tips till you see no more silver/gray on your tips. Even if the Q-tips are white after wiping go through a few more just to be on the safe side***.
I turned on the car and was quite pissed because my gas gauge still read 3/4 full. I drove to the gas station to fill up on my gas. I then put the pump and filled it using the slowest setting that way there is no vapor lock as some have suggested to do. I then noticed that my level went slightly above 3/4 and basically a tick below Full. I then paid the attendant and drove a 1/4 mile down the road and my gas tank for the first time read **FULL**!!!!! Holy shiznit!!! I turned it off and on just to make sure it wasn't a fluke and sure as hell it worked. IT DID
I thought this was worth mentioning and I am a true believer of this DIY. Thank you all for suggesting it. To those thinking of purchasing new sensors you better do this first. It is very easy to do and will save you hundreds....which can go to mods instead
Some words of advice. It's better that you do this on a level surface. Its better to do this when you only have a 1/4 tank of fuel to avoid spilling. It's better to do it on a sunny day so you can vent the car to get rid of the fuel smell when done. And its better to tell the dealer to go "F" themselves when they want to charge you an arm and a leg to do a full replacement at your cost when you have no warranty.
Thanks Gents!!!!!
Last edited by Jiggyfingers; Nov 5, 2011 at 03:32 PM.


Joined: Oct 2011
Posts: 126
Likes: 22
From: Dirty Jerzey
Mr. 3rd Day Dude,
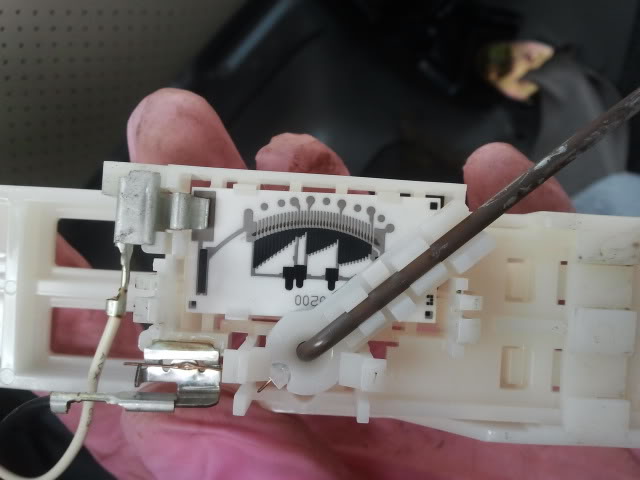
That last picture you took was spot on. The piano key circuit board is where you want to clean. More especially that long black line from side to side from the brass contact sliding back and forth. Its basically where the brass contact from the float lever is making contact to the circuit board. Clean the entire pathway for that and you should be good. My personal experience....keeping using Q-Tips till the there is no more residue on the Q-Tips. Keep blowing through them till its stupid clean.
That last picture you took was spot on. The piano key circuit board is where you want to clean. More especially that long black line from side to side from the brass contact sliding back and forth. Its basically where the brass contact from the float lever is making contact to the circuit board. Clean the entire pathway for that and you should be good. My personal experience....keeping using Q-Tips till the there is no more residue on the Q-Tips. Keep blowing through them till its stupid clean.
Trending Topics
Joined: Oct 2011
Posts: 126
Likes: 22
From: Dirty Jerzey
***Update***
I am happy to report that my fuel tank filling issue is still resolved. Today at the gas station I had a few ticks above E and was able to squeeze 15 gallons into the tank. Needle spiked to F. I am on my 5th fillup since the fix.
__________________________________________________ ________________________________
Also, as a reminder prior to the DIY I was only able to fill it 12 gallons (3/4) at the most....
Thanks again...
Last edited by Jiggyfingers; Nov 20, 2011 at 02:53 PM.
Joined: Oct 2011
Posts: 126
Likes: 22
From: Dirty Jerzey
Propping it with a piece of wood to hold it up while I worked= 30 seconds
Removing the driver side sensor= 3 minutes or so
Cleaning the driver side sensor= 10 minutes. I repeated the process over and over again until my Q-Tips were perfectly clean hence no grime left to clean similar to doing a white glove test
Inserting and bolting down the driver side sensor= 5 minutes
The passenger side was a little more tricky because the sensor houses the fuel pump as well. I took extra care which is why it took extra time. I would say between the disassembly and reassembly of the passenger side it took somewhere between 30-35 minutes. This extra time also accounts for cleaning up debris, resetting the liner and remounting the seat.
If you have an hour or so to kill on a nice Saturday morning go for it. I am not a certified mechanic but considering the fact that I took my time and ensured everything was mounted back in place to spec made this a simple repair with huge return on investment.

Joined: Oct 2011
Posts: 126
Likes: 22
From: Dirty Jerzey
Just remember you are cleaning the circuit board only. More important where the float arm brass contact makes direct contact to the board. In the picture above its the gray half moon piano looking strip. Within that strip there is a thin black line. When you hold the sensor sideways you will see that's where the float arm contact rubs side-to-side like a wiper blade which sends a signal to your computer to let you know the status of your tank. That thin black strip u see in the picture is actually carbon/soot buildup and wear (which depletes continuity since its not a conductor). That is what you want to clean that way the gold float contact can make a good connection with the circuit board itself.
3rd Day Dude took a good picture....
3rd Day Dude took a good picture....
Last edited by Jiggyfingers; Nov 21, 2011 at 11:00 AM.


