
DIY beginning of wire tuck

Joined: Sep 2009
Posts: 3,205
Likes: 23
From: bay area
DIY beginning of wire tuck
putting this hear because i dont know if its different for coupes or 2nd gen sedans. i did this in my 04 sedan.
this DIY shows how to wiretuck the loom that runs over the pass side fender well. you take the same steps to do the drivers side. not all pictures were takin by me which is why in some pictures the car is blue (mine) and others its white.
this DIY also leaves out some steps because i am assuming you already know how to take the headlight and bumper off. if not. then a wire tuck is not something you should be attempting yet.
enjoy...
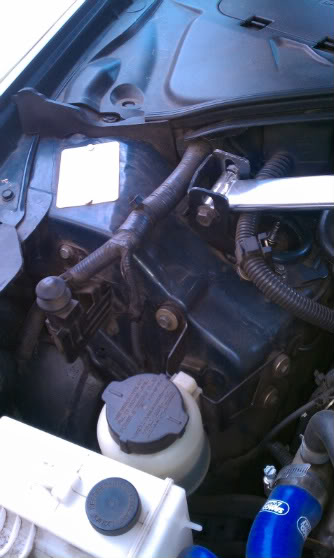
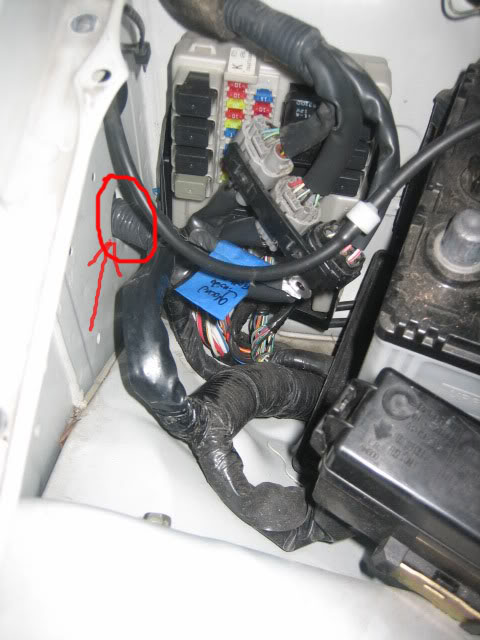
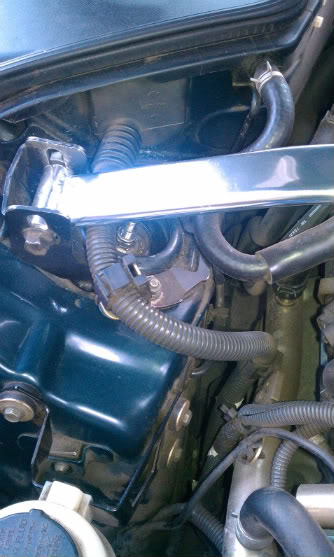
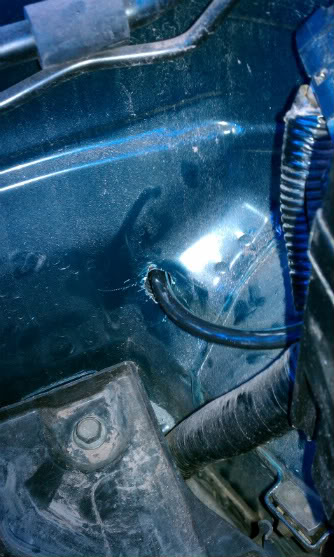
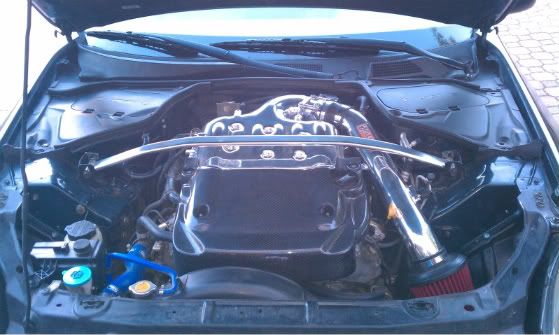
first when you open the hood you see this...a big ugly wire loom that runs directly over the pass side fender well.
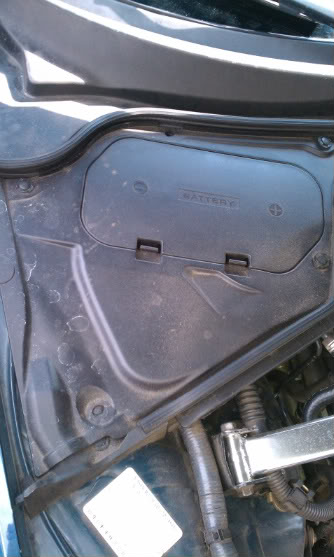
-first step is to take off the battery cover
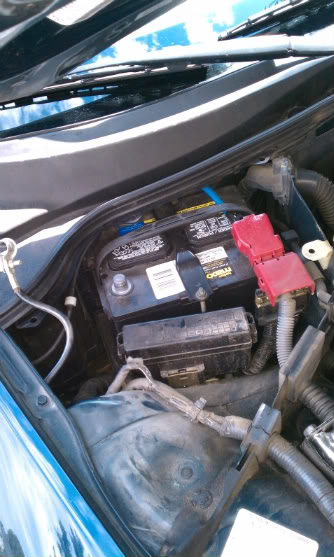
-then you are going to want to use a 10mm wrench to take the negative battery terminal off
-if you havnt already, this would be a good time to remove the bumper and headlights.
-since you have either already or are just now taking those off, now would also be a good time to take the inner fender out. there are both philips screws and those plastic clips holding this on. make sure you have them all out or its not going to come out.
-you can now start unplugging wires
- the wires that you will need to unplug are as fallows..
--headlights
--airbag sensor
--winshield washer
--horn
--wierd thing that is springy when you push the hood down(i took this out completely)
--2 grounds (1 is on front of fender and 1 is on backside of fender. both use a 10mm bolt)
-now pull all the wires up and back to where the battery is located.
-if you look inside the fender inbetween the battery and fender you will see a "manifold" that has 3 harness plugged in attatched to it. remove that from the fender. i did this by simply pulling on it. this will reveal the hole behind it that is roughly 1.25 inches in diameter. this hole is where you are going to run all the wires through.
in this picture you can see...the hole, and the whole harness ran through it. you will need to obviously pull 1 peice through at a time as its a tight fit.
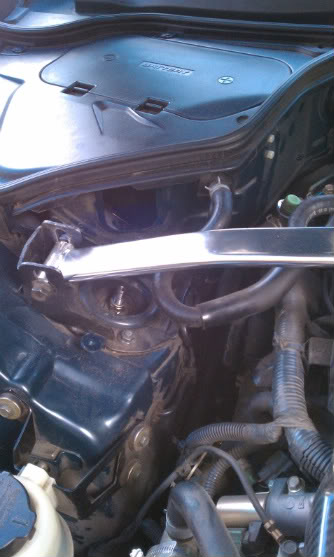
-pull it through as far as you can possible go with it.
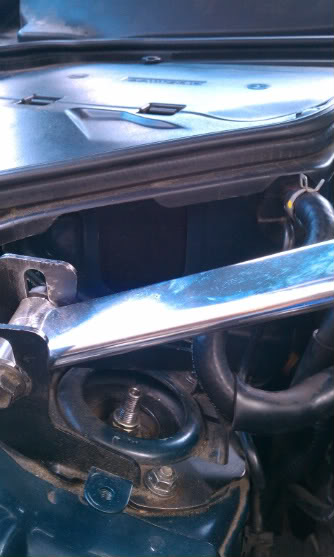
-from underneither it should now look like this...
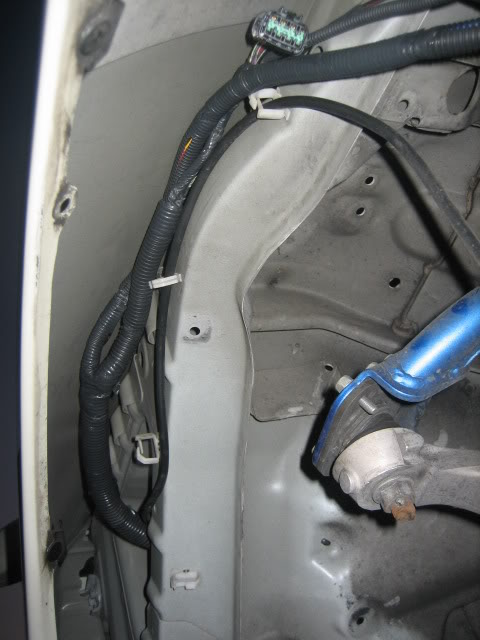
-pull all the wires to the front of the fender towards the headlights.
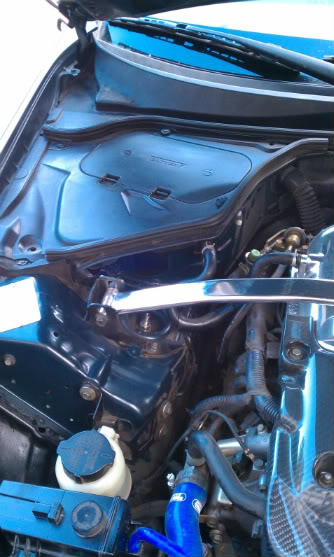
-run them back into the engine bay.
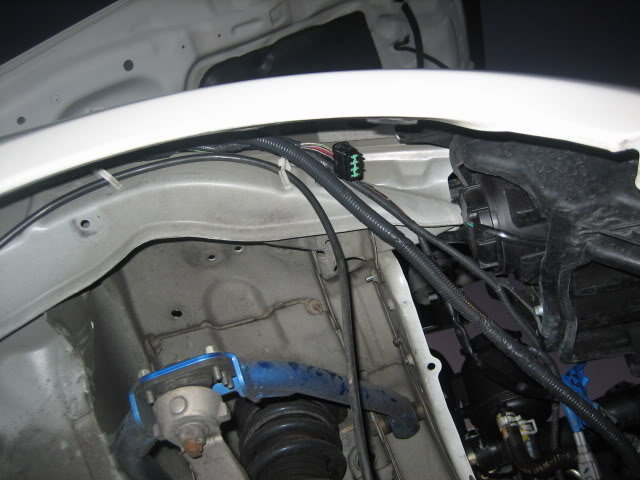
-you can now start plugging the wires back in where they go.
-i left the washer fluid unplugged as i plan on taking that out. otherwise i believe that is the only wire you will need to extend other than the 2 ground wires
-the headlight wires is going to be real tight. its going to look like it wont reach but it will. if its not. then unhook the harness that is still attatched to the headlight as it just slides on and off a little prong. that should give you an extra 3 inches or so.
-once everything is plugged back in you now need to extend the 2 ground wires and you can pick where ever you want you put those.
-now put the headlight back in. the front bumper back on and the inner fender back on in the reverse process that you used to take them all off. you can also now put the neg battery terminal back on and the battery cover.
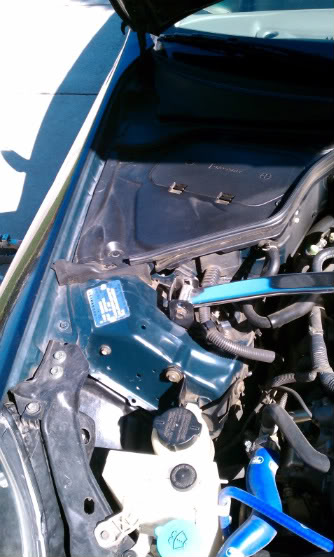
then stand back and look at the clean fender and smile because you are that much closer to having a clean engine bay.
i know this is not the best DIY. but it is also my first one. i was learning how to do this wire tuck as i was doing it. a lot of pictures are not involved but thats because those steps are pretty self explanitery. if you have any input let me know and i can add it. thanks for looking. hope this helps some people.
UPDATE...
just got done with the positive wire that runs from the battery to the alternator. very easy to do. sean had told me that there was a hole that should already be there that you can just run the wire through but i could not find any hole that going into the battery compartment. so you will need a drill and a step bit.
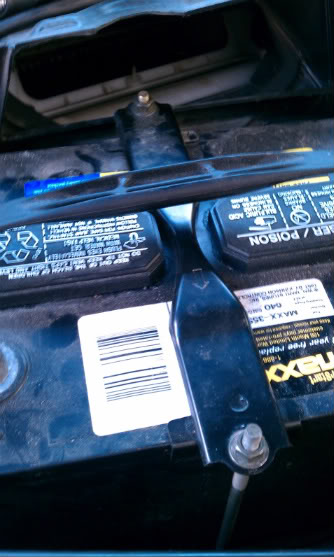
-first thing you are going to want to do is take off the battery cover and wiper cowl. both come off by simply removing the plastic clips.
-undo the neg and pos on the battery
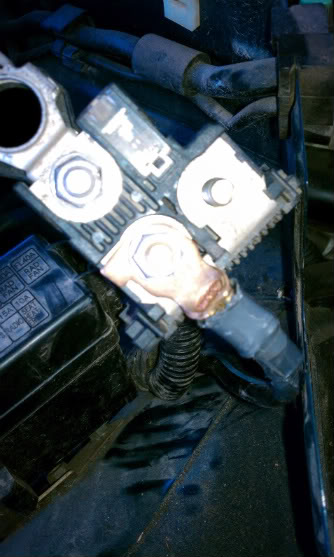
-below is a picture of the possitive camble "manifold".. just from looking at yours you will be able to tell which one you need to disconnect from it. (the one leading to the alternator.)
-now pull this wire out from the battery compartment and take the grommet off.
-you will now see that the battery has a tie down so that it doesnt move. there are 2 nuts holding it in place. loosen the front one and the front tie-down should now be able to unhook. which will also allow the back one to unhook.
- you can now remove the battery.
-i was told there was a hole in here but i couldnt find it so i made my own. i chose here. (this is just the beginning of the whole. it will need to be a lot bigger.)
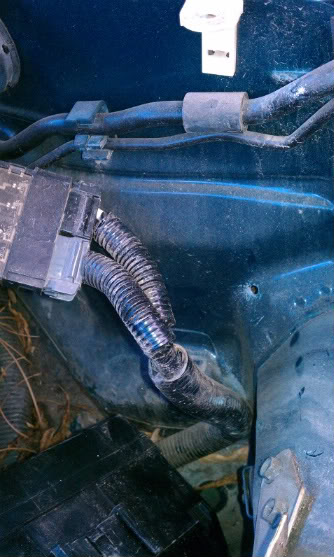
-now that the hole is drilled. you can pull the wire through.
-rehook it to the "manifold" and set it aside.
-put the battery back in and hook the pos and neg back up
-you are now done. kinda...
-it should now look like this
-there is a big ugly hole where that grommet used to be where the wire went through.
-there a multiple solutions for this but i chose the easiest and its probably kinda ghetto but it works for now.
-i took a peice of cardboard and painted it black and glued it to the backside of the hole haha
the final product should look like this...
PICTURE OF ENTIRE ENGINE BAY. PASS FENDER, DRIVERS FENDER AND POS BAT CABLE ALL TUCKED
this DIY shows how to wiretuck the loom that runs over the pass side fender well. you take the same steps to do the drivers side. not all pictures were takin by me which is why in some pictures the car is blue (mine) and others its white.
this DIY also leaves out some steps because i am assuming you already know how to take the headlight and bumper off. if not. then a wire tuck is not something you should be attempting yet.
enjoy...
first when you open the hood you see this...a big ugly wire loom that runs directly over the pass side fender well.
-first step is to take off the battery cover
-then you are going to want to use a 10mm wrench to take the negative battery terminal off
-if you havnt already, this would be a good time to remove the bumper and headlights.
-since you have either already or are just now taking those off, now would also be a good time to take the inner fender out. there are both philips screws and those plastic clips holding this on. make sure you have them all out or its not going to come out.
-you can now start unplugging wires
- the wires that you will need to unplug are as fallows..
--headlights
--airbag sensor
--winshield washer
--horn
--wierd thing that is springy when you push the hood down(i took this out completely)
--2 grounds (1 is on front of fender and 1 is on backside of fender. both use a 10mm bolt)
-now pull all the wires up and back to where the battery is located.
-if you look inside the fender inbetween the battery and fender you will see a "manifold" that has 3 harness plugged in attatched to it. remove that from the fender. i did this by simply pulling on it. this will reveal the hole behind it that is roughly 1.25 inches in diameter. this hole is where you are going to run all the wires through.
in this picture you can see...the hole, and the whole harness ran through it. you will need to obviously pull 1 peice through at a time as its a tight fit.
-pull it through as far as you can possible go with it.
-from underneither it should now look like this...
-pull all the wires to the front of the fender towards the headlights.
-run them back into the engine bay.
-you can now start plugging the wires back in where they go.
-i left the washer fluid unplugged as i plan on taking that out. otherwise i believe that is the only wire you will need to extend other than the 2 ground wires
-the headlight wires is going to be real tight. its going to look like it wont reach but it will. if its not. then unhook the harness that is still attatched to the headlight as it just slides on and off a little prong. that should give you an extra 3 inches or so.
-once everything is plugged back in you now need to extend the 2 ground wires and you can pick where ever you want you put those.
-now put the headlight back in. the front bumper back on and the inner fender back on in the reverse process that you used to take them all off. you can also now put the neg battery terminal back on and the battery cover.
then stand back and look at the clean fender and smile because you are that much closer to having a clean engine bay.
i know this is not the best DIY. but it is also my first one. i was learning how to do this wire tuck as i was doing it. a lot of pictures are not involved but thats because those steps are pretty self explanitery. if you have any input let me know and i can add it. thanks for looking. hope this helps some people.
UPDATE...
just got done with the positive wire that runs from the battery to the alternator. very easy to do. sean had told me that there was a hole that should already be there that you can just run the wire through but i could not find any hole that going into the battery compartment. so you will need a drill and a step bit.
-first thing you are going to want to do is take off the battery cover and wiper cowl. both come off by simply removing the plastic clips.
-undo the neg and pos on the battery
-below is a picture of the possitive camble "manifold".. just from looking at yours you will be able to tell which one you need to disconnect from it. (the one leading to the alternator.)
-now pull this wire out from the battery compartment and take the grommet off.
-you will now see that the battery has a tie down so that it doesnt move. there are 2 nuts holding it in place. loosen the front one and the front tie-down should now be able to unhook. which will also allow the back one to unhook.
- you can now remove the battery.
-i was told there was a hole in here but i couldnt find it so i made my own. i chose here. (this is just the beginning of the whole. it will need to be a lot bigger.)
-now that the hole is drilled. you can pull the wire through.
-rehook it to the "manifold" and set it aside.
-put the battery back in and hook the pos and neg back up
-you are now done. kinda...
-it should now look like this
-there is a big ugly hole where that grommet used to be where the wire went through.
-there a multiple solutions for this but i chose the easiest and its probably kinda ghetto but it works for now.
-i took a peice of cardboard and painted it black and glued it to the backside of the hole haha
the final product should look like this...
PICTURE OF ENTIRE ENGINE BAY. PASS FENDER, DRIVERS FENDER AND POS BAT CABLE ALL TUCKED
Last edited by kennymo; Oct 11, 2010 at 08:56 PM.


Nice Kenny.
I know a wire tuck be done in various ways but I know we didn't have to drop my front bumper or remove my headlights when we did mine. Although it is commonplace to remove the front bumper, hadn't heard of anyone removing the headlights before. Also it is possible to do a wire tuck without extending any wires, we didn't extend any of my wires.
Thanks for taking the time to document your process, this should be a HUGE help to those looking to do this.

Joined: Sep 2009
Posts: 3,205
Likes: 23
From: bay area
glad you guys like it. i think next i will be doing the loom that runs out of the battery area and down the side of the motor? sean or marcus, either of you care to send me a pm to give me a heads up on how its done. i think i have a pretty good idea but would like to make sure before i start tearing into it.
and yea the headlights and bumper dont need to be removed. and i know that now. just seemed like a step that needed to be done to make some stuff easier. i wont have to though on the drivers side now that i have a better understanding
and yea the headlights and bumper dont need to be removed. and i know that now. just seemed like a step that needed to be done to make some stuff easier. i wont have to though on the drivers side now that i have a better understanding
That one is easy, you just unbolt it from the + battery terminal and pull it out of the rubber grommet. There is a square hole on the firewall just below it and a little further back that runs right up below the battery. Just reach down below the hard coolant pipe and you will find the hole, it is pretty big.
Trending Topics


Very helpful for someone who hasnt done this before, like myself. I think if more folks can do writeups on how to do portions of the wiretuck like this, it wont make the whole thing seem so overwhelming!

No problem Kenny. Nice write up
I was told you had to drill a hole?  That's what I winded up doing. Is this open hole directly under the battery tray?
That one is easy, you just unbolt it from the + battery terminal and pull it out of the rubber grommet. There is a square hole on the firewall just below it and a little further back that runs right up below the battery. Just reach down below the hard coolant pipe and you will find the hole, it is pretty big.
That's what I winded up doing. Is this open hole directly under the battery tray?