
What did you do to the G Sedan today?


Registered User
Joined: May 2005
Posts: 586
Likes: 7
From: Iowa
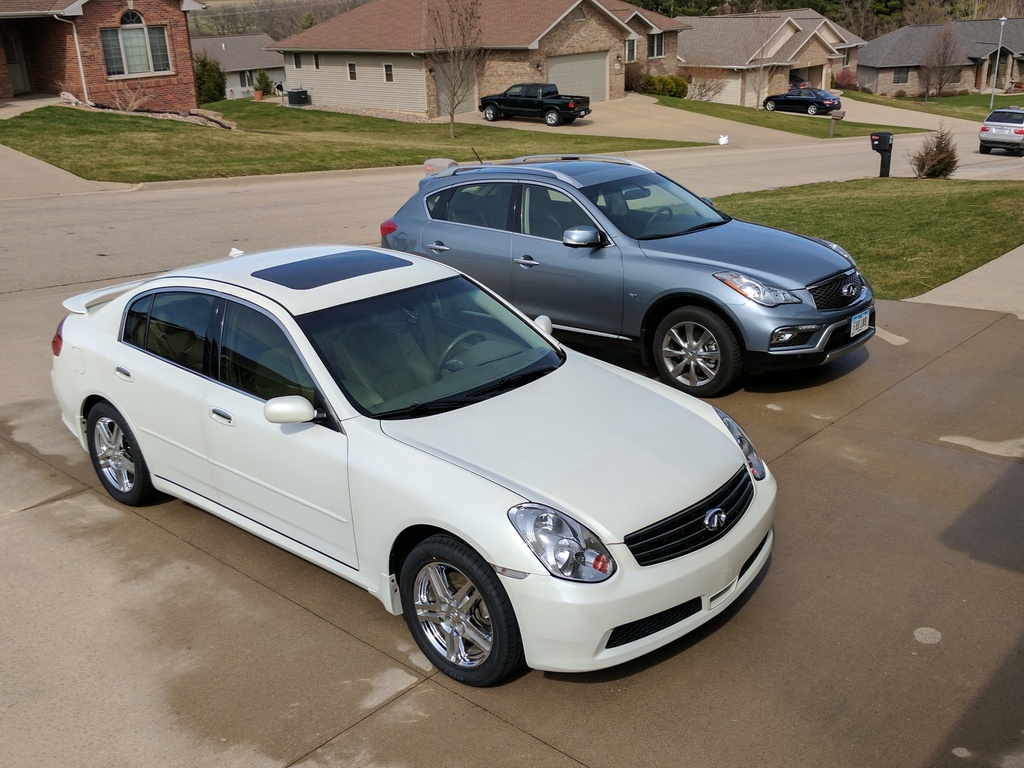
I have a lot of projects coming up for the G.. still at like 98k, but im going to do all the fluids and plugs now that it is warming up. But for today.. just a wash. First wash for the new 2017 QX50 as well.

Joined: Mar 2009
Posts: 18,299
Likes: 1,488
From: By the sea, Tx
G35 sedan w/ too much money in mods

Man I still dig the X bumper, especially with a factory or Ionic front lip. Don't know why that little cut out does it for me either, it just does. Cars are looking nice Konsole...........

Konsole - Very clean looking and well taken care of G there.
I have to ask, how do you get (and keep) your headlights looking so clear?
Did you do a true wet sand or other serious restoration to the lens?
Perhaps buy new ones or something or just have yet to have them fade/yellow yet?
I've used PlastiX before to polish mine a bit, but it doesn't seem to make them perfect and certainly doesn't last as long as I'd like. The faded/yellowed/fogged lenses are one of the main things that really stand out to me after the rest of the car is looking clean and I'd love for them to be closer to yours. Any other G i see and happen to glance at seems to be in the same boat with the faded lenses.

I tried PlastX and proper wet sanding/cut compound/clay bar. Once there original finish is compromised, in my opinion there is no premanent fix. You'' end up right back where you started in just a few months.
In my case I found a good set of donor housings. They weren't HID lights so I had to swap the lenses onto my original housings. There are some how-tos on this site for that process. The new ones look great and I'm hoping to keep them that way by adding a layer of UV-protection clear film from a wrap place. The key to success is to use heated butyl to seal the new lenses to the housings, or you'll get water in there.
If you can't find a good OEM donor set, probably the next best course of action is buying a set of those aftermarket housings from eBay and swapping just the lenses onto your stock housings. $150 and a few hours of elbow grease and you should be good to go, vs $30 and a few hours of elbow grease every few months.
PS holy crap these things are bright when they're not covered in scratches and a dingy yellow film!
K...
I've used PlastiX before to polish mine a bit, but it doesn't seem to make them perfect and certainly doesn't last as long as I'd like. The faded/yellowed/fogged lenses are one of the main things that really stand out to me after the rest of the car is looking clean and I'd love for them to be closer to yours. Any other G i see and happen to glance at seems to be in the same boat with the faded lenses.
I've used PlastiX before to polish mine a bit, but it doesn't seem to make them perfect and certainly doesn't last as long as I'd like. The faded/yellowed/fogged lenses are one of the main things that really stand out to me after the rest of the car is looking clean and I'd love for them to be closer to yours. Any other G i see and happen to glance at seems to be in the same boat with the faded lenses.
Joined: Mar 2009
Posts: 18,299
Likes: 1,488
From: By the sea, Tx
G35 sedan w/ too much money in mods
Not true at all. Use the process you described to get them crystal clear and then have them professionally sprayed with clear coat. They will stay looking new for years.
Registered User
Joined: May 2005
Posts: 586
Likes: 7
From: Iowa
I use plastx on them and keep them protected. Those have not been replaced or wet sanded. I have used a light cut pad and a polisher on them before.
Part of the reason the car is in good shape is it doesn't really sit outside much at all. I has been garage kept for it's whole life and only parked outside during the work day while my dad had it for awhile. I work mostly from home so it can stay inside.
It is going to start being kept outside a bit more though because I have too many vehicles. . I will just have to keep protection on it.
Part of the reason the car is in good shape is it doesn't really sit outside much at all. I has been garage kept for it's whole life and only parked outside during the work day while my dad had it for awhile. I work mostly from home so it can stay inside.
It is going to start being kept outside a bit more though because I have too many vehicles.
. I will just have to keep protection on it.
Thank you all for your replies, I suppose I will have to look into a bit more elbow grease to get it even better and try and find a protectant to apply to let it last longer then.
Thelron's photo is a great example of what I have and what I'd like to have lol. I am not sure if I am up to the task of swapping out internals of the housings if needed, but I suppose I can look into the how-tos and see how involved it is.
Blue, what process are you referring to, wet sanding?
Do any of those DIY complete restoration kits actually work that I believe come with their own can of clear coat?
Are there any other top coats that are recommended if I can get it like 80% clear with PlastiX and want to seal that for longer life?


Joined: Mar 2013
Posts: 1,992
Likes: 390
From: Raleigh, NC
Coupe, Premium package, sport suspension
My late lamented sedanX lights three years after professional polishing and then sprayed with three coats of auto body clear coat.
Don't use the clear that comes with the kit. Get them crystal sharp, then take them to your trusted body shop to spray them. They are always spraying clear coat so it shouldn't cost that much.
Don't use the clear that comes with the kit. Get them crystal sharp, then take them to your trusted body shop to spray them. They are always spraying clear coat so it shouldn't cost that much.
Registered User
Joined: May 2005
Posts: 586
Likes: 7
From: Iowa
I went out and looked at mine more closely after this conversation. They do have a little bit of pitting and such, but no haze. I guess my cleaning has kept them clear. I am guessing a harsher polish and clear coat would still do them good.
Finally did a long overdue replacement of shocks/struts, and some minor suspension repairs and upgrades...
100,000 miles on the original (red "sport") shocks/struts. You don't really know how beat your old ones are until you replace them! The old ones were still in good physical condition (no leaks) but they were done.
Replaced them with a KYB set for the coupe (to match my G/Z spring setup). Went with Monroe mounts because I have read the KYB ones can squeak. I wanted the closest to OEM feel I could get, and both the KYB and Tokico blues rate high in that regard (Tokico make the OEM ones). Went with the KYB because with a local sale price they were 1/3 of the Tokico blues. Worth the risk! They do feel very good. What a difference! Smoooooth and tight.
Replaced one bad right-side front lower control arm, and both tie rod ends.
Also installed: SPC rear camber arms and SPC front upper A arms. The coupe springs lower my car about an inch at each corner. That's not a lot and rear geometry didn't have to change much, but the front end was about 2.0* degrees out of camber with the stock arms. The adjustable arms allowed me to get within spec, at 0.8*. Should save me some front tire wear!
All in all everything took about 4 hours at my buddy's shop.
I went for a short ride afterward, and first thing I noticed is how quiet everything was. I've lived with that bad LCA bushing for so long that I stopped noticing it, but I sure notice its absence!

Registered User
Joined: Feb 2014
Posts: 66
Likes: 5
I read years ago when this was discussed before the member doing it mentioned he had to relocate the evap box on the rear passenger side, did you as well. This swap was discussed a ton way back when but I remember only 1 person ever posting they did it.
And $40?!?!?!?! You should be in jail for theft, that's just insane but congrats on the deal of the century.
And $40?!?!?!?! You should be in jail for theft, that's just insane but congrats on the deal of the century.


Mocked-up the gauge plate prototype. The bottom hole is for an aftermarket hazard switch that hasn't arrived yet.
I didn't want a gauge pillar, or gauges on the steering column or dahsboard. Wanted to keep the double din.
What do you think?
I can do a run of these. USD$50 shipped for each unit with or without the hazard switch hole if I can get five of you guys interested.
I didn't want a gauge pillar, or gauges on the steering column or dahsboard. Wanted to keep the double din.
What do you think?
I can do a run of these. USD$50 shipped for each unit with or without the hazard switch hole if I can get five of you guys interested.
Edit: Would this work on the coupe, and can the stock hazard switch be utilized?