
DIY Driver Airbag replacement w/PICS


DIY Driver Airbag replacement w/PICS
I cant post in DIY section so Im posting it here mods can move it or sticky or watever
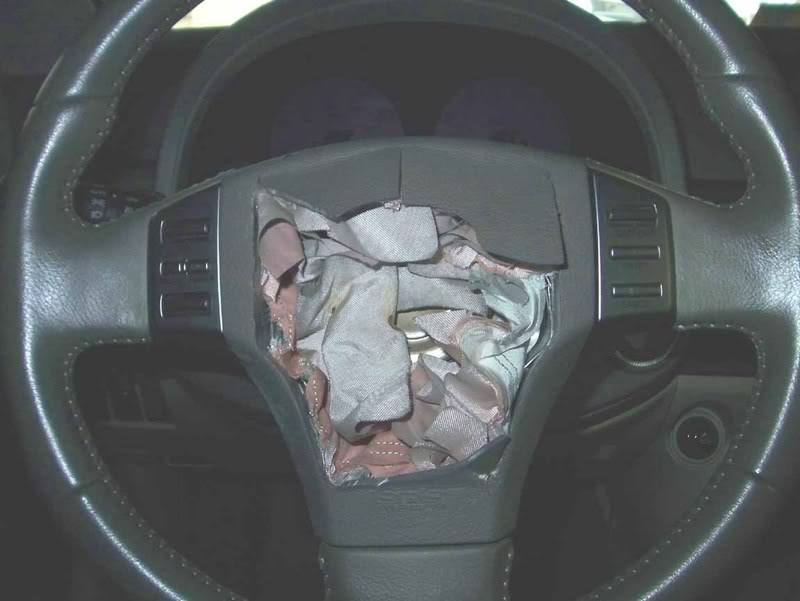
in a accident...airbag deployed?
dont wanna get insurance involved?
or just doing a JDM steering wheel swap
heres some help
DISCLAIMER: you are grown & should know how mechanically inclined u are & how well u follow directions. Do this at ur own risk
first off u need these 2 or 3 tools
1. simple flathead screw driver (if u dont know what this is STOP NOW!!)
2. u only need this if u need to change clockspring also
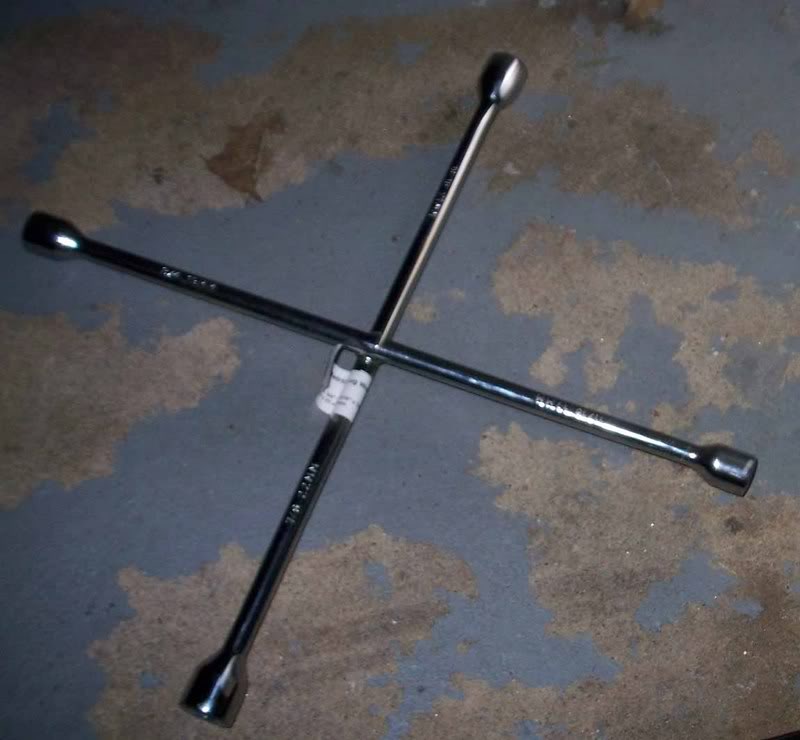
your average 4-way works best but a socket wrench with 19mm socket will work also (4-way give u better leverage though)
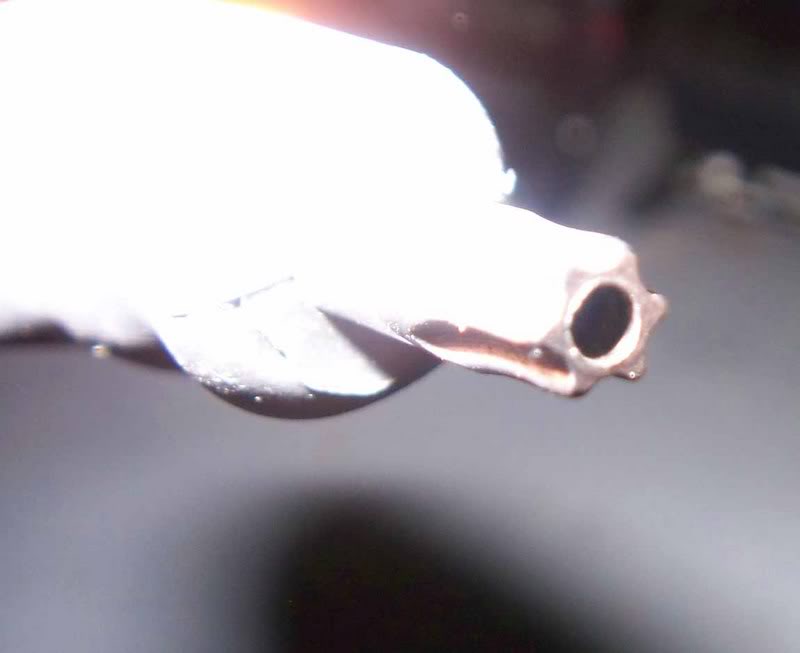
3. T25 torx tool $10-$15 not a regular one but a "safety" or "security" T25, difference is it has a hole in middle (see pic) regular T25 will not work
Lets get started:
1. disconnect both battery terminals & move them out the way so they dont mysteriously connect to battery later on
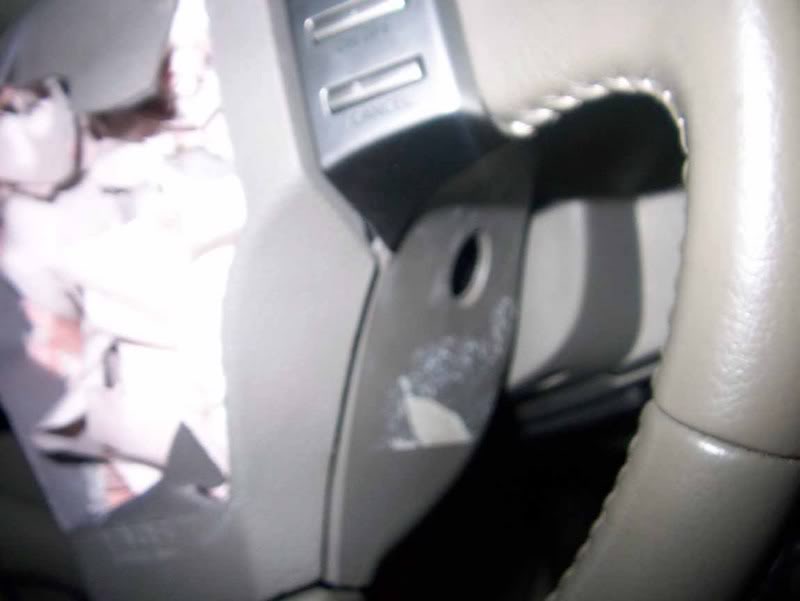
2. Remove circle plastic tabs on side of steering wheel with screw driver (one on each side) ...you will then see the 2 Torx screws
3. remove the 2 screws with safety T25 torx tool. apply a lot of pressure while turning screws slowly, if u strip the screw u are FVKKKED big time. BTW screws are pretty long so be patient!!

4. pull airbag out with you hand, very simple huh, now remove the orange & yellow plug (lift the black part up first then u can pull them out)
IF THE ORANGE & YELLOW PLUGS ARE MELTED ON AS MINE WERE, THEN STOP & PUT BACK TOGETHER BECAUSE U NEED TO BUY A NEW CLOCKSPRING.
IF YOU HAVE THIS ALREADY THEN SKIP STEP 5 & GO ON TO STEP 6
IF PLUGS ARE STILL GOOD THEN GO TO STEP 5 & UR DONE!!
5. Plug in your new airbag & reverse the steps, a bodyshop will tack on about $100-$150 on to ur bill for labor & it only takes about 15-20min
------If u need to replace clockspring-------
then from step 4 if the orange & yellow plug are melted on u have to cut the 2 wires its attached to its useless. new clockspring will have these wires on it.
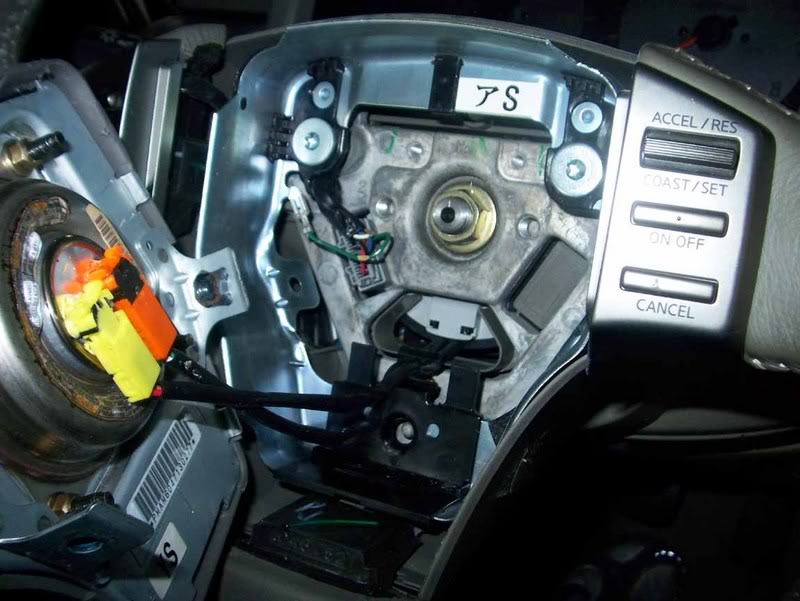
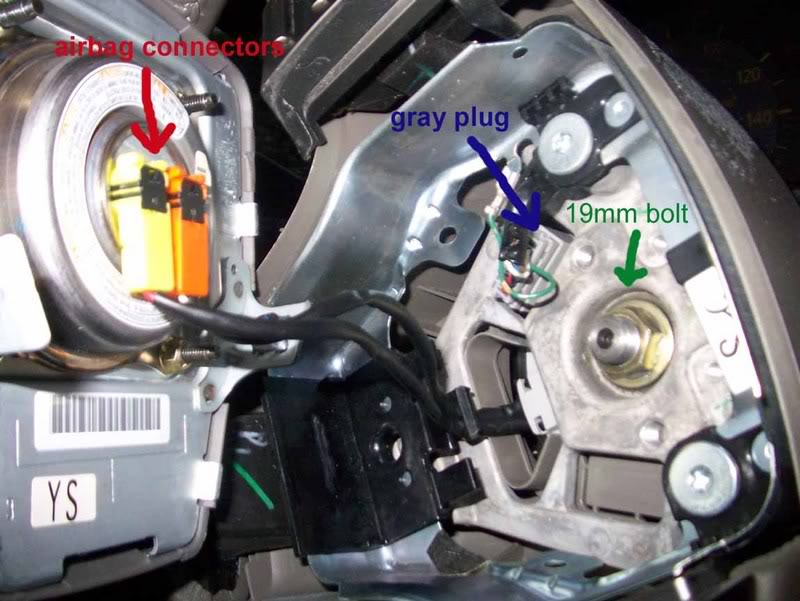
6. Remove gray plug in pic then with the 4-way or 19mm socket remove "gold" nut in middle of steering wheel, then pull steering wheel towards u & rock back & forth till t comes off
This is what you should see now (do not remove these 3 screws yet)
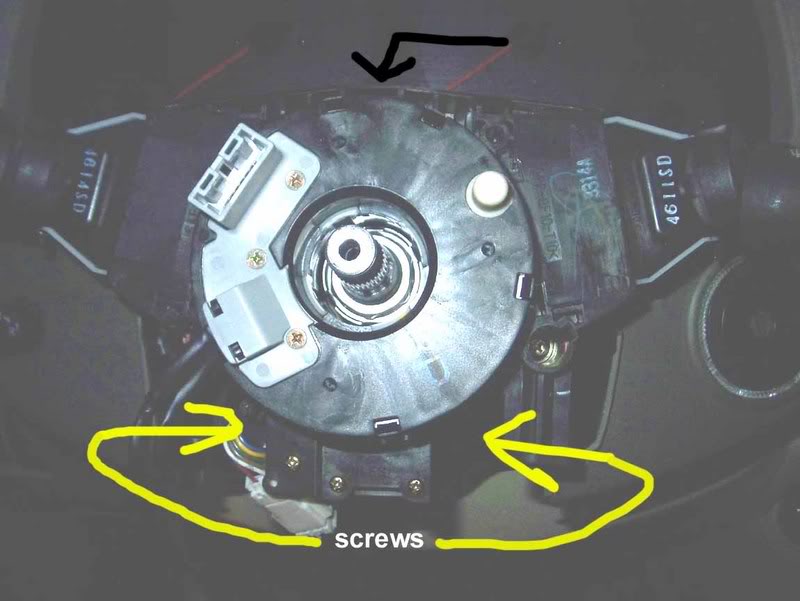
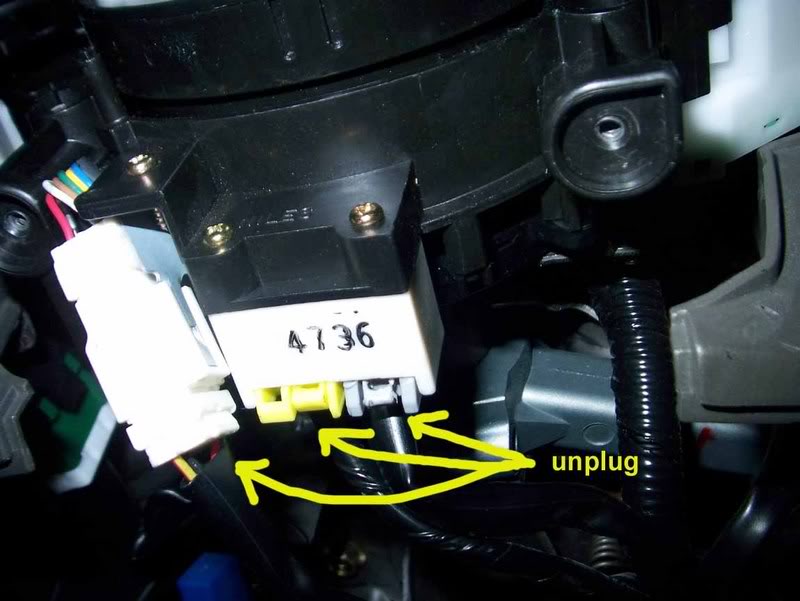
7. look underneath & unplug these 3 plugs from clockspring the white one comes out no problem but the yellow & gray is kinda tricky its one plug but 2 pieces if i remember correctly u must pull out yellow side side half way then pull the gray part or vice-versa (u'll figure it out) puttin it back in is the same put in half way then push other side in.
then there is another white plug near the top
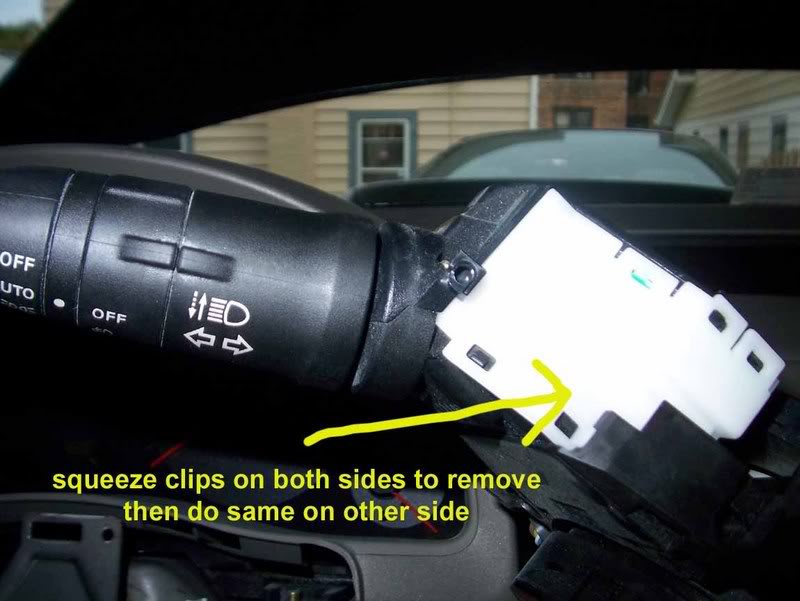
8. now go to headlight & wiper controls see pic self explanatory
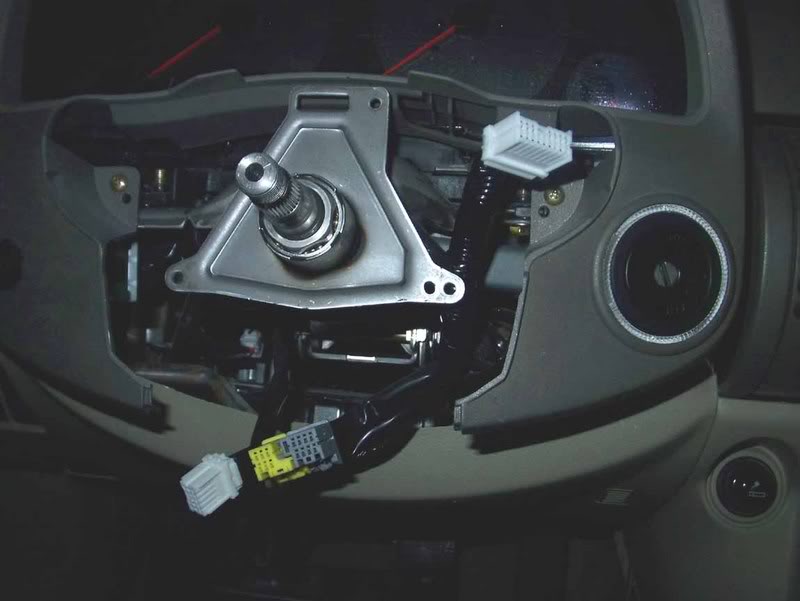
9. Now unscrew the 3 screws 1 on top & 2 on bottom sides & pull clockspring off
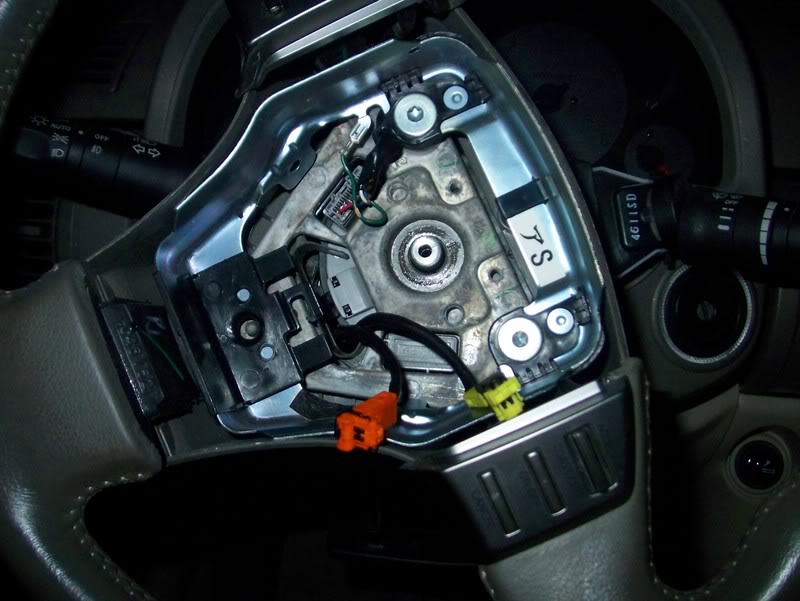
this is what u should see
put on your new clock spring
screw it back in
plug in all plugs
put wiper & headlight switches back (no worry about getting them mixed up they have different plugs
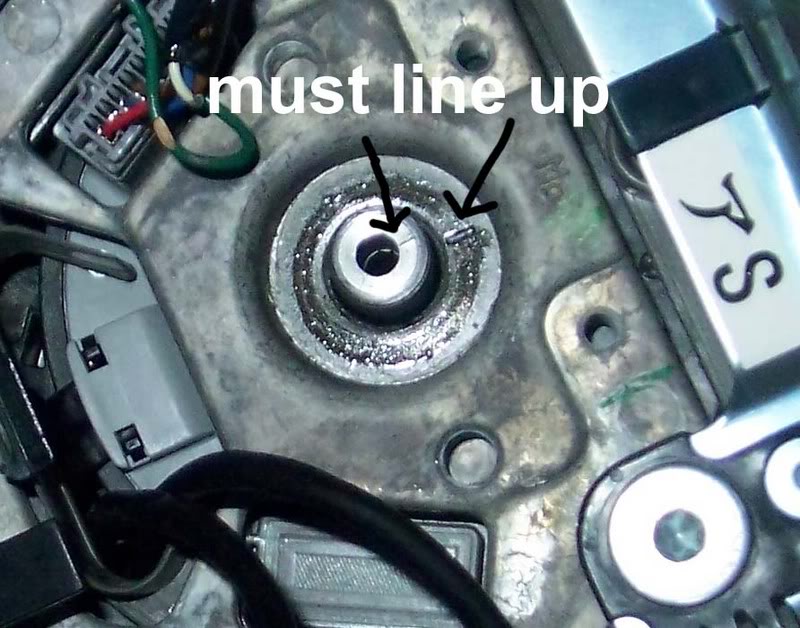
10. VERY IMPORTANT when u put the steering wheel back on there is a thin line groove in the top center it must line up with the center line groove in pic below (if u dont line this up then ur steering will be off)
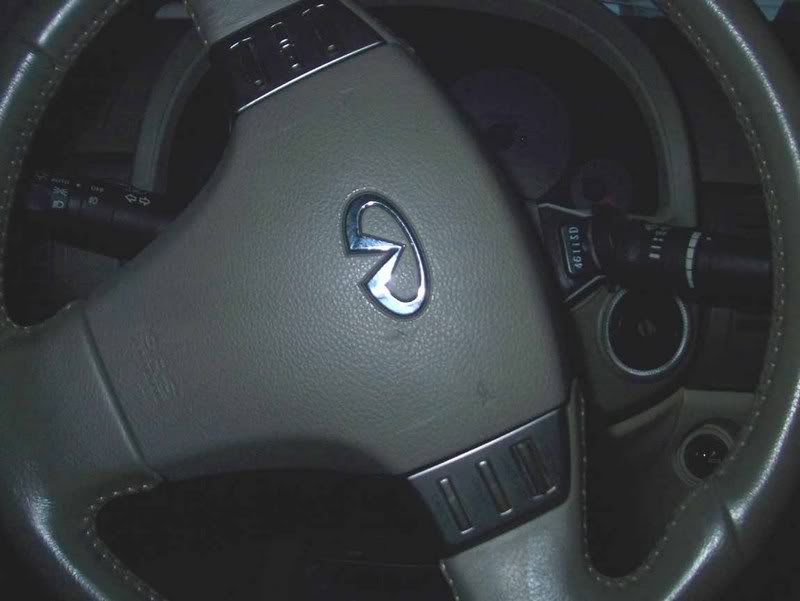
11. put 19mm bolt back on with 4-way use reverse steps till u look like this again
in a accident...airbag deployed?
dont wanna get insurance involved?
or just doing a JDM steering wheel swap
heres some help
DISCLAIMER: you are grown & should know how mechanically inclined u are & how well u follow directions. Do this at ur own risk
first off u need these 2 or 3 tools
1. simple flathead screw driver (if u dont know what this is STOP NOW!!)
2. u only need this if u need to change clockspring also
your average 4-way works best but a socket wrench with 19mm socket will work also (4-way give u better leverage though)
3. T25 torx tool $10-$15 not a regular one but a "safety" or "security" T25, difference is it has a hole in middle (see pic) regular T25 will not work
Lets get started:
1. disconnect both battery terminals & move them out the way so they dont mysteriously connect to battery later on
2. Remove circle plastic tabs on side of steering wheel with screw driver (one on each side) ...you will then see the 2 Torx screws
3. remove the 2 screws with safety T25 torx tool. apply a lot of pressure while turning screws slowly, if u strip the screw u are FVKKKED big time. BTW screws are pretty long so be patient!!
4. pull airbag out with you hand, very simple huh, now remove the orange & yellow plug (lift the black part up first then u can pull them out)
IF THE ORANGE & YELLOW PLUGS ARE MELTED ON AS MINE WERE, THEN STOP & PUT BACK TOGETHER BECAUSE U NEED TO BUY A NEW CLOCKSPRING.
IF YOU HAVE THIS ALREADY THEN SKIP STEP 5 & GO ON TO STEP 6
IF PLUGS ARE STILL GOOD THEN GO TO STEP 5 & UR DONE!!
5. Plug in your new airbag & reverse the steps, a bodyshop will tack on about $100-$150 on to ur bill for labor & it only takes about 15-20min
------If u need to replace clockspring-------
then from step 4 if the orange & yellow plug are melted on u have to cut the 2 wires its attached to its useless. new clockspring will have these wires on it.
6. Remove gray plug in pic then with the 4-way or 19mm socket remove "gold" nut in middle of steering wheel, then pull steering wheel towards u & rock back & forth till t comes off
This is what you should see now (do not remove these 3 screws yet)
7. look underneath & unplug these 3 plugs from clockspring the white one comes out no problem but the yellow & gray is kinda tricky its one plug but 2 pieces if i remember correctly u must pull out yellow side side half way then pull the gray part or vice-versa (u'll figure it out) puttin it back in is the same put in half way then push other side in.
then there is another white plug near the top
8. now go to headlight & wiper controls see pic self explanatory
9. Now unscrew the 3 screws 1 on top & 2 on bottom sides & pull clockspring off
this is what u should see
put on your new clock spring
screw it back in
plug in all plugs
put wiper & headlight switches back (no worry about getting them mixed up they have different plugs
10. VERY IMPORTANT when u put the steering wheel back on there is a thin line groove in the top center it must line up with the center line groove in pic below (if u dont line this up then ur steering will be off)
11. put 19mm bolt back on with 4-way use reverse steps till u look like this again


Originally Posted by M4Gunner
good job bud. ive always know those torques as "tamper-proof" theres always a million different names for one tool..
thanks & thats so true depends on what region of the country u come from everyone has a different name.


Originally Posted by ttrank
Wow thanks for all the detail. When I changed out my steering wheel I never took any pics. I'm glad someone was nice enough to do it.
I changed my passenger bag also a few days later (the whole dash has to come out) I started taking pics but then gave up on doing a DIY becuase the dash has so many parts it woulda took me like a whole day just to write a DIY on it. dash removal is not hard though just a little time consuming (there are not many screws just a lot of clips)

Trending Topics


Originally Posted by JZ39
So, if you were to just replace the steering wheel, then you would not have to mess with the clockspring regardless of whether the leads were melted on, correct?


really great write up and some good info here! thanks! THIS NEEDS TO BE A "STICKY!"
one question - will the removal of the stock steering wheel set off the airbag sensor? is there a way to defeat it (like you do when you get aftermarket seats)?
one question - will the removal of the stock steering wheel set off the airbag sensor? is there a way to defeat it (like you do when you get aftermarket seats)?
Last edited by n1cK; Apr 21, 2008 at 02:16 AM.