
DIY: Interior Trim Removal
#1
 02-07-2009 | 01:50 PM

Joined: Jan 2004
Posts: 21,095
Likes: 47
From: Toronto, GTA north
DIY: Interior Trim Removal
So.....
- You have wood trim & want Washi?
- You have Washi trim & want wood?
- or you're doing a custom trim.... painted etc.
Here are some DIY pics that may help.
note: most pics were taken after trim was removed,
so you could see what is behind.
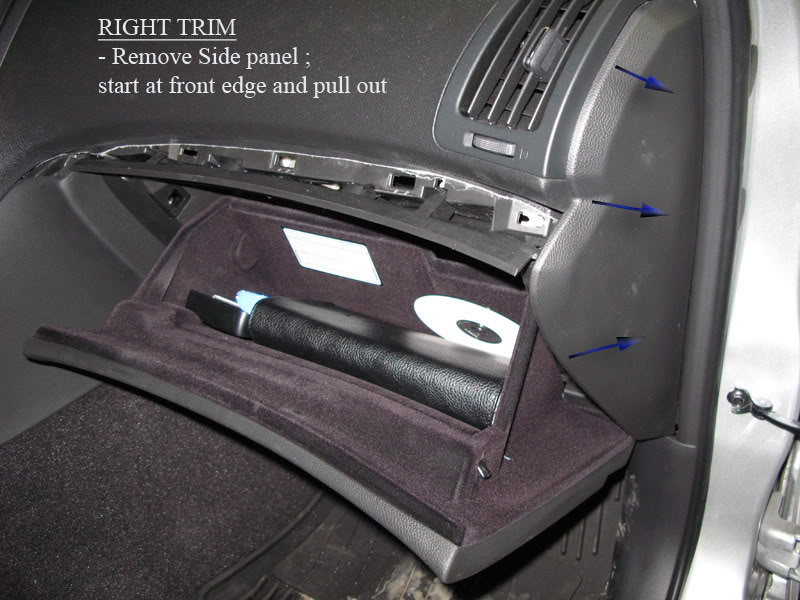
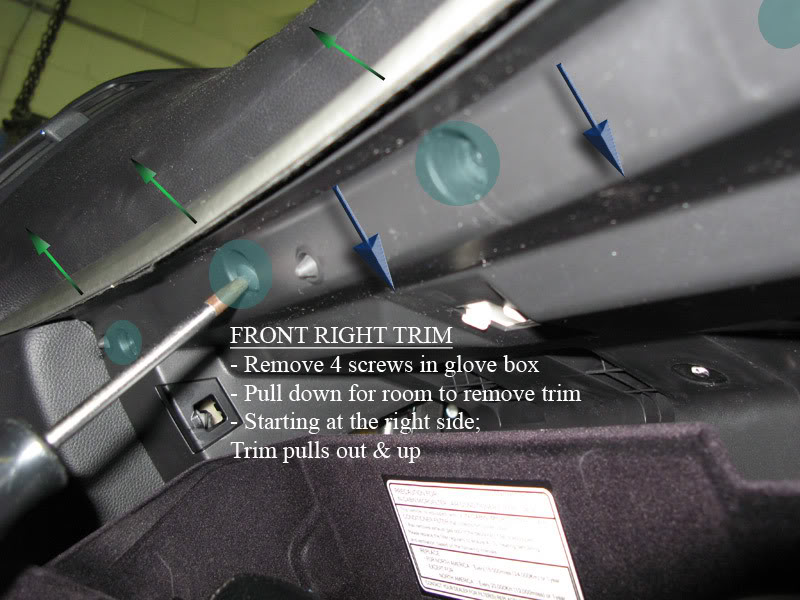
Right side Trim...
:edit:
It's probably easier to completely remove the glove box for reassembly.
Copied post by dafinman
"- Remove the horizontally plastic molding below the glove box.
You just pull down the front edge and it comes right off.
- Next remove the glove box by opening it and then pulling out and slightly up.
It is held in place by two large plastic posts protruding from its sides that fit into a slots in the housing,
and by a few plastic forks on the bottom that fit into slots and serve as the hinging mechanism.
The there is also a cable that attaches to the side of the glove box and is very easily unsnapped by pulling it left off the box.
The box will come completely off with no wires or anything attached."
- then undo the screws as below.
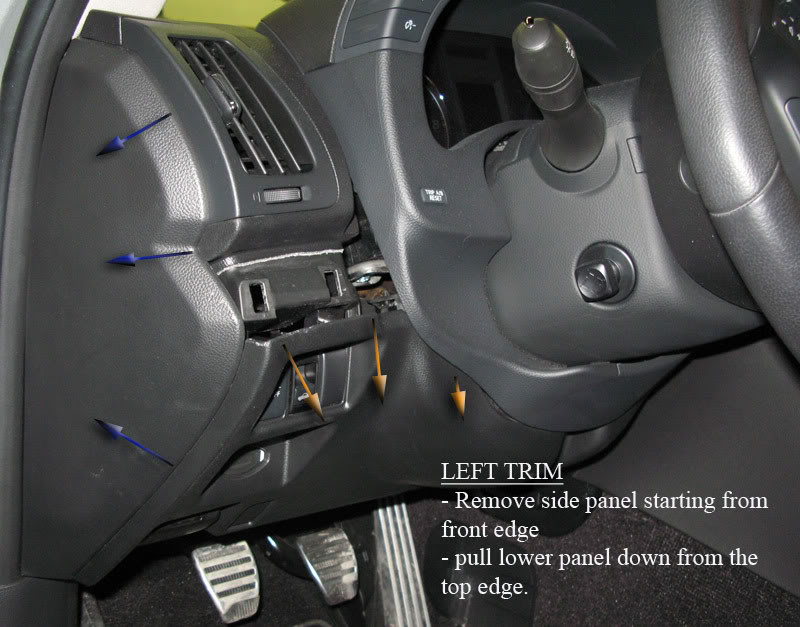
Left side Trim...
* the Trim piece pulls straight out.
Center Trim...
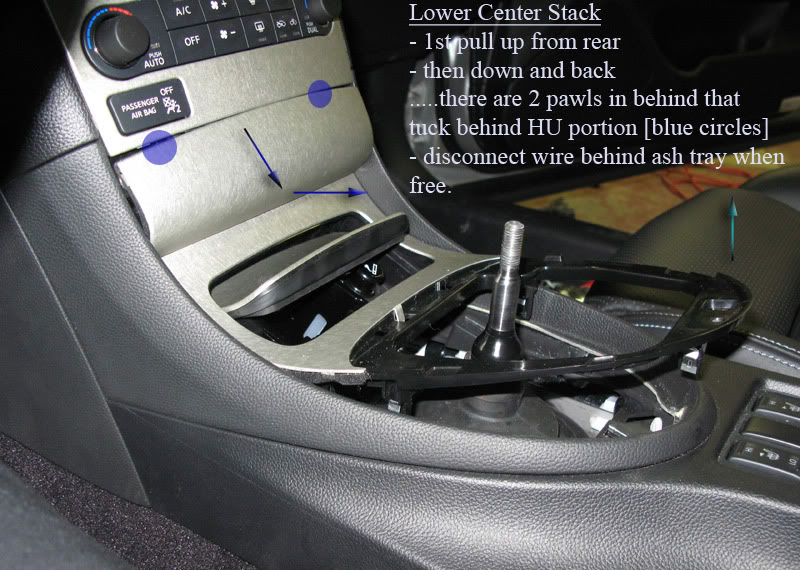
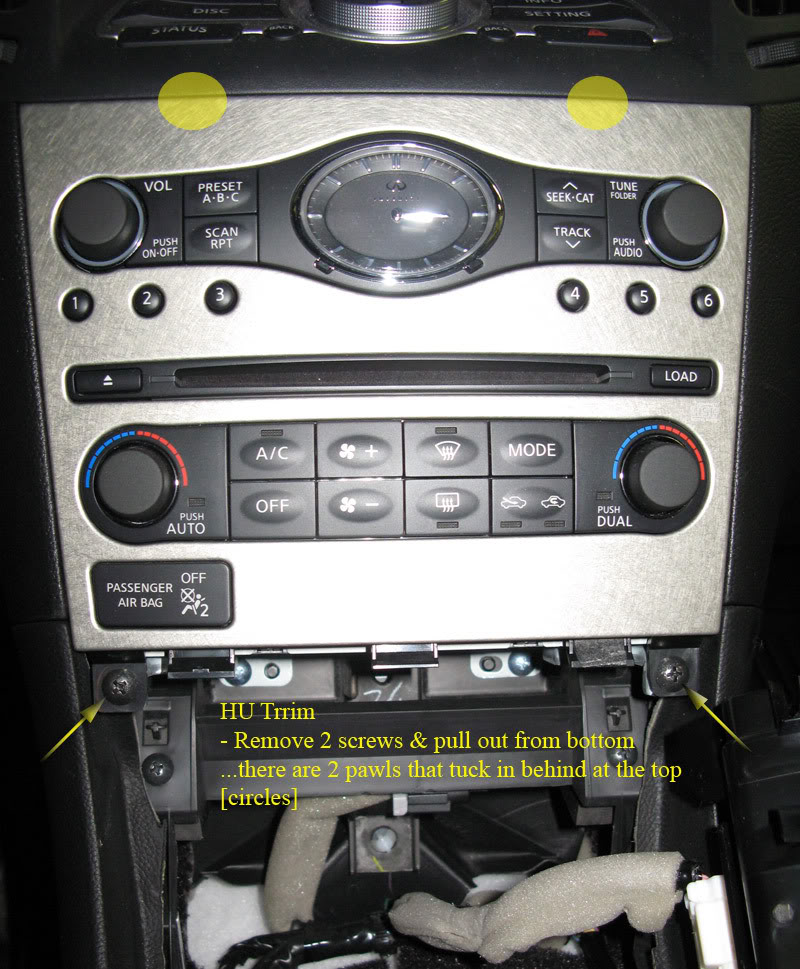
(info to pending for AT lower center)
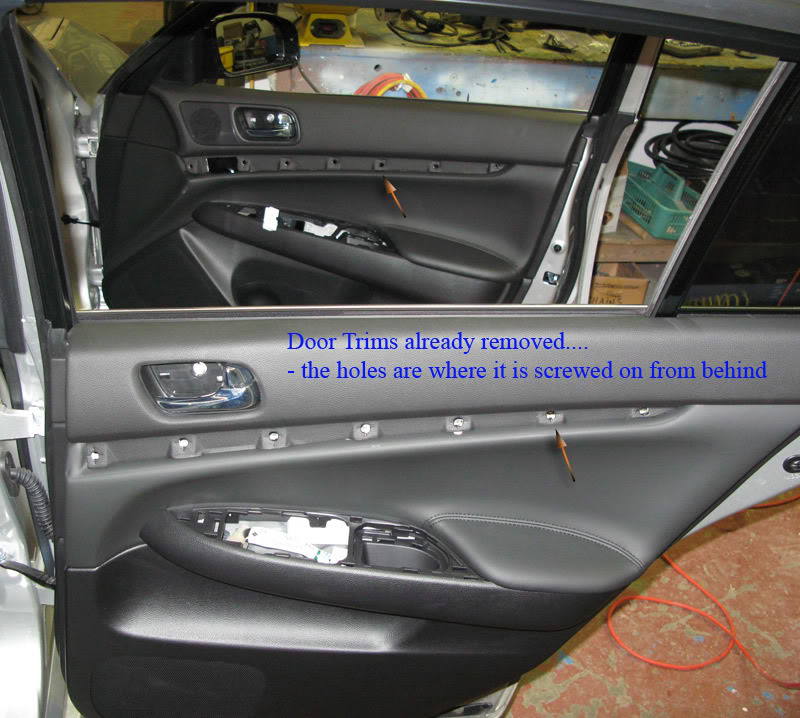
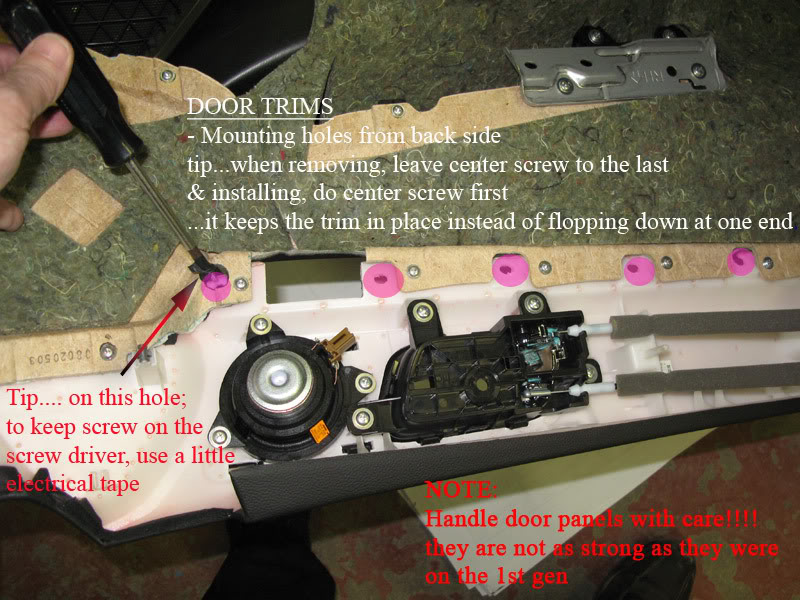
Door Trim...
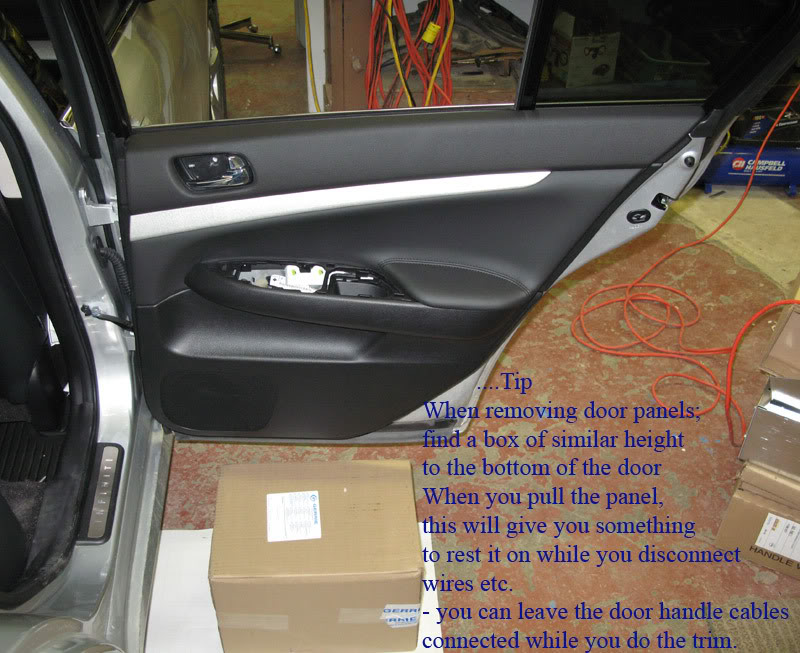
NOTE: See DIY: Door Panel removal for info on removing panels
- You have wood trim & want Washi?
- You have Washi trim & want wood?
- or you're doing a custom trim.... painted etc.
Here are some DIY pics that may help.
note: most pics were taken after trim was removed,
so you could see what is behind.
Right side Trim...
:edit:
It's probably easier to completely remove the glove box for reassembly.
Copied post by dafinman
"- Remove the horizontally plastic molding below the glove box.
You just pull down the front edge and it comes right off.
- Next remove the glove box by opening it and then pulling out and slightly up.
It is held in place by two large plastic posts protruding from its sides that fit into a slots in the housing,
and by a few plastic forks on the bottom that fit into slots and serve as the hinging mechanism.
The there is also a cable that attaches to the side of the glove box and is very easily unsnapped by pulling it left off the box.
The box will come completely off with no wires or anything attached."
- then undo the screws as below.
Left side Trim...
* the Trim piece pulls straight out.
Center Trim...
(info to pending for AT lower center)
Door Trim...
NOTE: See DIY: Door Panel removal for info on removing panels
Last edited by InTgr8r; 02-12-2009 at 01:44 PM.


#7
02-07-2009 | 10:08 PM
Joined: Jan 2004
Posts: 21,095
Likes: 47
From: Toronto, GTA north
Trending Topics


#15
02-28-2009 | 05:00 PM
Registered User
Joined: Apr 2008
Posts: 1,904
Likes: 1
From: Toronto, Canada
K guys, I removed the rear driver side door today and was able to CF the trim and was able to put the door back properly with no problem; door still locks and windows still open and close.
There are 8 clips holding the panel.
If the clips happen to remain on the door instead of the panel, i would suggest to remove the clip from the door and attach it back to the door panel. I dont think you'll be able to put the door panel back properly if you dont do this.
I broke one clip. Good thing I got some spare ones.
Also, I did not remove the door panel completely. There were these two connectors wrapped in the grey foamy material that was connected from the panel to the door ( u can see this on the above image where Ian is pointing out where the screws go with the pink color).
I removed the trim while the panel was still attached and put it back while it was attached. I didnt know how to properly remove it in order to remove the entire panel from the door.
BIG +10000 on finding a box to put right under the panel. This helped big time.
Hope i didnt confuse anyone. Maybe Ian can shed light on what im saying about the two slender connectors wrapped in the grey foam.
On a personal note... this mod isnt a picnic at all... :S Im forced to complete it cuz ive started already... I cant wait till its all done and I hope I dont run into other issues with the driver side door since its more complicated than the rears...