
DIY: Rear Wheel Bearing Removal


Joined: May 2003
Posts: 2,395
Likes: 7
From: San Diego Area
i have tried and tried to get the hub off. the 4 bolts are still in. and the hub is still on. the axle is pushed in as far as it can possibly go and the hub will not budge. i tried to just get the 4 bolts on and take the whole assembly out as 1 but even those were so damn tight that those wouldnt budge either. any ideas?


see some on sale at auto parts giant for 60, anyone know where we can find a better deal? On my case i need a front driver side

Registered User
Joined: Jun 2008
Posts: 8
Likes: 0
From: Bronxville, NY
Just picked up a Bearing, Hub and Seal at Pepe Infinity in White Plains, NY. Apparently NY prices are higher...$325 for just the parts. Bringing it all to a local mechanic on Monday. (I'm handy, but don't have the time or space to do this job).

Registered User
Joined: May 2005
Posts: 170
Likes: 3
I bought the rear bearing and hub from Infinitipartsusa.com for $200 bucks shipped. I have installed the new hub/bearing assembly but haven't got the axel back in yet. Cleaned the axle, but haven't grease it yet. I'm going to use Valvoline SynPower grease. Hopefully it works.
Not having power tool is a pain in the ***. I have to use breaker bar on every single bolt. Used a wrench and dead blow hammer on the torque member bolt because I coudn't get the breaker bar in there.
Everything went well so far. The hardest part was getting the the axel out. I didn't want to bend it too much. So I removed the A-arm (spring support, whatever you want to call it). The axle just slide right out after that.
Tips for those who is having trouble removing the rotors; just release the emergency break. Also, the axle will spin if you don't have a power tool to remove the 6 bolts. I use a pry bar and jam it between two wheel studs on the hub and the ground. This prevents the axle from spinning when you try to disconnect the axle from the differential.
Registered User
Joined: Jun 2008
Posts: 8
Likes: 0
From: Bronxville, NY
Picked up the G from the Mechanic this morning....$275 to press in the bearing and install the whole thing. Definitely worth it to me. Car rides nice, no more whining from the rear. Now I can finally hear all the noise from my cupped Goodyear Eagle F1's. LOL.

I bought the rear bearing and hub from Infinitipartsusa.com for $200 bucks shipped. I have installed the new hub/bearing assembly but haven't got the axel back in yet. Cleaned the axle, but haven't grease it yet. I'm going to use Valvoline SynPower grease. Hopefully it works.
Not having power tool is a pain in the ***. I have to use breaker bar on every single bolt. Used a wrench and dead blow hammer on the torque member bolt because I coudn't get the breaker bar in there.
Everything went well so far. The hardest part was getting the the axel out. I didn't want to bend it too much. So I removed the A-arm (spring support, whatever you want to call it). The axle just slide right out after that.
Tips for those who is having trouble removing the rotors; just release the emergency break. Also, the axle will spin if you don't have a power tool to remove the 6 bolts. I use a pry bar and jam it between two wheel studs on the hub and the ground. This prevents the axle from spinning when you try to disconnect the axle from the differential.
Not having power tool is a pain in the ***. I have to use breaker bar on every single bolt. Used a wrench and dead blow hammer on the torque member bolt because I coudn't get the breaker bar in there.
Everything went well so far. The hardest part was getting the the axel out. I didn't want to bend it too much. So I removed the A-arm (spring support, whatever you want to call it). The axle just slide right out after that.
Tips for those who is having trouble removing the rotors; just release the emergency break. Also, the axle will spin if you don't have a power tool to remove the 6 bolts. I use a pry bar and jam it between two wheel studs on the hub and the ground. This prevents the axle from spinning when you try to disconnect the axle from the differential.
I have been checking around...found out Oreilly has it for $65 for the hub assembly. The guy tells me it is bearing and all. I have them requesting one to see what it actually is.
Last edited by spoolinupblue; Sep 15, 2010 at 11:43 AM.

Registered User
Joined: May 2005
Posts: 170
Likes: 3
That is really cheap for rear beaing and hub assembly. The rear bearing and hub come in seperately. You have to press them together. Only the front comes as an assembly.
Registered User
Joined: May 2005
Posts: 170
Likes: 3
if you're planning to re-use the rear hub, go to dealer or machine shop and have old bearing press out, then press the new bearing in.

Registered User
Joined: Sep 2009
Posts: 249
Likes: 2
I was getting this weird noise from my front right tire. I thought it was uneven tire wear, but when I checked the tire it looked good. I took it to a shop and had them look at it. They said the wheel bearings are bad. So I'm going to be replacing the bearings on the front passenger side. Should I replace the front driver side too?
I'm going to first call some shops here to see how much it is to press the hub to the wheel bearing assembly. If it is more than the cost of getting a new hub and bearing assembly pre-pressed, I will just get it pre-pressed.
I'm going to first call some shops here to see how much it is to press the hub to the wheel bearing assembly. If it is more than the cost of getting a new hub and bearing assembly pre-pressed, I will just get it pre-pressed.

Registered User
Joined: Jan 2011
Posts: 30
Likes: 0
My noise was..... a small motorcycle was chasing me between 35mph~60mph.
I decided to replace the rear left wheel bearing. Here is my procedure.
Step0) Put the gear in neutral. Support front weels and rear right wheel(safety).
Step1) Loose wheel nuts a little (21mm socket). Don't remove them.
Step2) Jack up
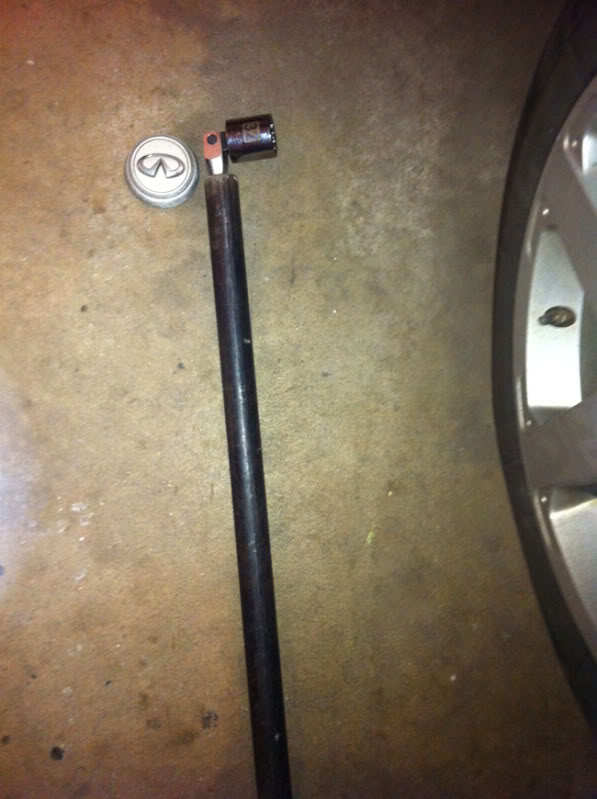
Step3) Remove nuts & wheel. Remove center wheel cap(infiniti mark). Remove cotter pin.
Step4) Install wheel again. Jack down
Step5) Remove axle nut (32mm socket / Rent for $0 at Autozone)
Step6) Jack up, Remove nuts & wheel.
Step7) Remove 2 caliper bolts (19mm socket). Secure caliper with wire.
Step8) Remove roter (hand or rubber hammer)
Step9) Remove 6 bolts/nuts on axle shaft - differential (14mm socket, 14mm wrench)
Step10) Support drive axle with something not to dangle (jack stand or paper box)
I tried to push the axle with 3 leg jaw puller but it was impossible. It's stuck.
PS: Don't even try this if you want to use the hub again. It might bend the hub.
Step11) Slam the drive axle. (8lb sledge hammer / $22 at Lowe's). I hit 15 times. lol.
Step12) Drive axle should not be blocked by anything (Exhaust pipe, differential, etc)
Step13) Remove 1 bolt/nut on lower link (19mm socket, 19mm wrench, jack)
Step14) Remove drive axle (hand, rubber hammer, or jaw puller for $0 at Autozone)
Step15) Remove 4 bolts on the rear side of hub bearing assembly (17mm socket)
Step16) Insert 4 bolts on the hub bearing assembly again (hand)
Step17) Hit the bolts with wrench or rubber hammer (the assembly might be stuck on the knuckle)
Step18) Remove the bolts (hand)
Step19) Remove hub and hub bearing assembly (hand)
Step20) Clean the hub and hub bearing assembly with brake cleaner ($2.xx at Autozone)
Step21) Go to local shops (pepboys asked $35 / remove the old bearing and press a new bearing)
I bought the hub bearing assembly for $65 at O'reilly. It has aftermarket brand, precision, but
was made in Japan with Japan made NTN bearing. I like OEM but I didn't want to wait for delivery.
I'm going to assemble them tomorrow... lol.
I decided to replace the rear left wheel bearing. Here is my procedure.
Step0) Put the gear in neutral. Support front weels and rear right wheel(safety).
Step1) Loose wheel nuts a little (21mm socket). Don't remove them.
Step2) Jack up
Step3) Remove nuts & wheel. Remove center wheel cap(infiniti mark). Remove cotter pin.
Step4) Install wheel again. Jack down
Step5) Remove axle nut (32mm socket / Rent for $0 at Autozone)
Step6) Jack up, Remove nuts & wheel.
Step7) Remove 2 caliper bolts (19mm socket). Secure caliper with wire.
Step8) Remove roter (hand or rubber hammer)
Step9) Remove 6 bolts/nuts on axle shaft - differential (14mm socket, 14mm wrench)
Step10) Support drive axle with something not to dangle (jack stand or paper box)
I tried to push the axle with 3 leg jaw puller but it was impossible. It's stuck.
PS: Don't even try this if you want to use the hub again. It might bend the hub.
Step11) Slam the drive axle. (8lb sledge hammer / $22 at Lowe's). I hit 15 times. lol.
Step12) Drive axle should not be blocked by anything (Exhaust pipe, differential, etc)
Step13) Remove 1 bolt/nut on lower link (19mm socket, 19mm wrench, jack)
Step14) Remove drive axle (hand, rubber hammer, or jaw puller for $0 at Autozone)
Step15) Remove 4 bolts on the rear side of hub bearing assembly (17mm socket)
Step16) Insert 4 bolts on the hub bearing assembly again (hand)
Step17) Hit the bolts with wrench or rubber hammer (the assembly might be stuck on the knuckle)
Step18) Remove the bolts (hand)
Step19) Remove hub and hub bearing assembly (hand)
Step20) Clean the hub and hub bearing assembly with brake cleaner ($2.xx at Autozone)
Step21) Go to local shops (pepboys asked $35 / remove the old bearing and press a new bearing)
I bought the hub bearing assembly for $65 at O'reilly. It has aftermarket brand, precision, but
was made in Japan with Japan made NTN bearing. I like OEM but I didn't want to wait for delivery.
I'm going to assemble them tomorrow... lol.
Last edited by medianjoe; Jan 22, 2011 at 10:52 PM.

Great post!!!^^^ I would like to add the following:
Step5) Remove axle nut (32mm socket / Rent for $0 at Autozone)
Yank on it and don't damage your quarter panel!
Step9) Remove 6 bolts/nuts on axle shaft - differential (14mm socket, 14mm wrench)
Use the e-brake to lock the axle. Might not be necessary to use a socket on both sides as the locking washers help.
Step10) Support drive axle with something not to dangle (jack stand or paper box)
I was able to fully remove the whole CV axle without disconnecting exhaust or control arms. Installation is not difficult.
Step17) Hit the bolts with wrench or rubber hammer (the assembly might be stuck on the knuckle)
A slider hammer (with a wheel stud connector) works well. Can be rented from AutoZone.
DON'T BE AFRAID TO USE PB BLASTER AND ANTI-SEIZE ON ALL PIECES!!!!! I put anti-seize in the knuckle before re-installing the hub/bearing. I also filed down any rust in the hole in the knuckle.


Registered User
Joined: May 2008
Posts: 155
Likes: 0
A hub that has excess runout of over 0.005" would require replacement. 0.005" of deflection or runout is enough to cause brake wear and vibration issues.
If a car with a bad bearing is being driven on for an extended period of time, it is somewhat likely that the hub to have some sort of runout. The easiest method would be to check for runout before replacing the hub. If the hub is within 0.004" of tolerance, then no replacement is necessary. For precise runout limit, refer to the factory service manual.
Unfortunately, it seems like that there are two types of mechanics out there. One would replace them without performing a runout reading on the hub. The other would simply not replace them because there are some mechanics out there who don't even know what hub runout is. I am not joking.
Personally, if getting a reading is of challenge, I would simply replace the hub for the peace of mind. It is cheaper to do it right the first time than to keep replacing rotors every 5000 miles.