
Any one replace their lower ball joints?


I see what you are saying..OEM nut has build in washer. Wish the OEM nut was taller to get a good grip on the threads. Not sure if I could reuse my old one-might be stripped already. Do you know what size and pitch the threads are?

OK First- DO NOT rent the AutoZone ball joint press. You need the press from Advance Auto, ONLY because it comes with the 2-7/16” I.D. adapter. You WILL NOT be able to press the OEM ball joint out with the 2-1/4” I.D. adapter; it's about 1/8” too narrow, cannot slide over the outer lip of the OEM ball joint. If you could find a 2-3/8” steel tube you would probably have the best fit. You will be able to use the 2-1/4” I.D. adapter if you are replacing an eBay Bremen ball joint- they have a barely smaller O.D. than OEM.
The job is not difficult, just a little challenging. Thanks to blak max for the inspiration to pop it off on the car. All you need is the correct size press adapters and a long steel pipe. You do not even need muscle for this (which is what I though would be the problem for me).
Here we go with a step by step similar to blak max-
MAKE SURE CAR IS ON FLAT GROUND AND SECURE BECAUSE YOU WILL BE ROCKING THE CAR
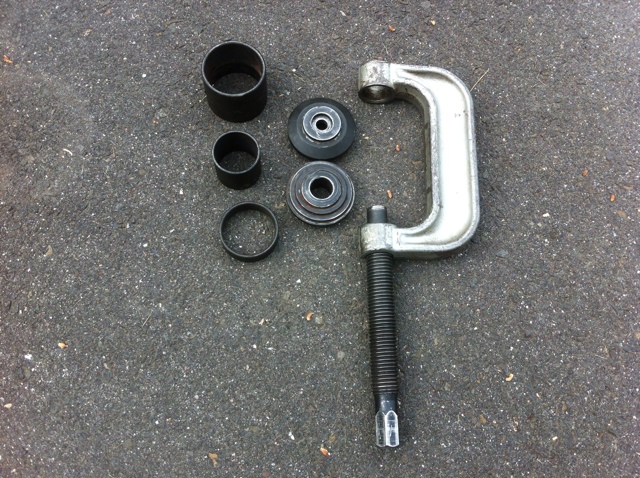
Top to bottom- 2-7/16” I.D. adapter for pressing old ball joint off car. Next, smaller diameter for pressing new ball joint on car and a short adapter to allow the ball joint to press completely through. Notice the end pieces have a smaller and larger I.D. Bigger I.D. always goes on top no matter if pressing in or out.
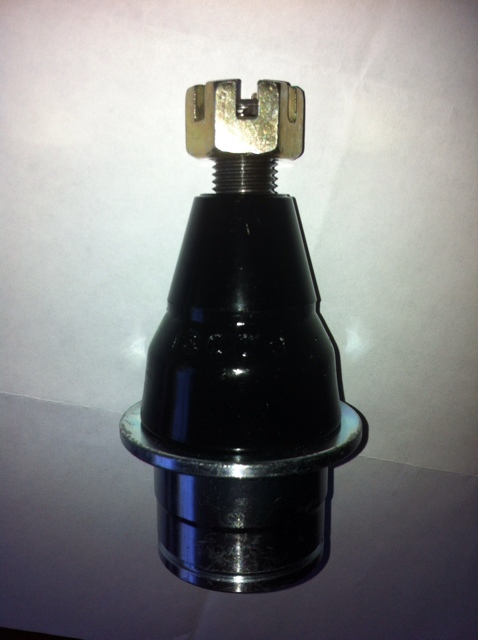
You need to remove the conical spacer off the old ball joint before you can use the adapters, unless you find a longer adapter. To do this use a fork like blak max did and hit it with a sledge hammer-go to town.
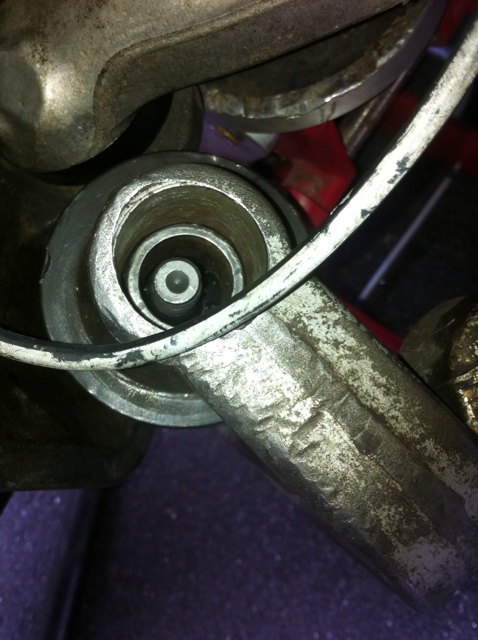
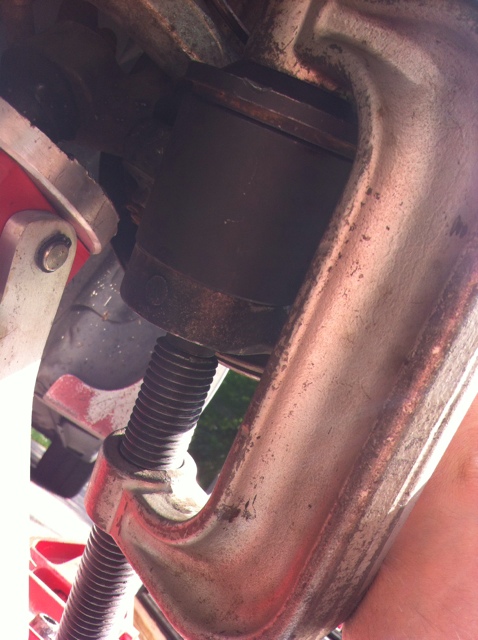
Set-up for pressing old ball joint off; will need to remove lower piece to press out completely. Make sure the pieces are lined up straight and not off center. It will make the job so much easier if you straighten it out and tighten by hand at first to secure it steady. This is where you MUST use a 2-7/16" adapter with the kit and NOT a 2-1/4". Too bad they don't make one size in between.

Stop here and remove lower end, it helped give you a great start, now the rest will be done without the bottom piece.
Turn til it gets out using this setup
Can’t do the job without the pipe
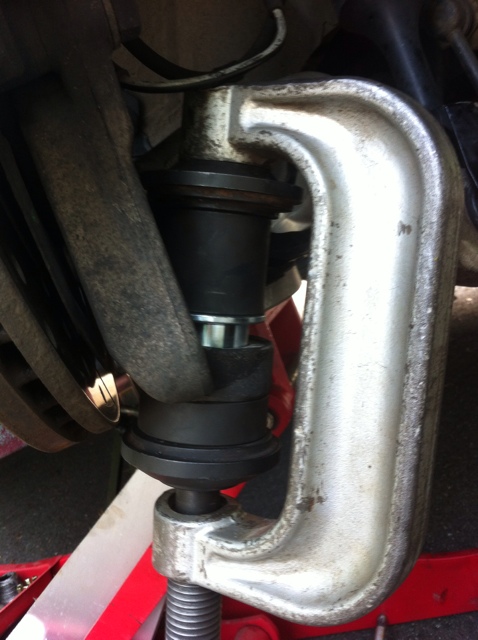
This is the setup for pressing new, notice the short spacer on the bottom so the new ball joint can go down completely.
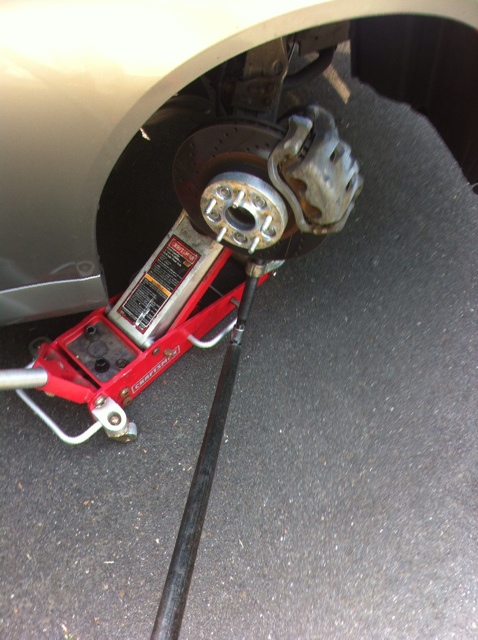
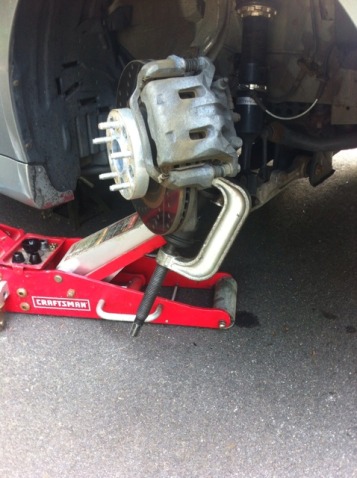
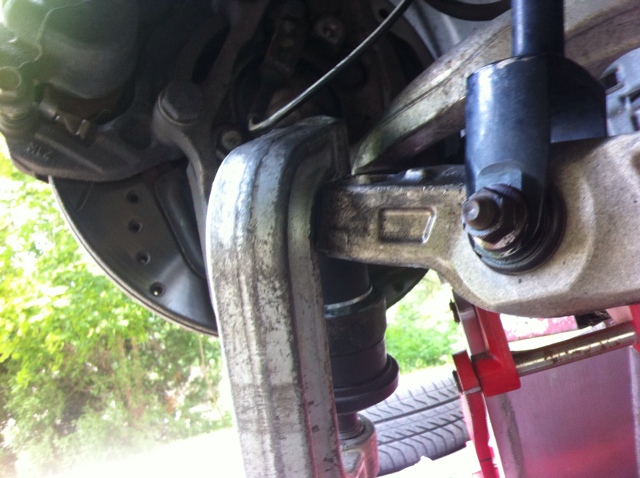
Here is the press positioned against the lower control arm. That will help so the hub doesn’t move all around. You will need to use the stop on the compression rod when pressing the driver side.
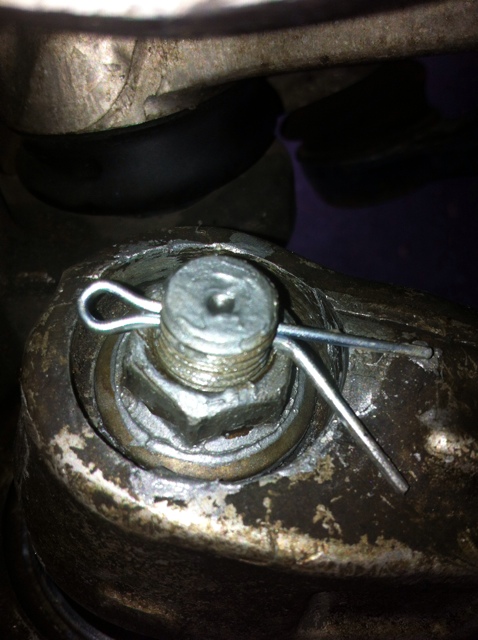
Make sure you anti-seize the stud and cotter pine hole.
If I’m missing anything let me know and I will answer any questions.
I don’t know of any specific symptoms for the lower ball joints. My car has about 165K on it so I was sure they needed to be replaced, thought I would give it a try. Basically my car feels “newer” and not as loose in the front with the new ball joints. Haven’t test drove it that much but I think the clunk when maxing out my steering is gone. And bumps/pot holes are a little less rough. Lets see how it acts on the highway..
The job is not difficult, just a little challenging. Thanks to blak max for the inspiration to pop it off on the car. All you need is the correct size press adapters and a long steel pipe. You do not even need muscle for this (which is what I though would be the problem for me).
Here we go with a step by step similar to blak max-
MAKE SURE CAR IS ON FLAT GROUND AND SECURE BECAUSE YOU WILL BE ROCKING THE CAR
Top to bottom- 2-7/16” I.D. adapter for pressing old ball joint off car. Next, smaller diameter for pressing new ball joint on car and a short adapter to allow the ball joint to press completely through. Notice the end pieces have a smaller and larger I.D. Bigger I.D. always goes on top no matter if pressing in or out.
You need to remove the conical spacer off the old ball joint before you can use the adapters, unless you find a longer adapter. To do this use a fork like blak max did and hit it with a sledge hammer-go to town.
Set-up for pressing old ball joint off; will need to remove lower piece to press out completely. Make sure the pieces are lined up straight and not off center. It will make the job so much easier if you straighten it out and tighten by hand at first to secure it steady. This is where you MUST use a 2-7/16" adapter with the kit and NOT a 2-1/4". Too bad they don't make one size in between.
Stop here and remove lower end, it helped give you a great start, now the rest will be done without the bottom piece.
Turn til it gets out using this setup
Can’t do the job without the pipe
This is the setup for pressing new, notice the short spacer on the bottom so the new ball joint can go down completely.
Here is the press positioned against the lower control arm. That will help so the hub doesn’t move all around. You will need to use the stop on the compression rod when pressing the driver side.
Make sure you anti-seize the stud and cotter pine hole.
If I’m missing anything let me know and I will answer any questions.
I don’t know of any specific symptoms for the lower ball joints. My car has about 165K on it so I was sure they needed to be replaced, thought I would give it a try. Basically my car feels “newer” and not as loose in the front with the new ball joints. Haven’t test drove it that much but I think the clunk when maxing out my steering is gone. And bumps/pot holes are a little less rough. Lets see how it acts on the highway..
Last edited by AARONHL; Jun 22, 2013 at 07:08 PM.
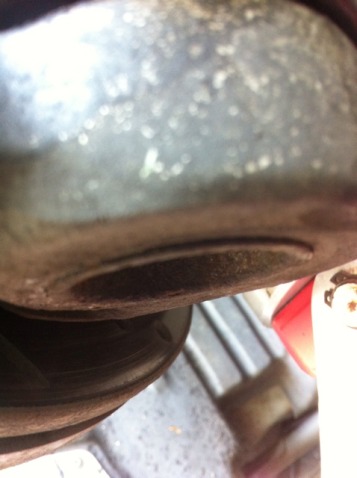
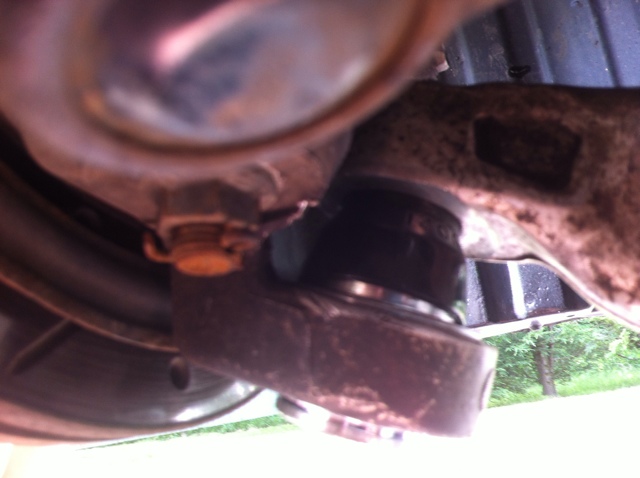
O forgot to mention- the ES bushing 9.13130 seems a little short. When the ball joint stud is bent, the boot rides up a little. If it was longer I think it would be a better set-up. One side is fully pushed down, the other side, shown below, is riding up


Aaron, I'll have you know that this is just a great pictorial. I logged on to see how the other guy had the press assembled b/c the instructions in the kit didn't make any sense to me. I'm now about to jump in my truck and run up to Auto Zone to take this press back and then over to Advance to pick up the right one.
Thanks dude! You really helped clear it up! I knew it had to be pressed up and out b/c of the clip on the bottom that you have to remove.
Thanks dude! You really helped clear it up! I knew it had to be pressed up and out b/c of the clip on the bottom that you have to remove.
You're welcome guys, just passing the knowledge along because everyone else has helped me so much on here. Let me know if you need anything else.
There is a guy on my350z that had an issue with the press adapters, mentioning that the adapter he had was too small. You will never get the ball joint out using it. I started using it and the ball joint was pressed out like 1/8" crooked at first. That is not the way to do it. Once I figured out I needed a bigger adapter it was like an hour job. You would not believe how easy it comes out with the right size adapters.
There is a guy on my350z that had an issue with the press adapters, mentioning that the adapter he had was too small. You will never get the ball joint out using it. I started using it and the ball joint was pressed out like 1/8" crooked at first. That is not the way to do it. Once I figured out I needed a bigger adapter it was like an hour job. You would not believe how easy it comes out with the right size adapters.
So last night I replaced one of my ball joints. It wasn't too much of a PITA once I had all the right pieces assembled for the press.
Also, I didn't need a pipe. I have pipes for arms hahaha. Once you get the first little bit of movement when pressing it out it comes out easy.
On the press that I had, the bottom pressing flange piece that goes on the screw piece had two different sides. One was tapered like a cone and the other was flat. At first I put the tapered part up to the bottom of the ball joint and figured out that I had it on upside down. I'll be doing the other one tonight.
Thanks again Aaron.
Lucky for me, the driver's side ball joint was fine. Didn't have to replace it. The "stealer"ship told me they both needed to be replaced but I saw nothing wrong with the driver's side one. Boot wasn't busted.
Good luck to all those out there that are needing to replace theirs. Do it yourself, don't pay anyone to do it. It's not hard at all.
Good luck to all those out there that are needing to replace theirs. Do it yourself, don't pay anyone to do it. It's not hard at all.
